
ServiceNow and Slack Integration with UiPath
Share at:

Introduction
In this article you can find out how to connect UiPath with ServiceNow and Slack. The main points covered are the following:
1. What's UiPath Integration Service
2. How you can enable UiPath Integration Service
3. Key concepts used in UiPath Integration Service
4. How to connect ServiceNow with UiPath
5. How to connect Slack with UiPath Integration Service
This article has two parts.
Part 1: ServiceNow and Slack Integration with UiPath
Part 2: Use case scenario
The use case showcases how triggers from ServiceNow can run unattended automation and post required information to the slack channel.
Let’s start!
UiPath Integration Service
In general terms, “Integration Service” is the process of connecting different systems (sub-systems, or external systems).
The goal is very simple, integration is required so that different systems can “talk to each other” speeding information flow and reducing the time to market. Think about a situation where an organization has more than 100 applications. You'll require ready-to-connect integration between UiPath Platform and other applications so that you can scale automation at a faster rate.
UiPath Integration Service seamlessly combines world-class UI and API automation, allowing both capabilities to be centrally accessed within the same integration design environment.
There are more than 50 connectors for such as Salesforce, ServiceNow, Dynamics CRM, NetSuite, SAP cloud and they continue to grow.
Another important feature to look for is “Triggers”. This provides a uniform mechanism for subscribing to events from the Connector platform. This way automation is triggered based on events in external systems. It gives you the flexibility to automatically start automation or processes in UiPath Orchestrator. Read more details about integration services in this article: "Introducing UiPath Integration Service."
In the next section, I'll cover the key features of UiPath Integration Service.
How to enable UiPath Integration Service
Integration Service for Automation Cloud requires you to enable “Integration Service” for the tenants you wish to use.
If “Integration Service” isn't enabled, navigate to “Admin > Tenants”, open “Tenant Settings using (⋮)” and finally hit the check box for “Integrations”. "
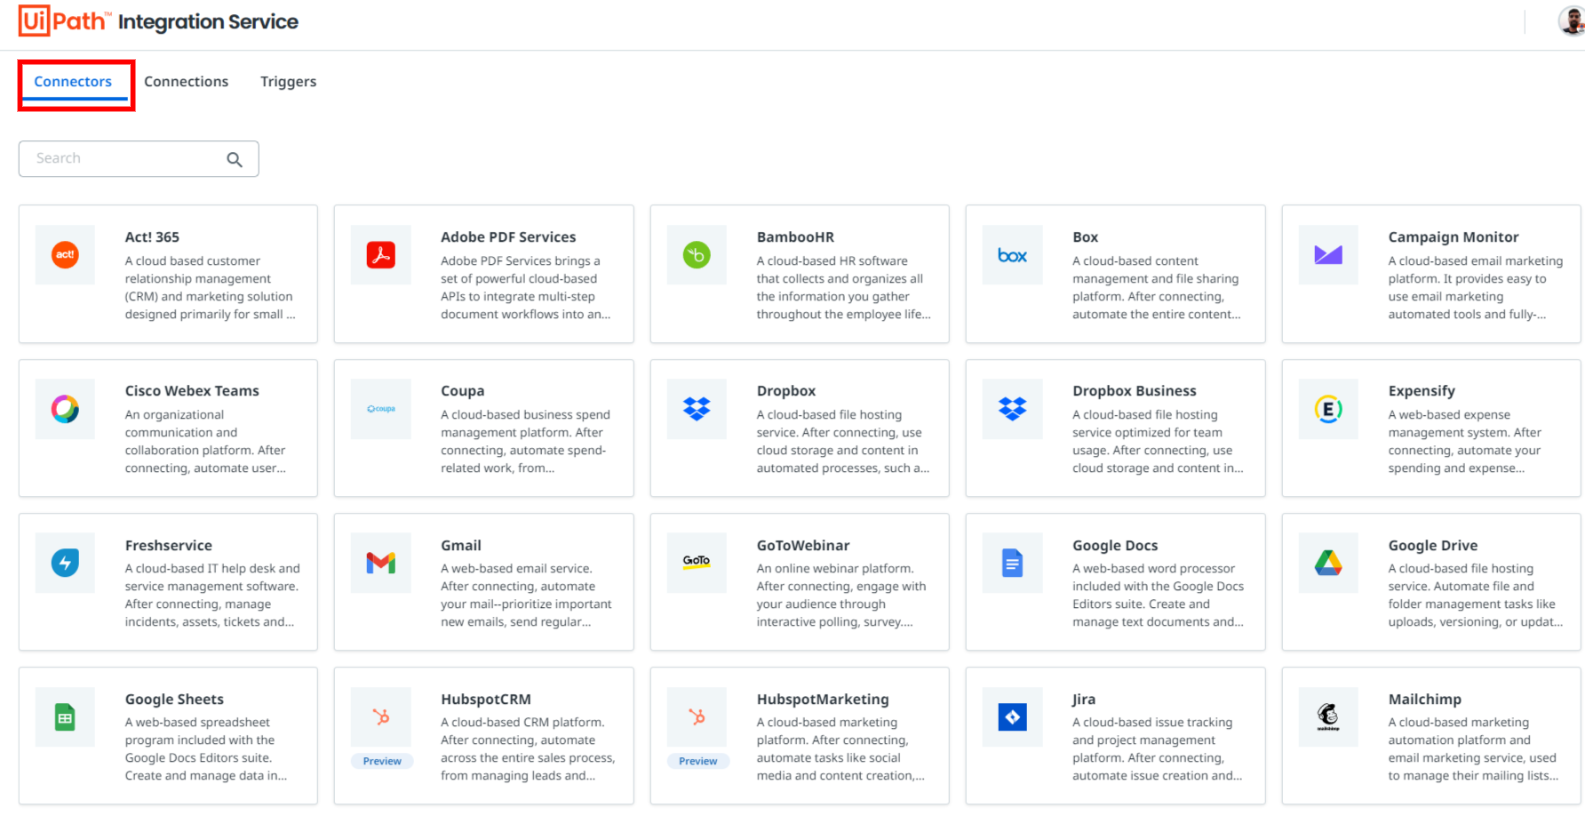
Once enabled you should be able to see the “Integrations” icon on the left navigation in Automation Cloud. Upon clicking you should be able to see the list of Connectors available in UiPath Integration Service.
You'll see a page like below.
Let's dive further and understand the workings and key concepts. Specifically, how triggers work to run your automation based on events received in upstream systems (for example, service now, incident ticket).
Key concepts in UiPath Integration Service
The Integration Service window includes three separate tabs:
1. Connectors – This tab shows you the list of available connectors. Connectors create a secure connection to your target application. You can treat them as powerful prebuilt API integration that provides an easy way to connect.
2. Connection – This tab shows you the list of connections you have created to an external application using the authentication method provided by API. You should be able to create multiple connections, edit, and update as required using the various options.
3. Triggers - Triggers provide an easy method to subscribe to events from the platform you have connected to which helps you run your automation. You should be able to create triggers by selecting the desired connector, connection, event and record types from the drop-down menu. This currently works based on polling every 5 minutes. Your process must be published and configured before you can bind that to automatically trigger on basis of events received. Read more about trigger documentation here.
Using triggers with UiPath Integration Service
As discussed above triggers allow you to start processes based on events that happen in other systems. Integration Service Connectors are used to expose events that are available for a given connector.
To receive details of the record that resulted in the event, you can define the following input arguments of type String in your process. Integration Service will populate them when it starts the job.
1. UiPathEventConnector
2. UiPath Event
3. UiPathEventObjectType
4. UiPathEventObjectId
All you need to do is create “4 input arguments” in the main XAML file of your process to receive the details.
UiPath ServiceNow integration connector
ServiceNow is a well-known cloud platform that accelerates IT Service Management (ITSM) transformation. Using ServiceNow integration you should be able to automate IT, HR, and many other customer experience workflows.
For connectivity between your UiPath Automation and ServiceNow instance.
First, you need to create “Application Registries” (your SNOW admin can help here if you don’t have access). Then Create a connection to UiPath Orchestrator using the required information.
Steps required at Snow Portal
1. First Go to System Definitions > Plugins and verify that the OAuth plugin Status is set to Active
2. Create Application Registries
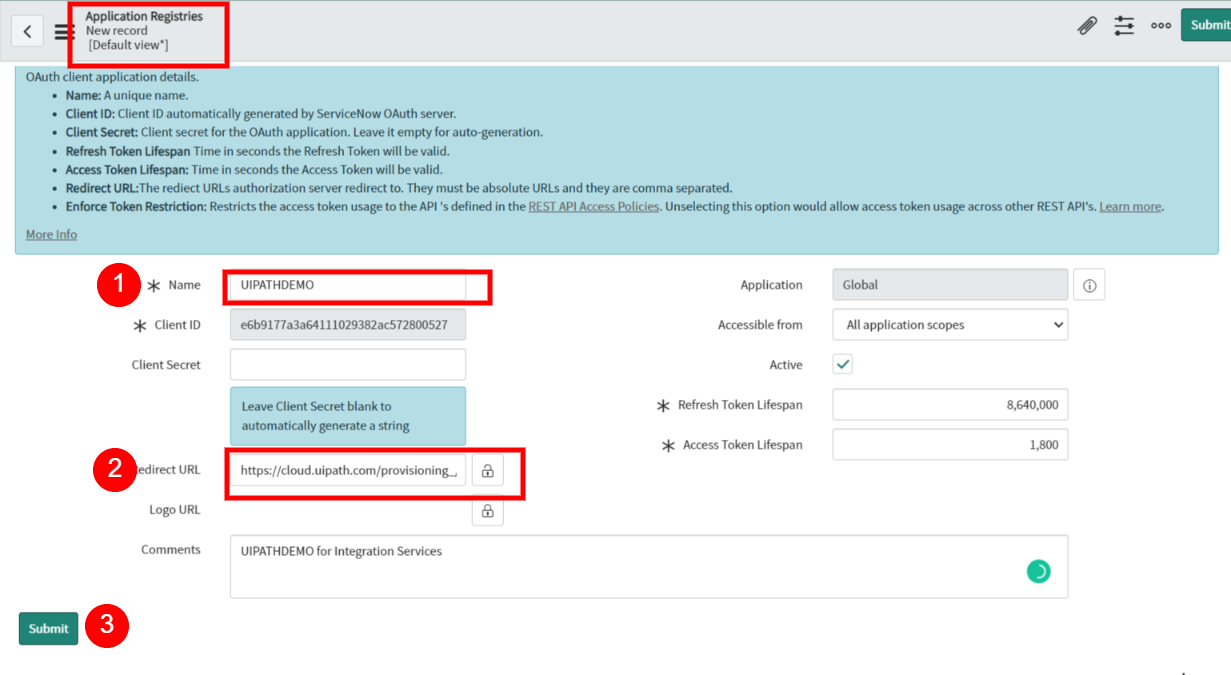
servicenow-application-oauth-setup-for-integration-services3. Name > Give a unique name
4. Client ID- Client ID automatically generated by ServiceNow OAuth server
5. Client Secret- Client secret for the OAuth application. Leave it empty for auto-generation
6. Redirect URL- The URLs the authorization server redirects to. They must be absolute URLs and they're comma-separated. (for UiPath cloud use: https://cloud.uipath.com/provisioning_/callback.)
The rest of the fields are optional. Once done, Copy Client ID, and Client Secret in the safe so that you can use them in the next step while connecting with UiPath Integration Service.
Steps required for UiPath Orchestrator
1. Navigate to Connector-> ServiceNow
2. Click on “Add connection”
3. Click In “New Window” -> Provide details of your ServiceNow Subdomain, Client ID, and Client secret
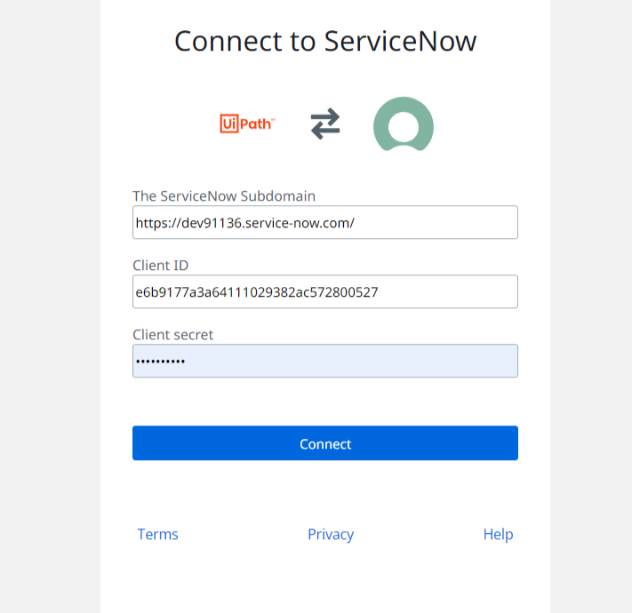
servicenow-application-integration-services-setup-window4. If everything goes well, you should be able to see the service now connection listed on the connection page.
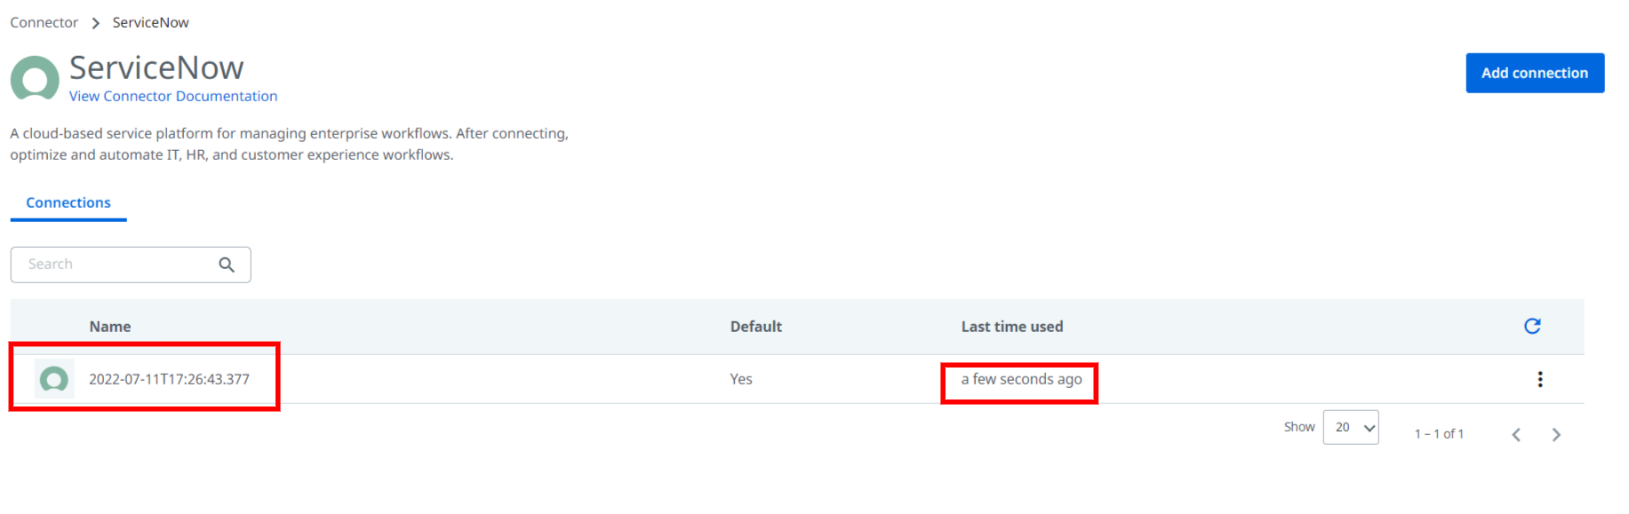
servicenow-application-integration-services-connection-windowLet's move to the next item, which is to configure the slack connector.
UiPath and Slack integration connector
Slack is the modern communication tool that brings all your team communication into one place so you can get more done in less time. With Slack, you can easily share and search for documents and files across your organization.
Using UiPath Integration Services for Slack, you should be able to communicate to channels, groups, read replies, send notifications, etc. Similar to ServiceNow Connector, we need to perform some steps in Slack before we can connect Slack with UiPath.
Steps required for Slack instance
You must perform the below tasks in Slack to successfully connect to it using UiPath and post notification messages.
1. Set up Your Slack workspace and channel
2. Get the Slack channel ID
3. Create and configure a Slack app
1. Set up your Slack workspace and channel
You must set up a workspace in Slack and create channels in the workspace. Then add people who should receive the specific notification messages into the channels.
Here I am assuming you already have the workspaces and channels created. Next, all you need to do is get the channel ID (required for sending notifications) and configure the Slack app for get the Slack channel ID.
2. Get the Slack channel ID
You must get the channel ID of the channel that you created in your Slack workspace. You'll use the channel ID to configure the integration properties in UiPath integration so that notifications are sent to the right Slack channel.
2.1 On your Slack workspace, navigate to the channel under Channels in the left navigation pane
2.2 Right-click the channel name
In the menu that displays, click the Copy link
2.3 Copy the link to a text editor, such as Notepad
2.4 Note the characters after the last forward-slash (/) in the link This is the channel ID of the Slack channel
2.5 Note that the channel ID can be a combination of letters and numbers. For example, C03BM5MFLE9
3. Create and configure a Slack app
You have to create a Slack app, and configure it to receive notifications sent by UiPath when an incident or request is created, and when a request is closed in ServiceNow.
3.1 Create a Slack App
3.1.1 Log in to the Slack app platform at https://api.slack.com
In the Slack API title bar, click Your Apps
3.1.2 Click Create an App, and in the resulting Create an App dialog, select From scratch
3.1.3 In the Name app, and choose workspace dialog, Enter the details
3.1.4 Click Create App
The app gets created and its Basic Information page appears.
3.2 Get the Slack app API credentials
3.2.1 On the app's basic information page, scroll down to the App credentials section
3.2.2 Note the client ID in the Client ID field, and the client secret in the Client Secret field
3.2.3 These API credentials, that is, the client ID and secret, were automatically generated when you created the app
You'll use these later while configuring connections to your Slack instance from UiPath.
3.3 Set permissions for your Slack App
3.3.1 In the left menu, under Features, select OAuth & Permissions
On the OAuth & Permissions page, go to the Redirect URLs section
3.3.2 Click Add New Redirect URL and Enter the URL of your UiPath integration instance. For example,
3.3.3 Click Add, and then click Save URLs
3.3.4 Scroll down to the Scopes section, and under User Token Scopes click Add an OAuth Scope
3.3.5 Enter the following scopes: mpim:write, mpim:history, mpim:read, usergroups:write, usergroups:read, im:read, im:write, users:write, users:read, users:read.email, users.profile:read, users.profile:write, chat:write, search:read, files:read, files:write, channels:read, channels:write, channels:history, groups:read, groups:write, groups:history, im:history
Steps required in UiPath Orchestrator
Navigate to Connector-> Slack
Click on “Add connection”
Provide Client ID, Client Secret copied from the above step
Hit connect
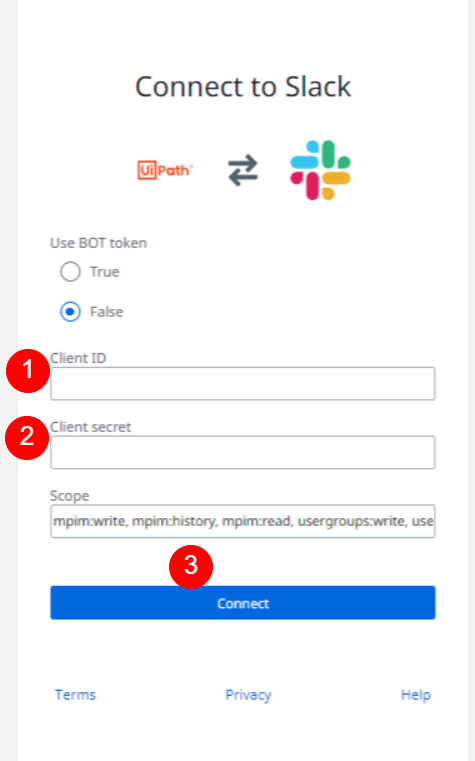

slack-integration-services-connection-permissionYou should be able to see the Connection listed on the page if everything goes well. All set for building an automation workflow using the integration connection created with ServiceNow and Slack.
Conclusion
So far we have configured the required connections for our automation. In the upcoming article you can deep dive into a use case. Find out the steps to take when using the integration services in UiPath Studio and how to solve the “Client Security Hash” using the incident data received from ServiceNow.
Topics:
Integration Service
RPA Solutions Consultant, Iris Software Inc.
Related articles


Get articles from automation experts in your inbox
SubscribeGet articles from automation experts in your inbox
Sign up today and we'll email you the newest articles every week.
Thank you for subscribing!
Thank you for subscribing! Each week, we'll send the best automation blog posts straight to your inbox.