
UiPath Test Suite and Data Service
Share at:

Editor's note: UiPath Test Suite has evolved. Explore the latest in agentic testing on our website.
UiPath Test Suite provides a great way for you to verify your workflows, APIs, and applications through automated test cases. The key to any good test case is making sure that you have enough input data variations to cover all usage scenarios. Currently, Test Suite enables you to leverage data variations defined in Microsoft Excel. However, managing, updating, and collaborating over Excel documents can be cumbersome, and adding data variations will require the re-publishing of the test case.
The UiPath Data Service enables you to consolidate and maintain data variations for your test cases. Instead of storing them in Excel files, simply create entities to store the inputs for your test case, and the results you expect for them. What's more, you can add data variations to entities at any time, without needing to update and re-publish your test case! Finally, with advanced access control capabilities, you can control who in your organization can add, edit, and delete data variations.
Using data service with Test Suite
Before we get started, you'll need to have the following:
1. Data Service enabled for a UiPath Automation Cloud tenant. Learn how
2. UiPath Studio Pro 2020.10 or higher
3. Your assistant or robot connected to a modern folder. Learn how
To illustrate the basic steps of using Data Service with Test Suite, we're going to test one simple automation. The automation will take two numbers as string input, adds them using the Windows Calculator app and produces the result as a string output.
Here's a sample project to help you follow along.
Step 1: Create Data Service entities and store data variations
Let's begin by creating the data variations in Data Service. Simply create an entity in the Data Service and create fields of the appropriate type for each input and output argument of your automation.
In this example, we'll use an entity called Calculator Test Data with the following columns:
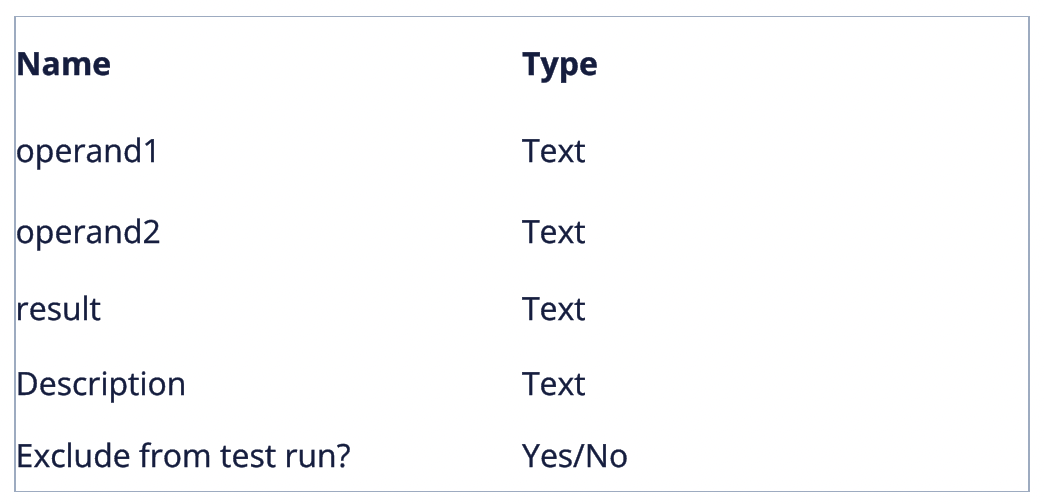
The inputs are "operand1" and "operand2", with the expected output stored in a column called result. Next, use the 'Add data' button to add your data variations as records in this entity.
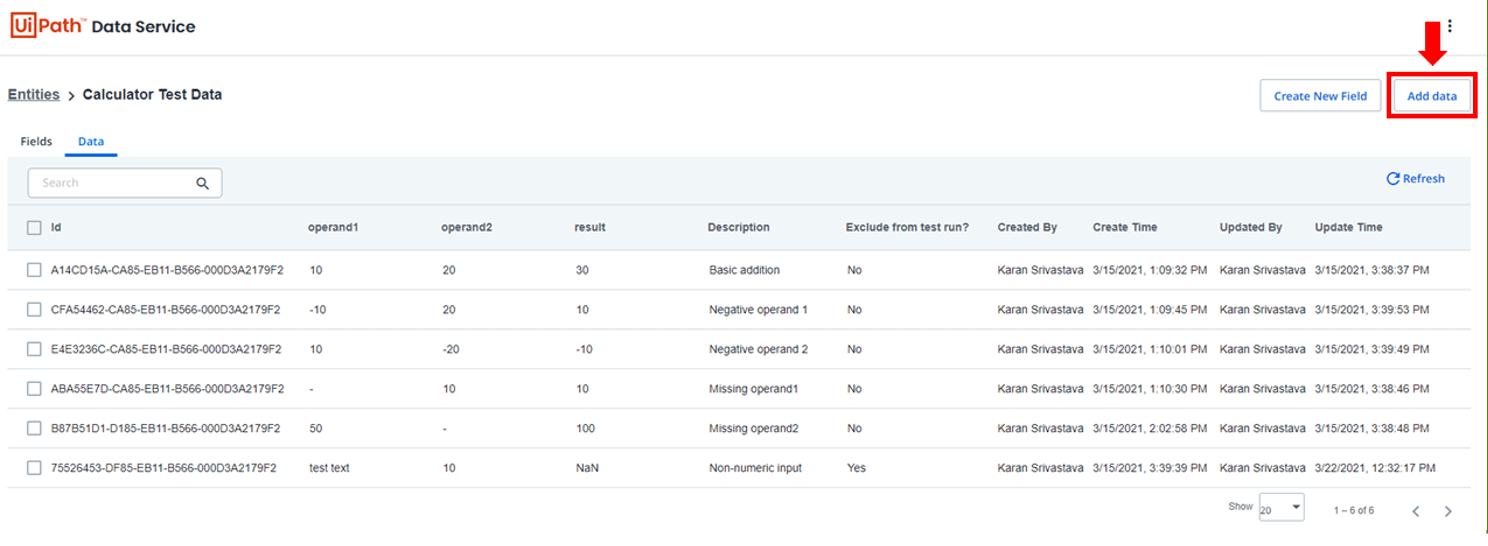
Tip: including a description field for a short overview of the variation can help when reviewing and identifying gaps in variations.
Step 2: Set up your project to access data variations in Data Service
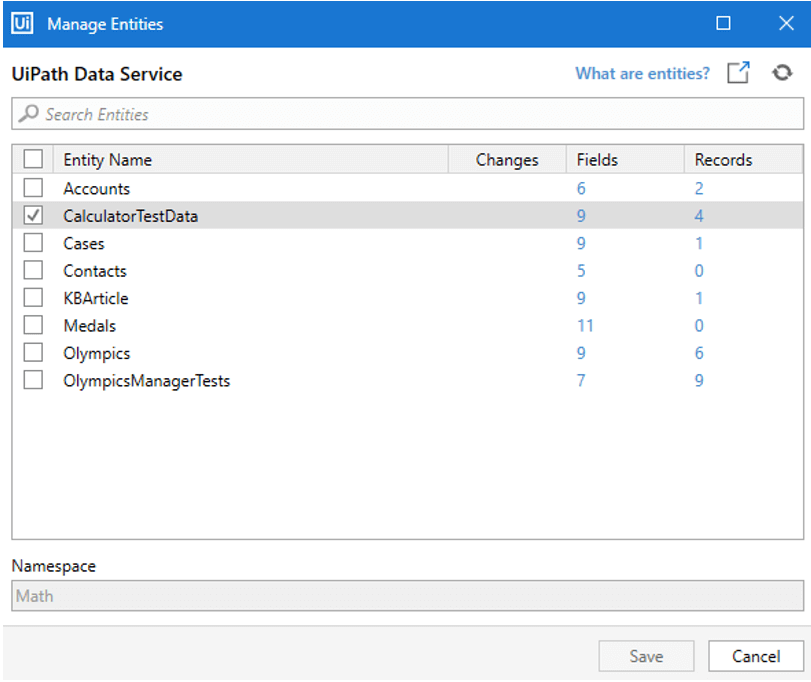
To access the data variations stored in Data Service, first, add the entity as a type in your Studio Pro project. Do this by clicking the Manage Entities button in Studio Pro, selecting the entity that contains your data variations and clicking Save.
Next, add Data Service activities to your project to retrieve data variations stored in our entity. To do this, simply click on the Install Package link in the hint display in Studio Pro.

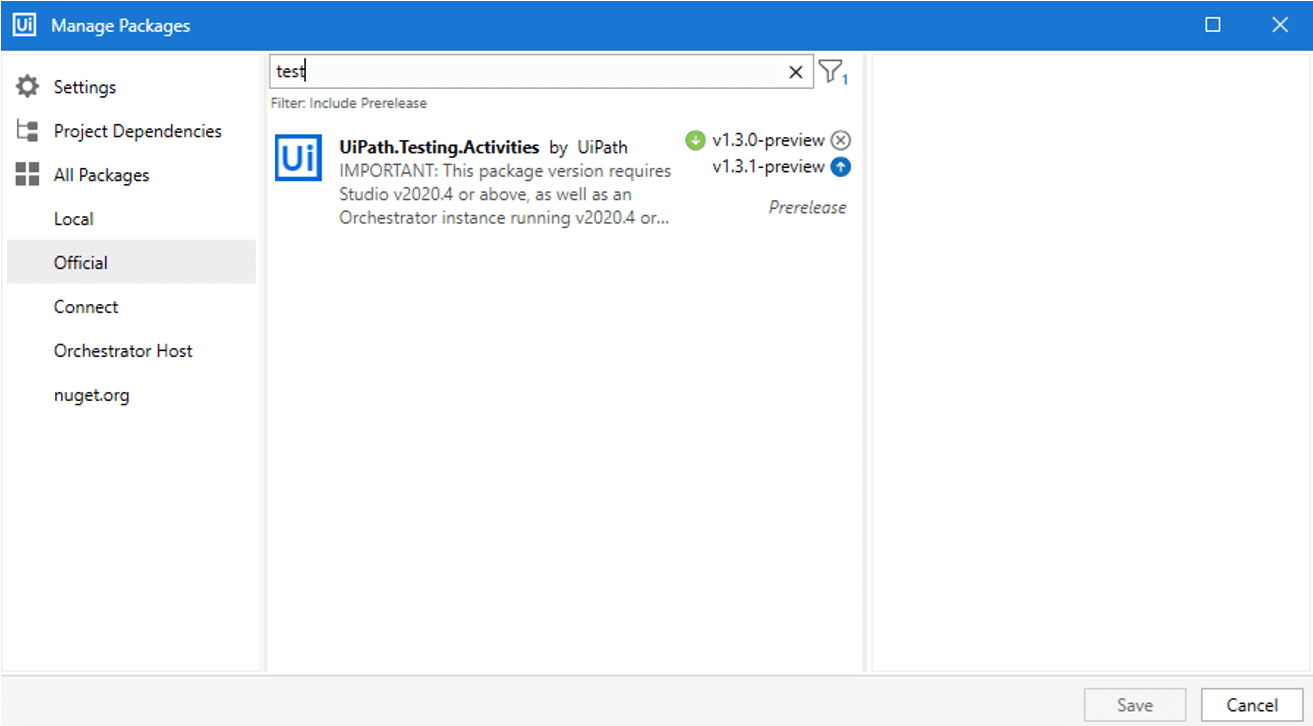
Finally, install the Testing Activities in our project by searching the official feed for Testing Activities in the Manage Packages window in Studio Pro. Install the activity pack and save it.
Step 3: Create a test case
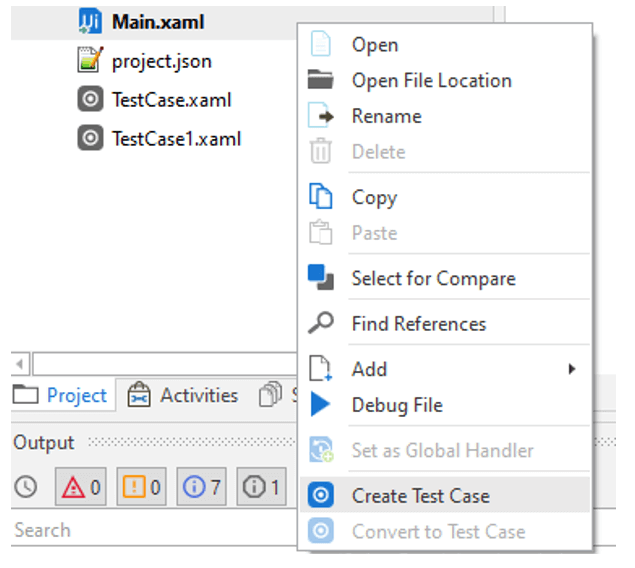
Next, create a test case for this automation by right-clicking on the workflow in the project explorer and selecting Create Test Case. Creating this test case gives you a "Given-When-Then" template to define the test case. The When sequence in the template invokes the workflow with its input arguments.
Next, we need a way to temporarily store all the data variations we retrieve from Data Service.
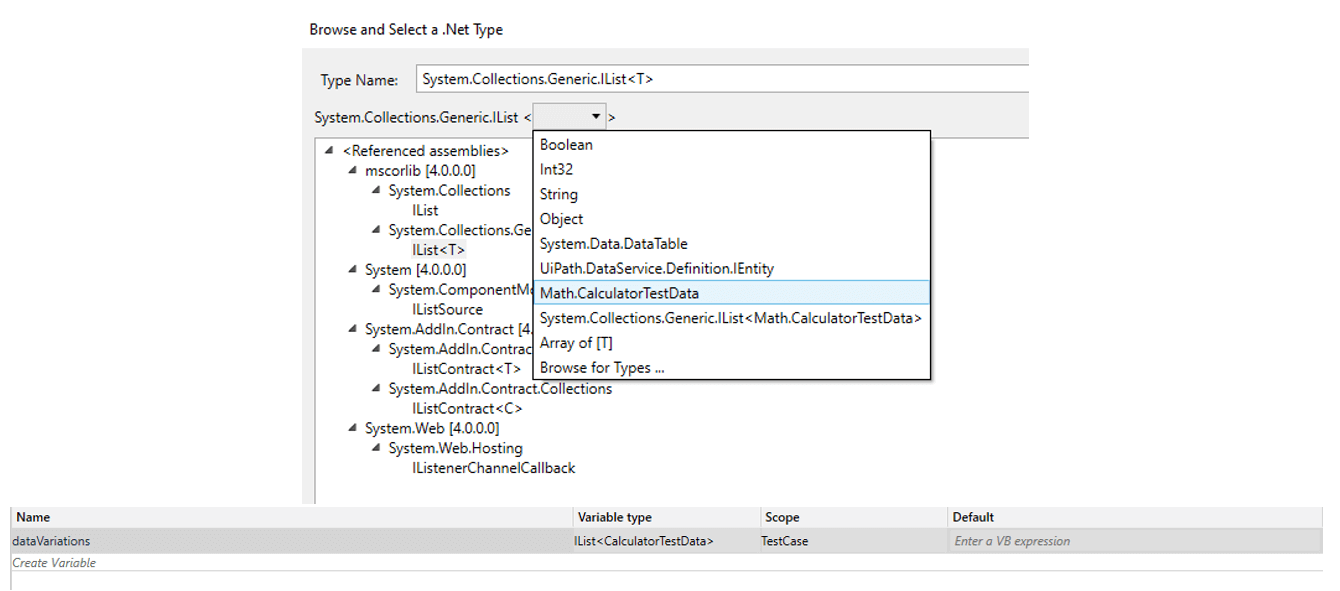
To do this, create a variable scoped to the test case of type IList, and set the type to the entity containing the data variations we previously added to the project. In this example, we'll call this variable "dataVariations".
Step 4: Build your test case
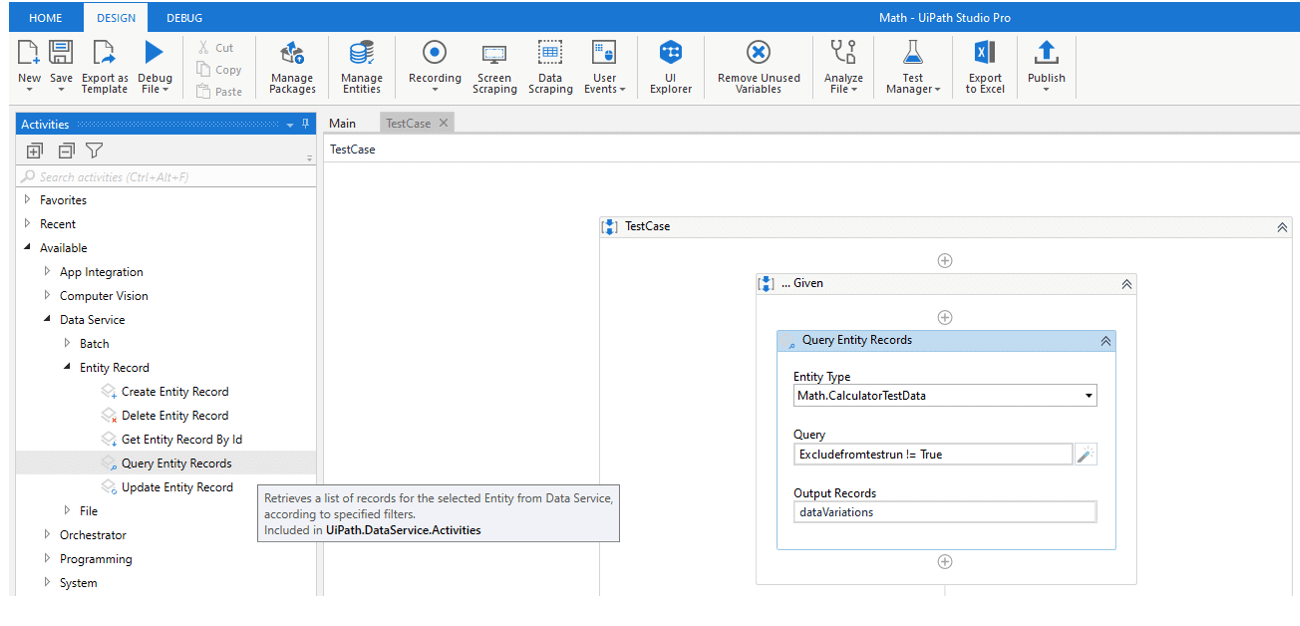
In the "Given" sequence of the test case, we need to retrieve the data variations from the entity. To do this, add the Query Entity Records activity, set the Entity Type property to the entity containing your data variations (Calculator Test Data in our example), and the Output Records property to the variable we created to store all data variations (dataVariations in this example).
Optionally use the query builder to define criteria for selectively retrieving data variations while excluding others. For example, an "Exclude from test run" column in your entity can be used to exclude variations that test activities for which development is not yet complete.
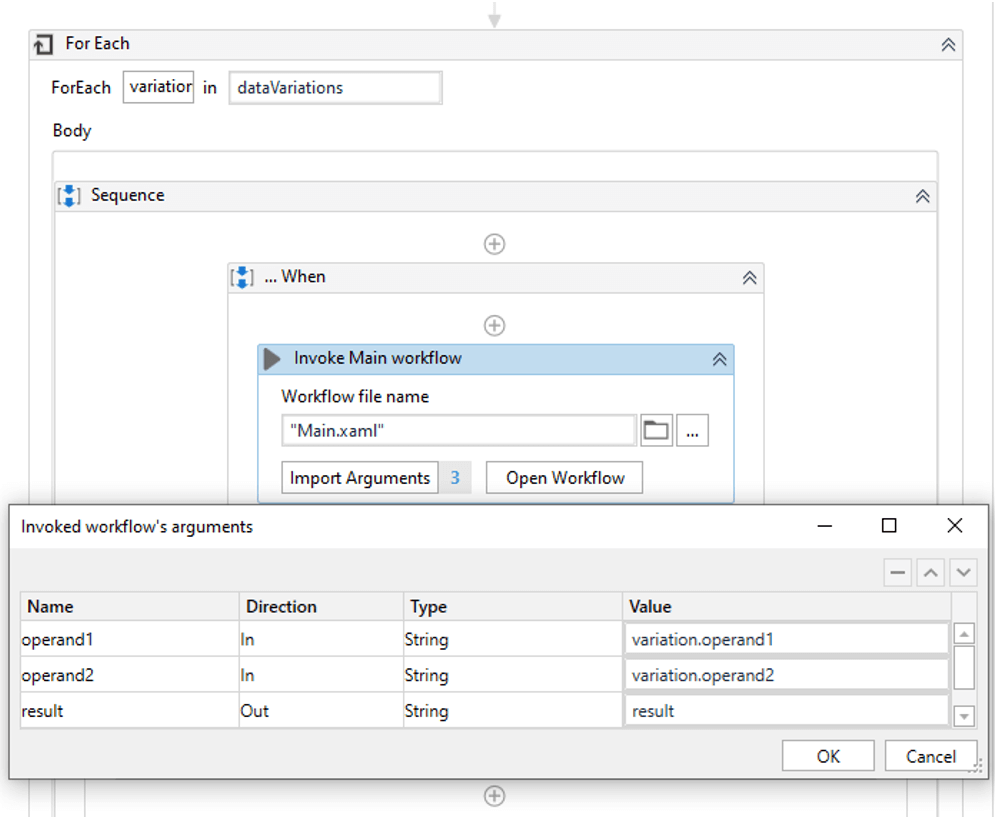
Next, add a For Each activity to iterate over the list of variations retrieved from Data Service and move the When and Then sequences of the template within it. Also, create a variable scoped to the For Each activity that will hold the output produced by the automation run. In this example, name this variable result.
Important: don't forget to set the TypeArgument property of the For Each activity to the entity containing your data variations.
Click on the Import Arguments button of the Invoke Workflow activity in the When sequence. Set the inputs to those retrieved from the Data Service entity and set the output to the variable we created in the For Each activity to store the result of the automation run.
Finally, we need to validate the results of the execution. To do this, add the Verify Expression activity in the Then sequence, and compare the result produced by the automation to what was defined in the Data Service entity.
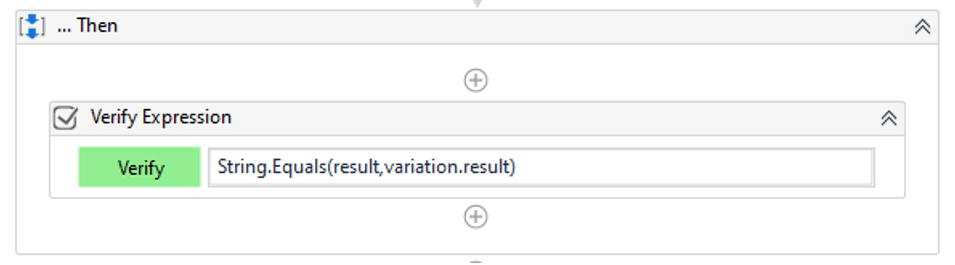
Tip: Set the AlternativeVerificationTitle property of the Verify Expression activity to the Description field for that record to help you identify the data variation that the test was run for when reviewing test runs in UiPath Orchestrator.
All that's left to do now is to run the test from Studio Pro! As your test executes the automation with data variations, you'll see the activity coverage percent on the automation change to give you a picture of the coverage you have. Add extra rows of data in Data Service to maximize coverage.
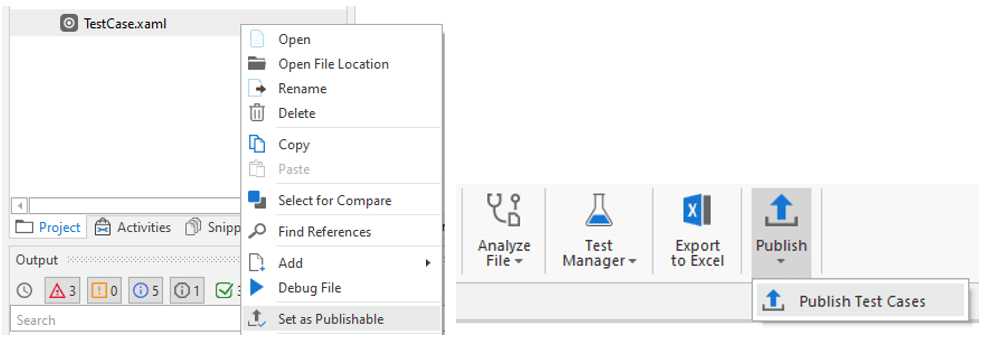
Step 5: Publish your test case
Once you're satisfied with your test case, simply right-click on it and select Set as Publishable, then use the Publish Test Cases button to publish it to the connected Orchestrator instance.
Senior Product Manager, UiPath
Related articles


Get articles from automation experts in your inbox
SubscribeGet articles from automation experts in your inbox
Sign up today and we'll email you the newest articles every week.
Thank you for subscribing!
Thank you for subscribing! Each week, we'll send the best automation blog posts straight to your inbox.