
Configuration of Projects with UiPath Task Mining
Share at:

Introduction
UiPath Task Mining allows us to analyze and understand the tasks performed by the users with the help of AI. With a centralized control from the admin portal, it is an easy way to analyze in detail the workflow data, including steps and execution time.
UiPath Task Mining uses advanced machine learning models to capture task patterns from the data. Among benefits we can mention: strong insights, transparent and secure.
Before we get started, you’ll need to have the following:
1. Task Mining enabled for a UiPath Automation Cloud™ tenant
2. UiPath AI Center™ enabled for a UiPath Automation Cloud tenant
3. Prerequisites for enabling the service
To get a clear understanding of how to configure and create a project, we will be using two applications Excel and Chrome for illustration purposes.
Step by step use case
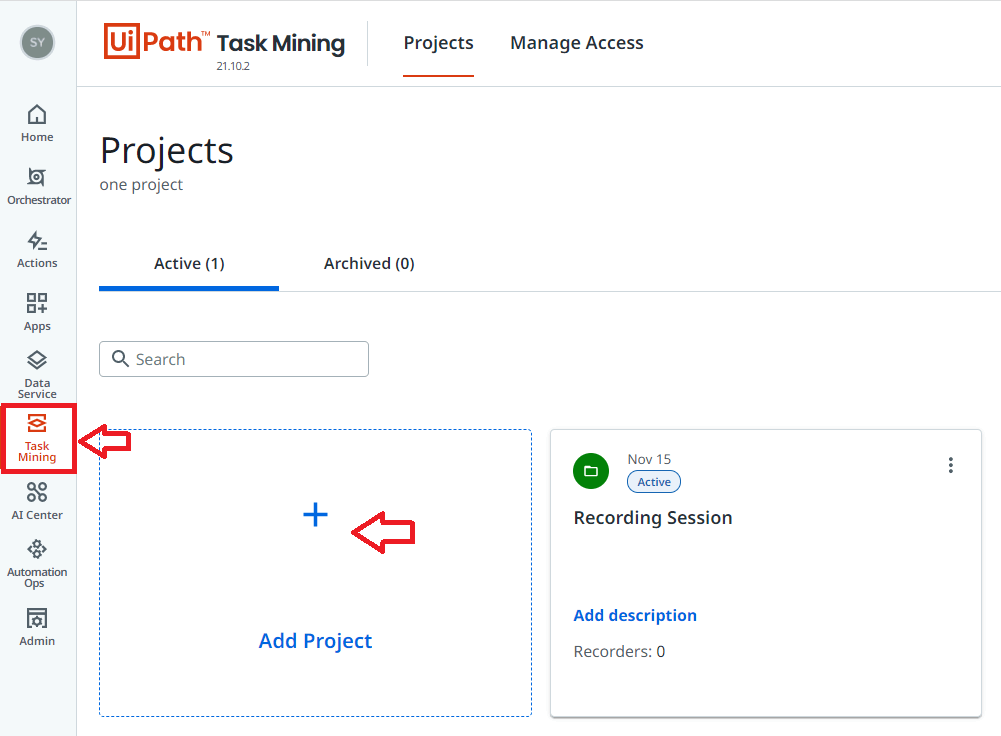
Step 1: Creation of project
Let’s begin by navigating to the Task Mining tool from the UiPath Automation Cloud tenant and then click on Add Project as shown in the image below.
Provide the project name and description and click on save button as shown in the picture below.

Next, the project is created, open the project by clicking on it and you should be able to see the insight details like screenshot below.
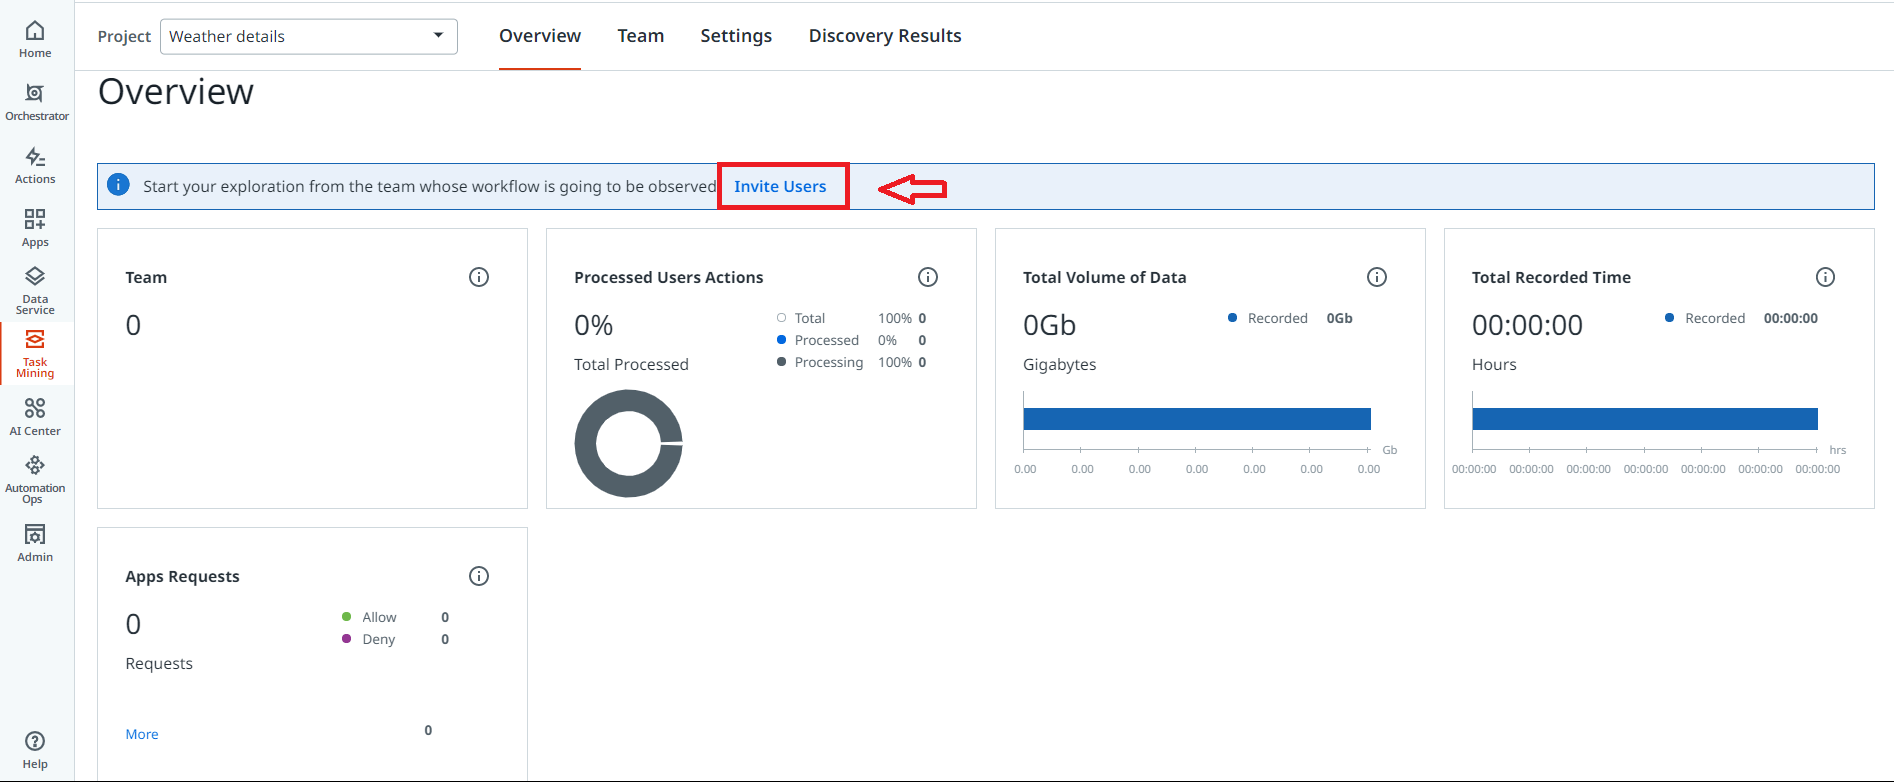
In the next steps we'll see how to send an invite to users.
Step 2: Invite users and download the Task Mining.exe
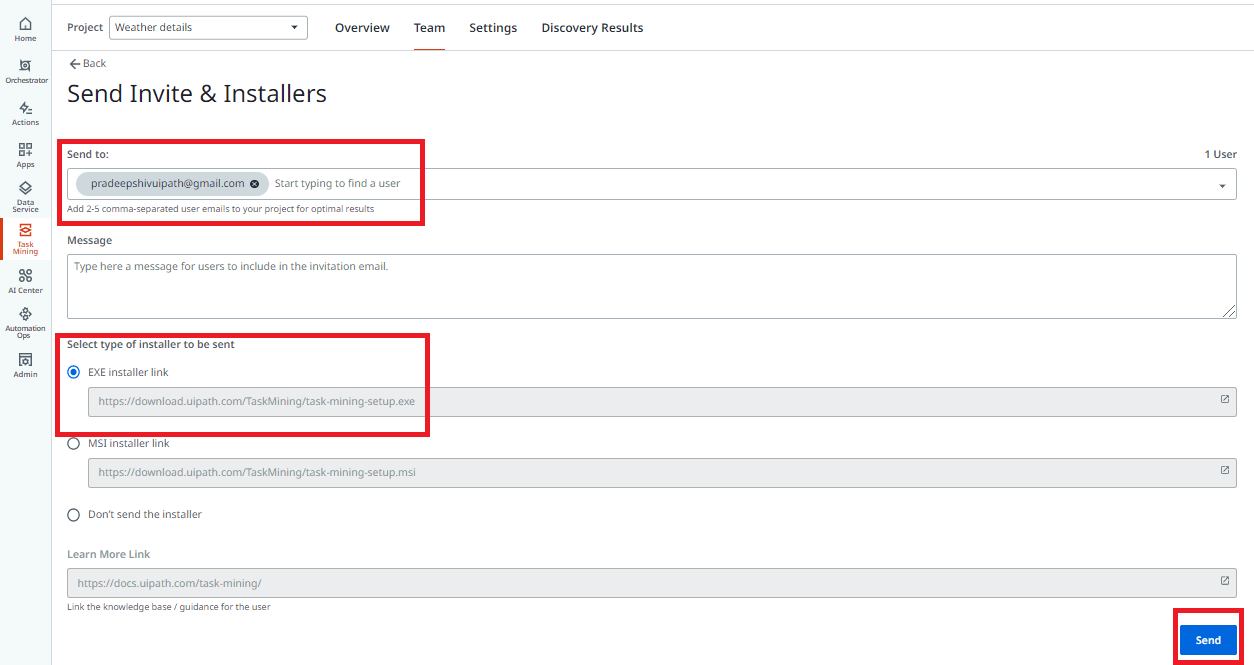
Click on Invite users as shown from above image and once the users accept their invite to Automation Cloud then we can add the user details as shown from the below image, choose EXE Installer Link and click on send button as shown in the image.
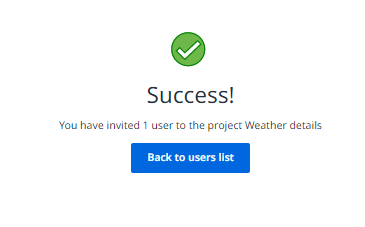
Once you send an invite, you’ll get a prompt message box (refer below image) and user gets an email stating to install the exe as shown in the image below.
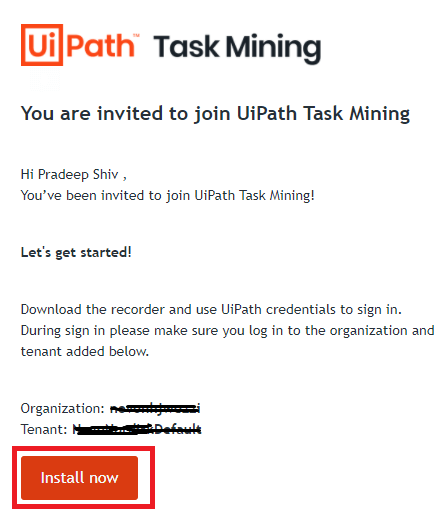
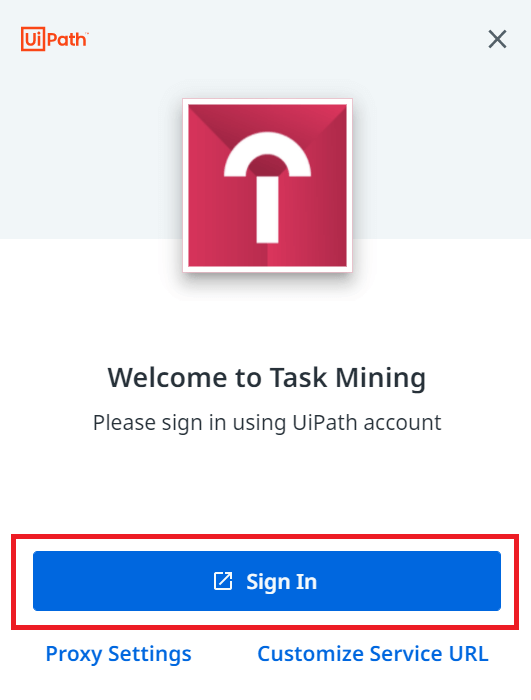
Next, Install the .exe file, once you have done installing the Task Mining Setup file, you need to Sign in with your account and choose the tenant which you are invited for and once done you should see the window like in the image below.
In the next steps we will see how to create a project in AI Center.
Step 3: Creation of the project in AI Center and configuration
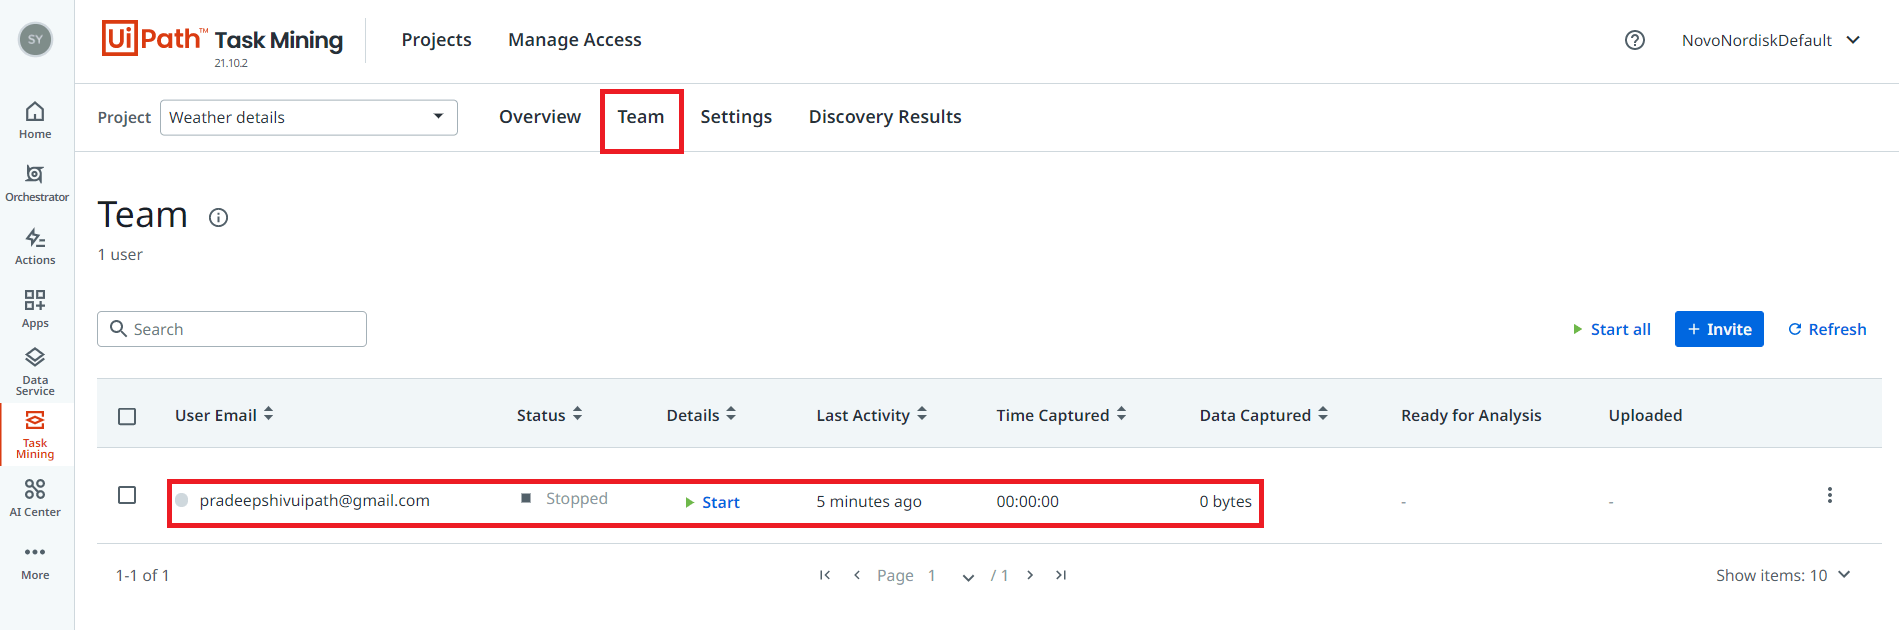
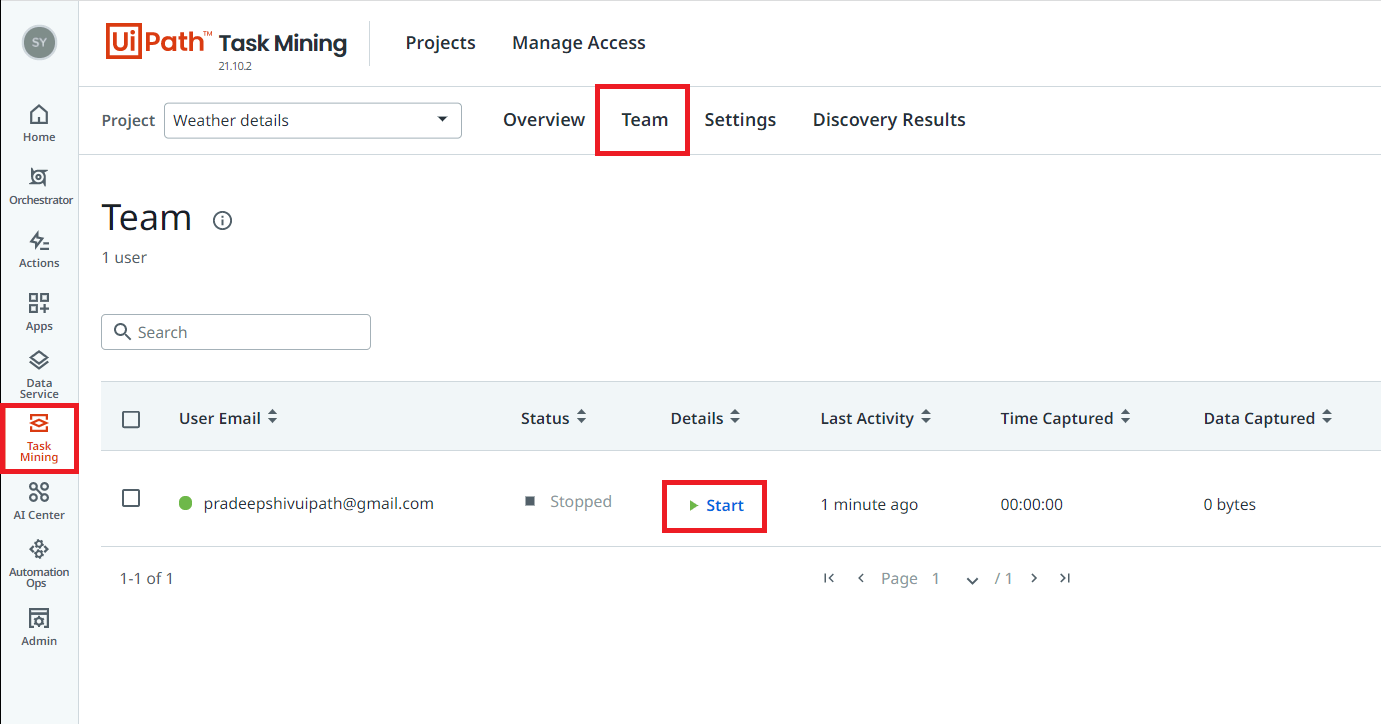
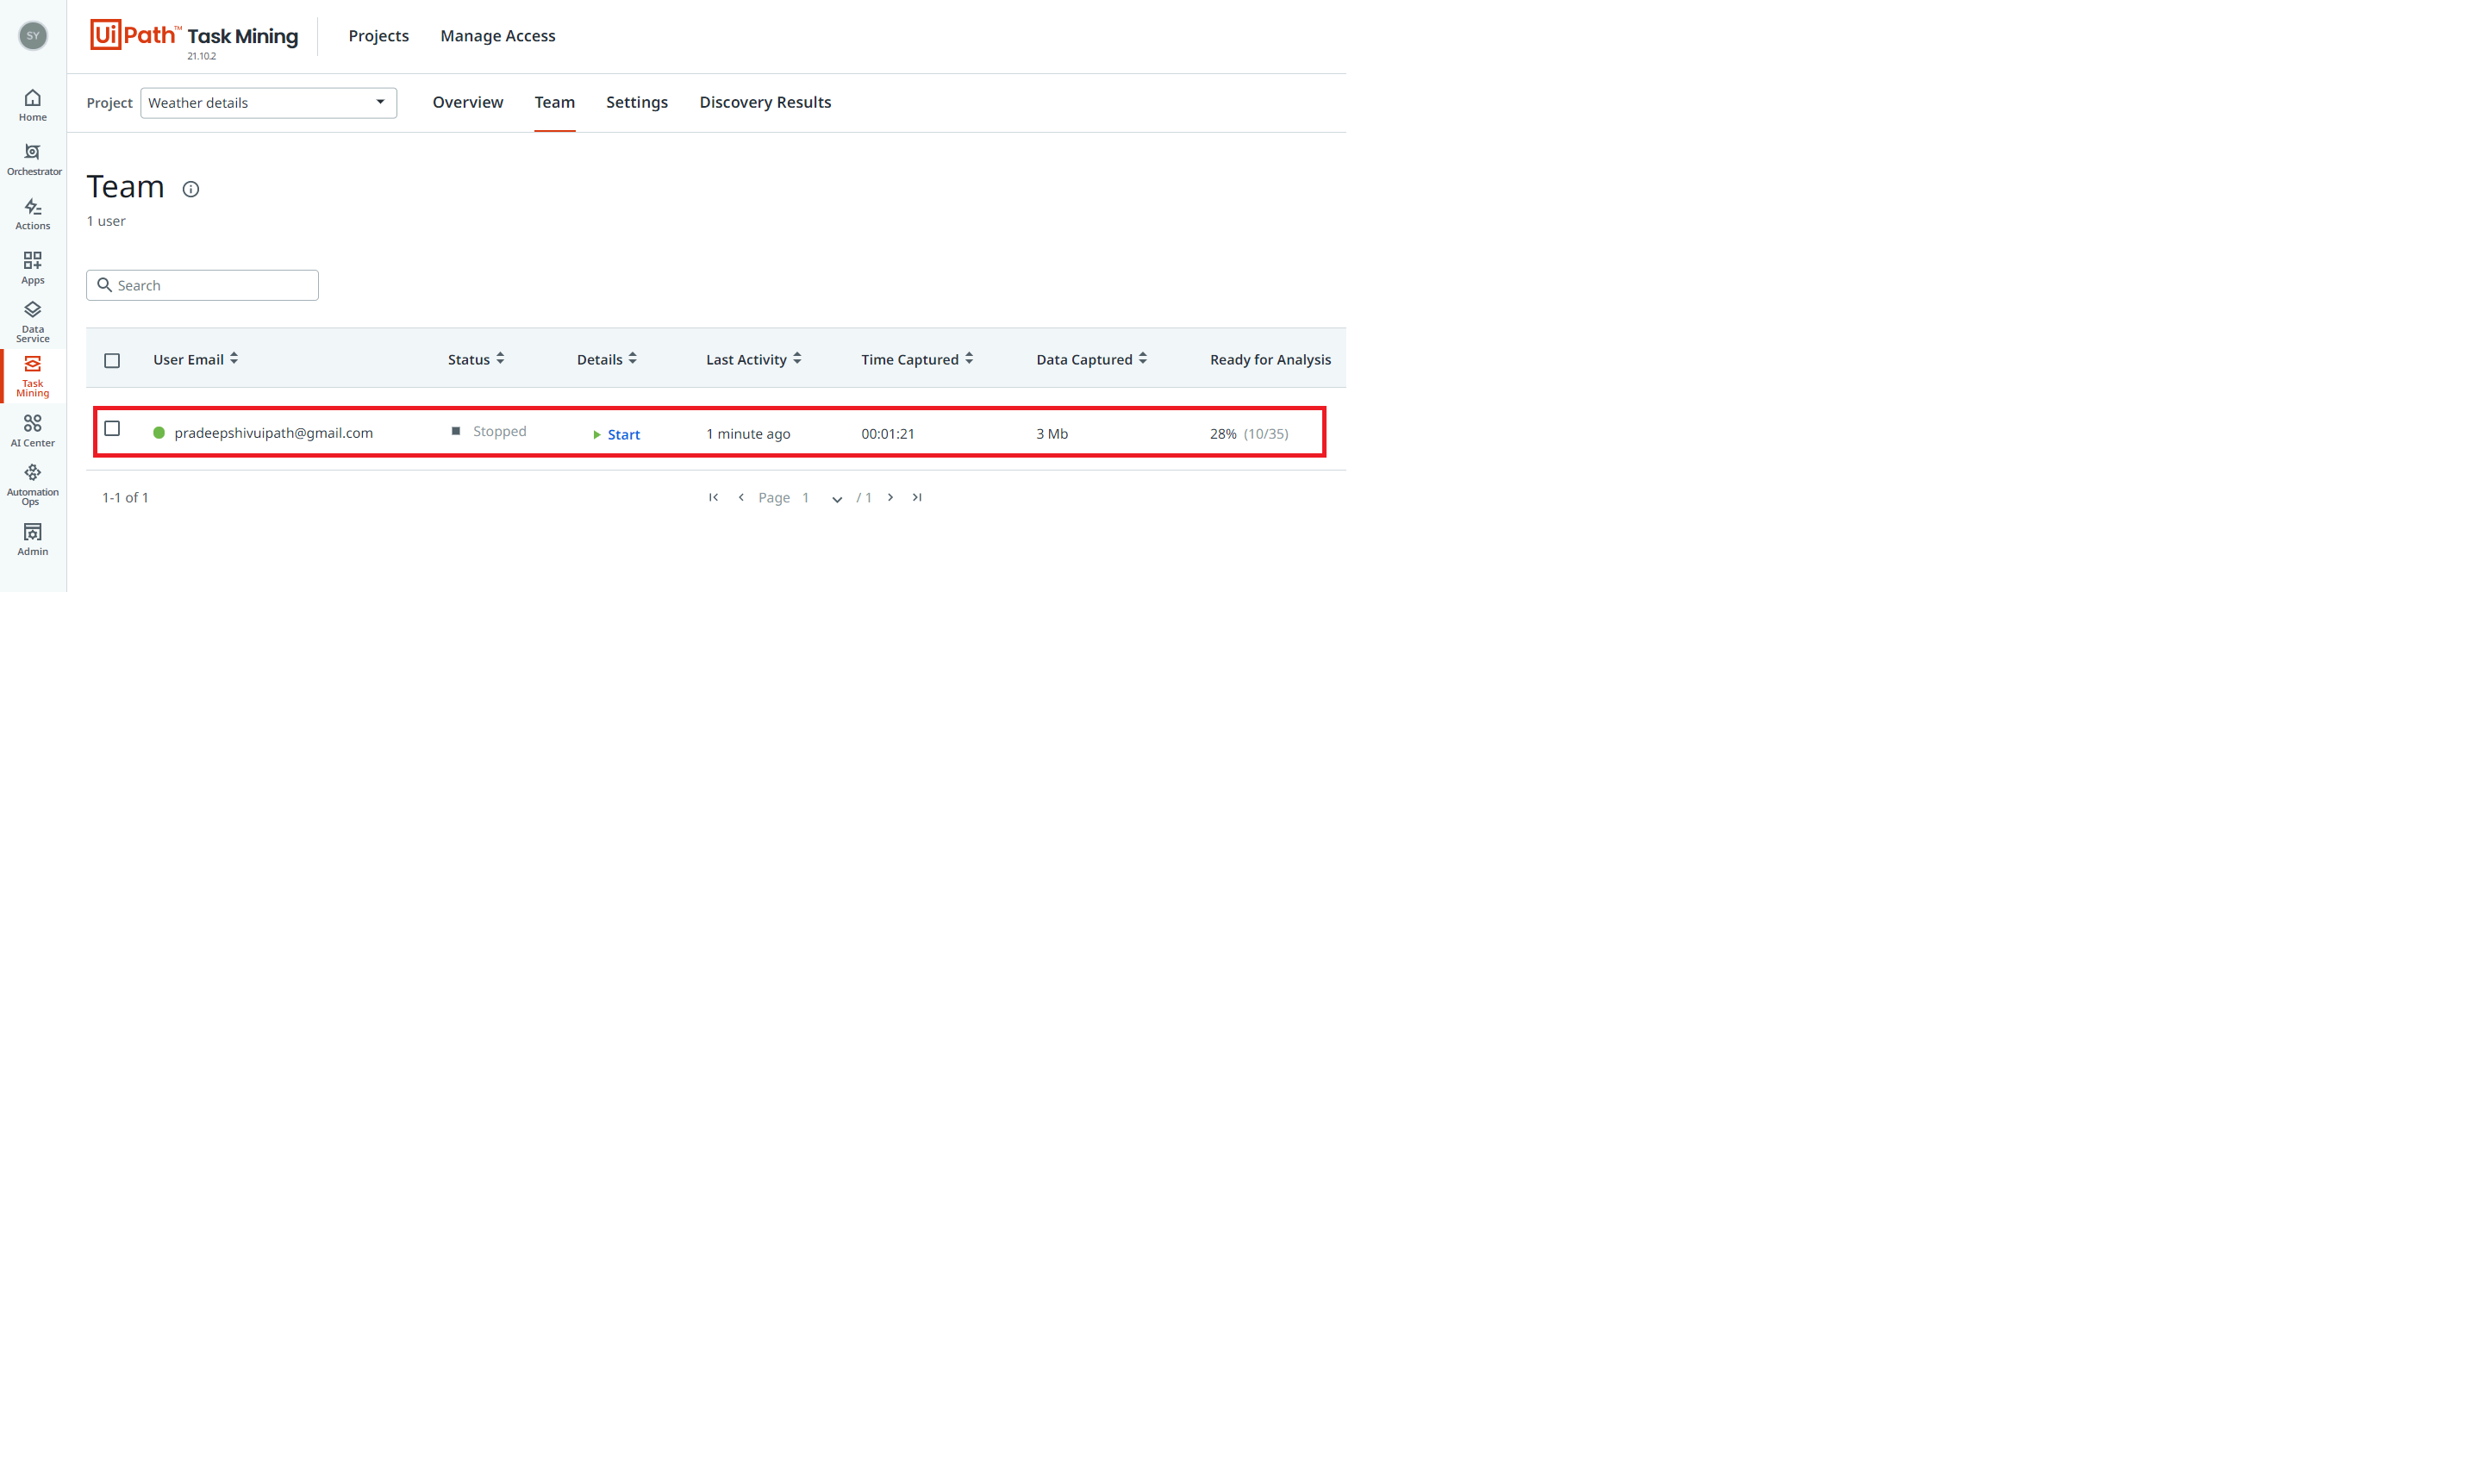
Once on successful sign in, navigate back to project that has been created and in the Team section you should see the status of the user and details as seen in the image below.
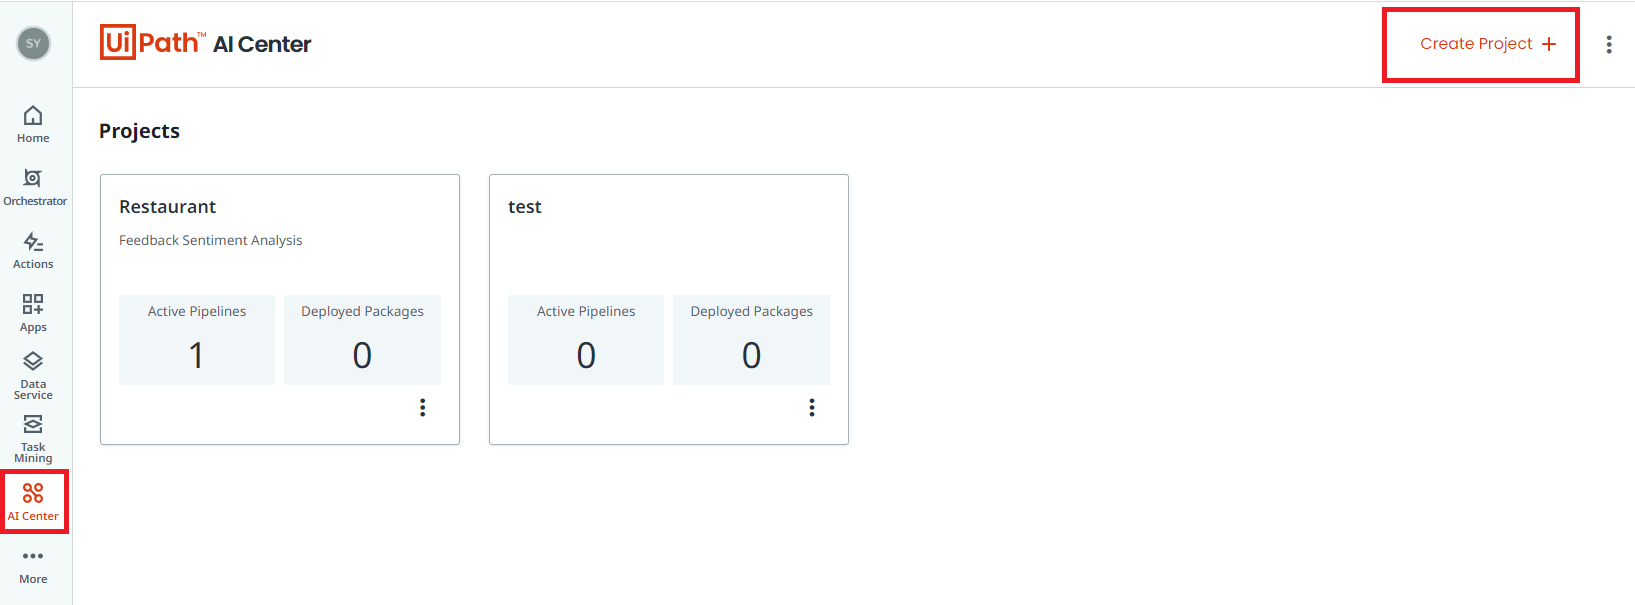
Navigate to AI Center from the list of products on your left panel, upon navigating to AI center click on create project as shown in the image below.
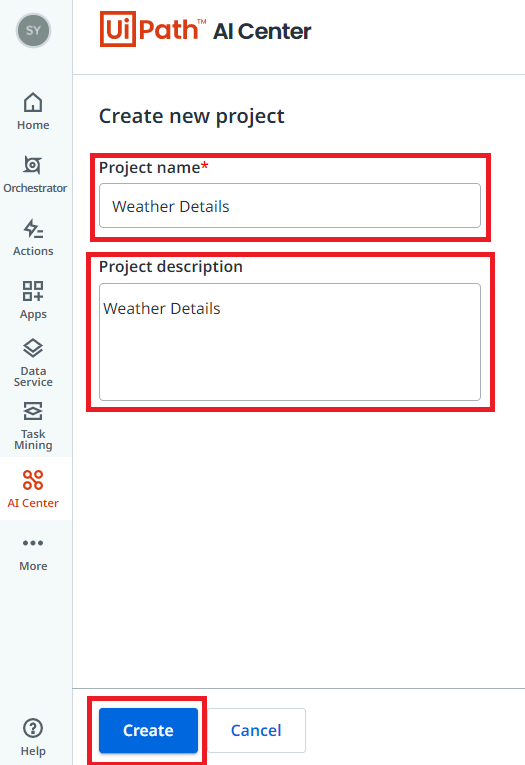
Create project by giving specific project name and description and click on Create button as shown in the below image.
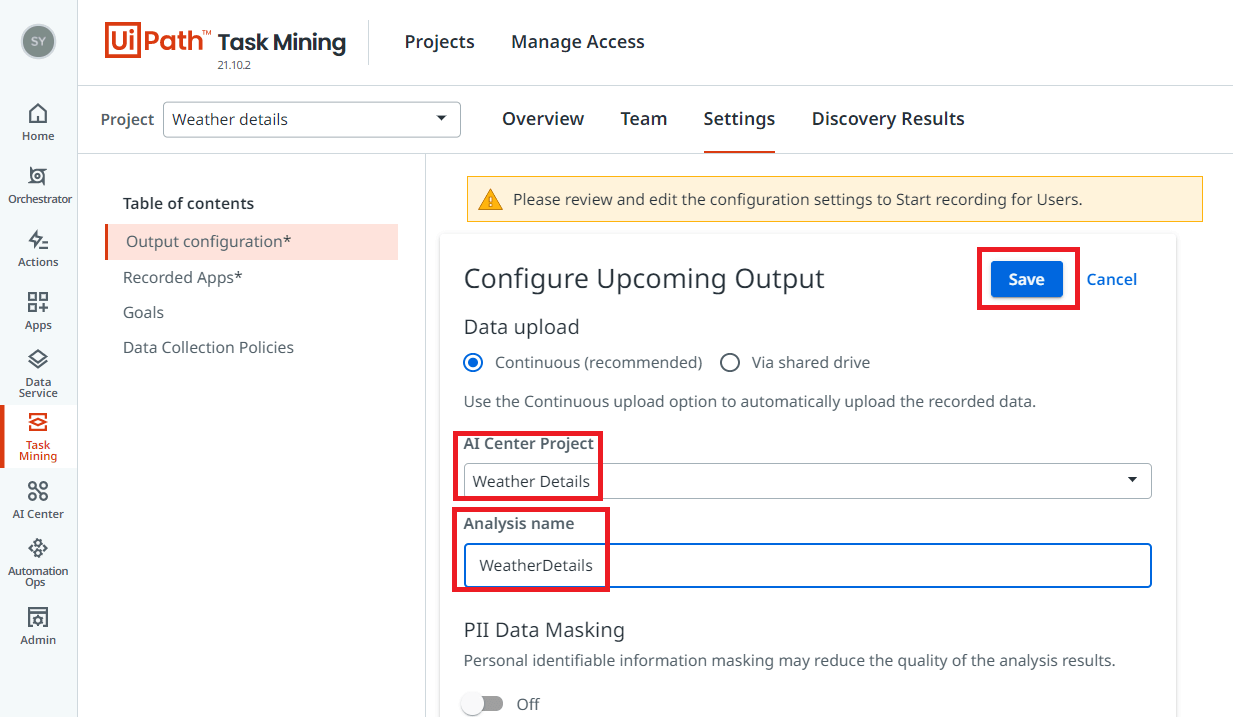
Next, that we created AI Project, navigate back to Task Mining project and to Settings tab. Click on Edit button as shown in the image and add the AI Project that we just created and give the Analysis name for the project and click on Save.
In the next steps we will see how to add the application which we need to get the details from and start recording.
Step 4: Running and adding applications
Navigate back to Team tab and click on Start button as shown in the below image.
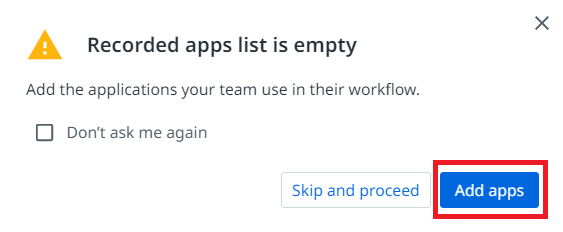
Upon clicking on the Start button, you’ll get a prompt message to Add the applications as shown in the below image. Click Add apps as shown.
Post clicking on Add apps, you should be able to see the page as shown in the below image, now we have two options Globally for all users and On Individually user requests, if we add application to globally, the users cannot remove the application which has been allotted to them and it is applicable for all the users. Individual request can be added from the settings by users themselves and later can be moved to global list. They can remove the application which they don’t want to track.
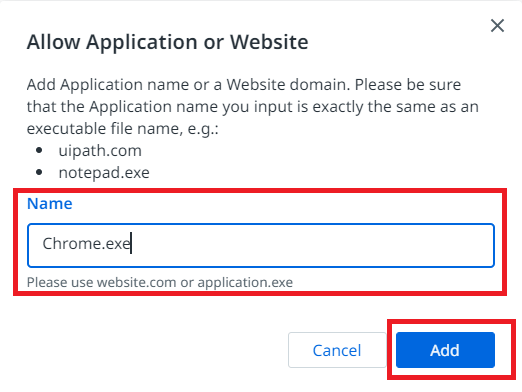
Click on Allow+ icon
Upon clicking on the Allow+ button, add the list of applications you want to track. In our case I’ll be adding Excel.exe and Chrome.exe as shown in the below image.
Upon adding the application to recording list, you can see the list of applications added by the admin as shown from the image below.

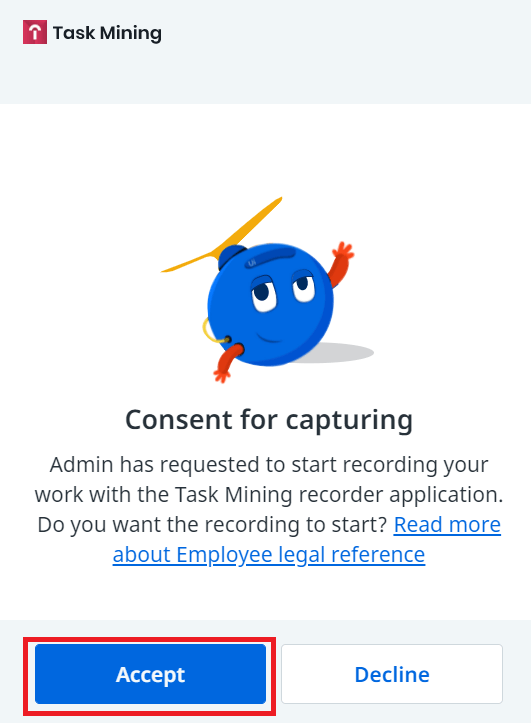
Next, navigate back to Team’s tab and click on Start. Upon clicking on Start button you’ll get a prompt message to Accept the consent for capturing the details, click on Accept as shown in the image.
You can perform the steps in Chrome and Excel to capture and stop the recording, upon stopping the recording you can see the status details as in below image.
Step 5: Adding ML Package and Creation of Pipeline
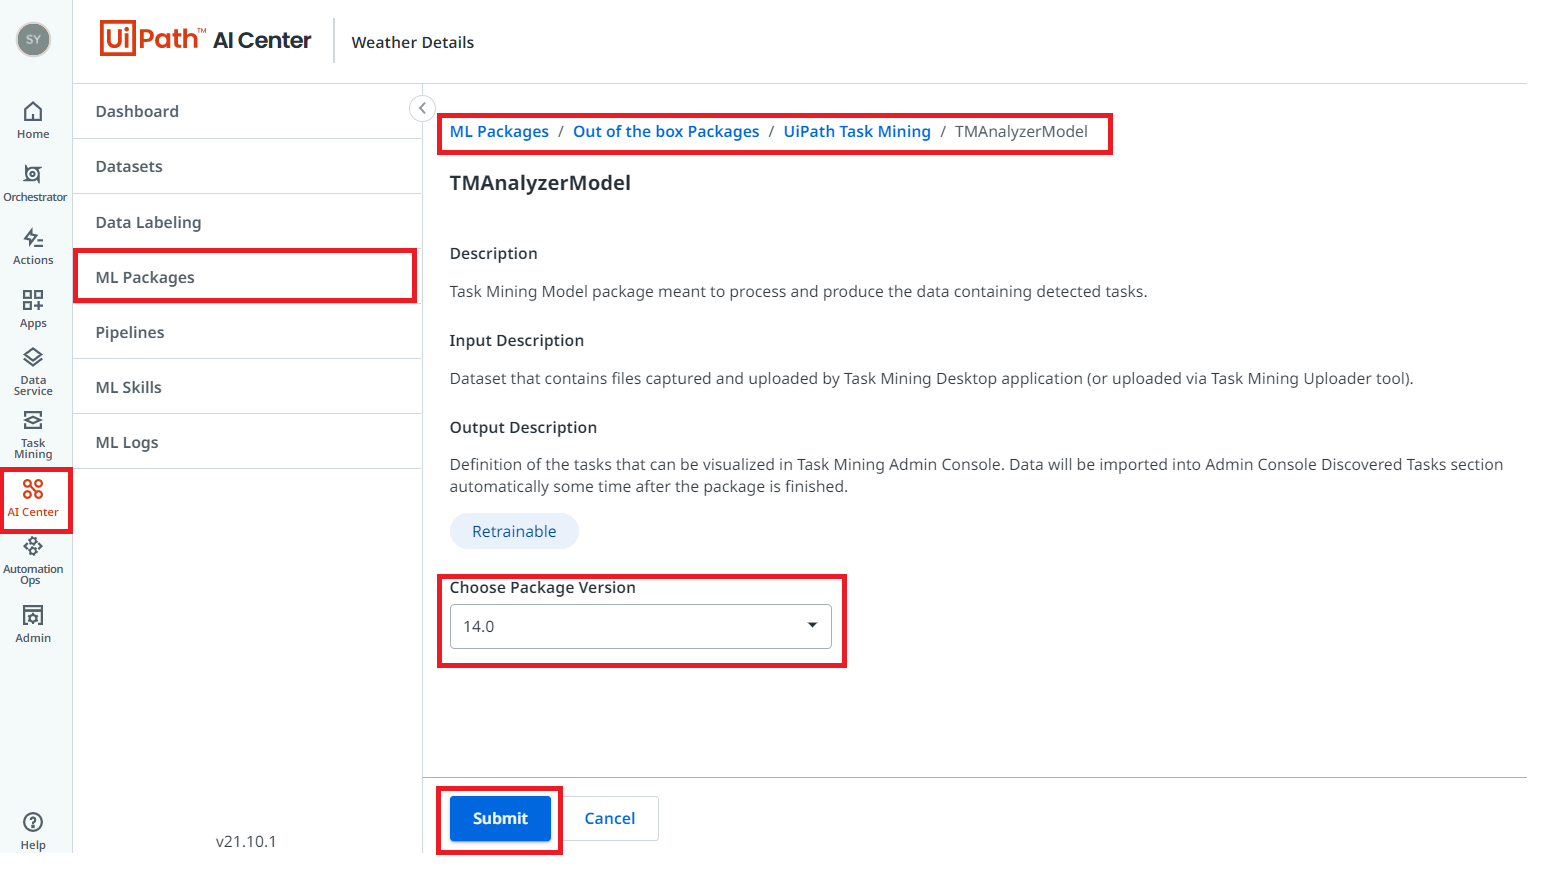
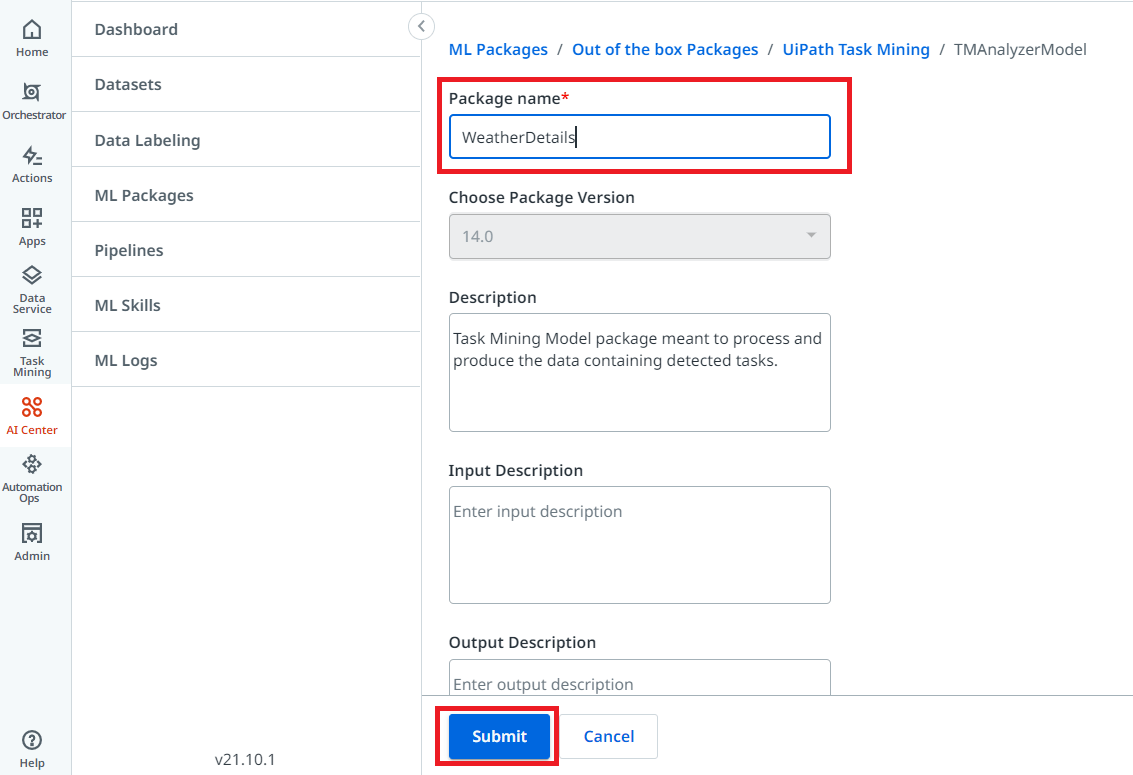
Navigate back to AI Center, to ML Packages > Out of the box packages > UiPath Task Mining > TMAnalyzerModel and click on Submit button as show in the image.
Upon clicking on Submit button, enter the package name as shown in the image below.
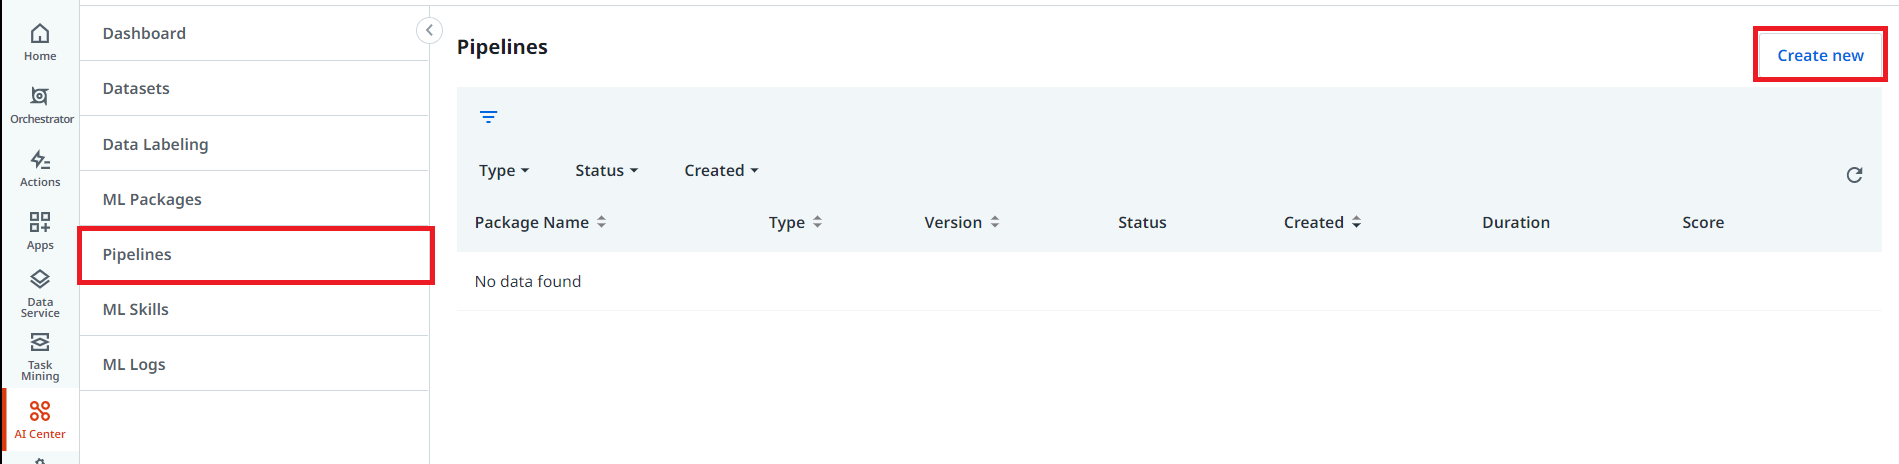
Post clicking on the Submit button, click on Pipelines tab as show from the below snap.
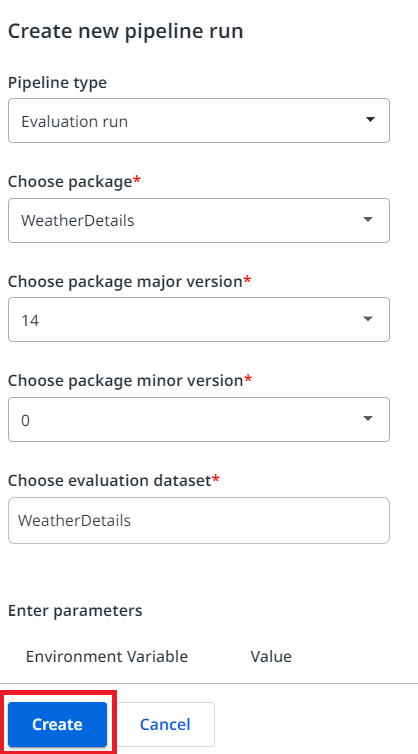
Upon clicking on create new, select the Pipeline type, Package, Major version, Minor Version, and the datasets (same as Analysis name defined in Step 3 )and click on create button as shown in the image.
Step 5: Results and Analyzing
For a Data Analysis, the datasets should contain at least 10,000 actions, but we recommend 50K actions as a good baseline. The model can support up to 200K actions collected in a given project.
If a user provides at least 200–1000 actions per hour, we can easily expect the result by end of the recording and get the results and analyzing of the session.
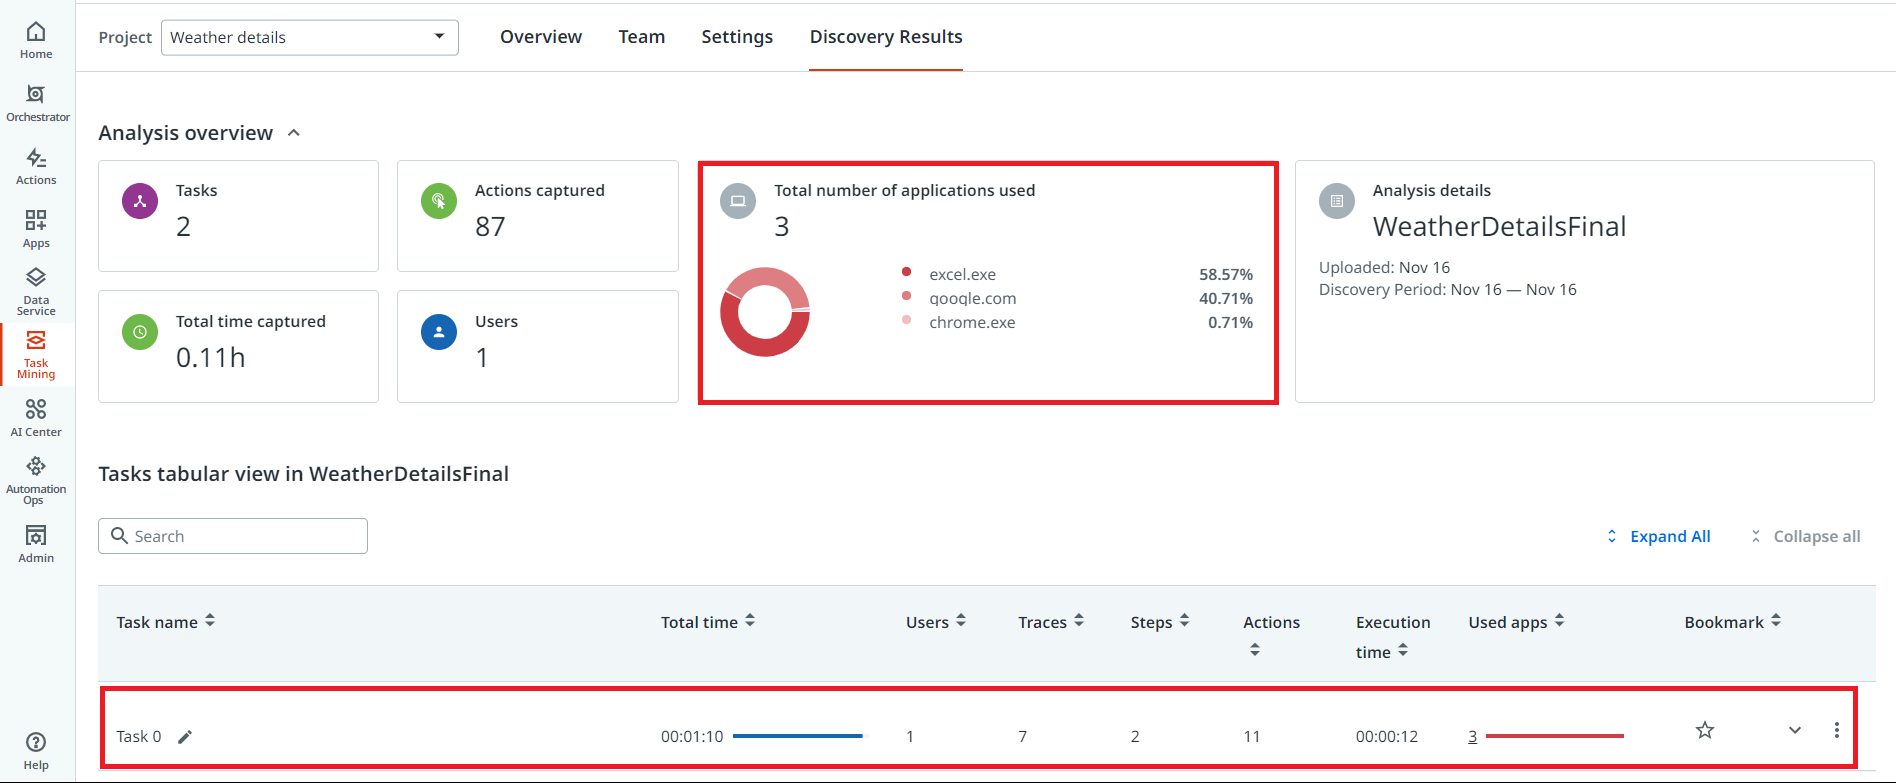
Navigate to Task Mining and in your project, navigate to Discovery Results tab. Upon pipeline results you can see the results like the image below. Once the analysis is completed, the user who executed it receives an email notification with the link to the results.
Once the results are generated you can see the Number of Application used, Actions captured. Duration and number of users from the first panel— we can also see the percentage of different applications being used.
To get a better view of each task, we can adjust the view by sliding the toggle, or +/- icons to adjust the same.
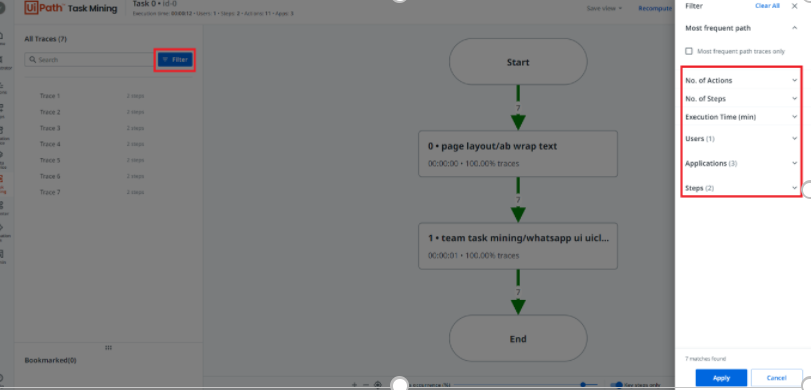
We can apply filters by clicking on the Filter button as shown below and filters can be done by:
1. Most frequent path
2. Number of actions
3. Number of steps
4. Execution time
5. Users
6. Steps
As shown in the below snap.
We can also edit the Task name by clicking on the pen icon next to the Task name as shown in the below snap.

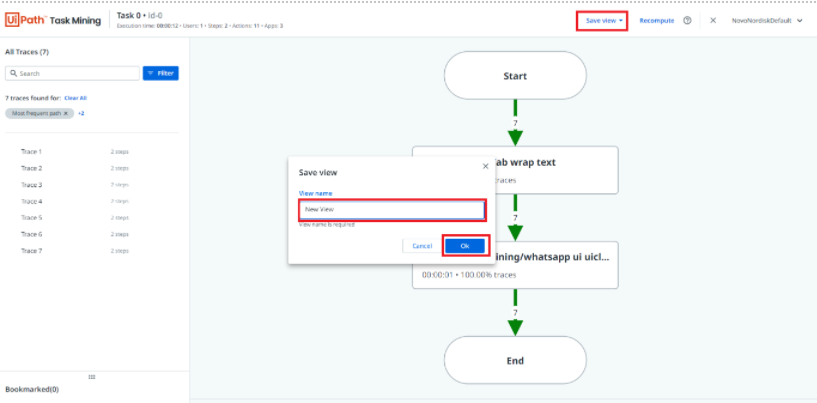
After configuring the filter view, you can Save the view, for later use.
You can name the view so that it's easier to find the preferred configuration from the Saved view option.
Later to view the saved views, you can always navigate to Save view drop down and choose Saved Views options to get the list of saved views as shown in the below snap.

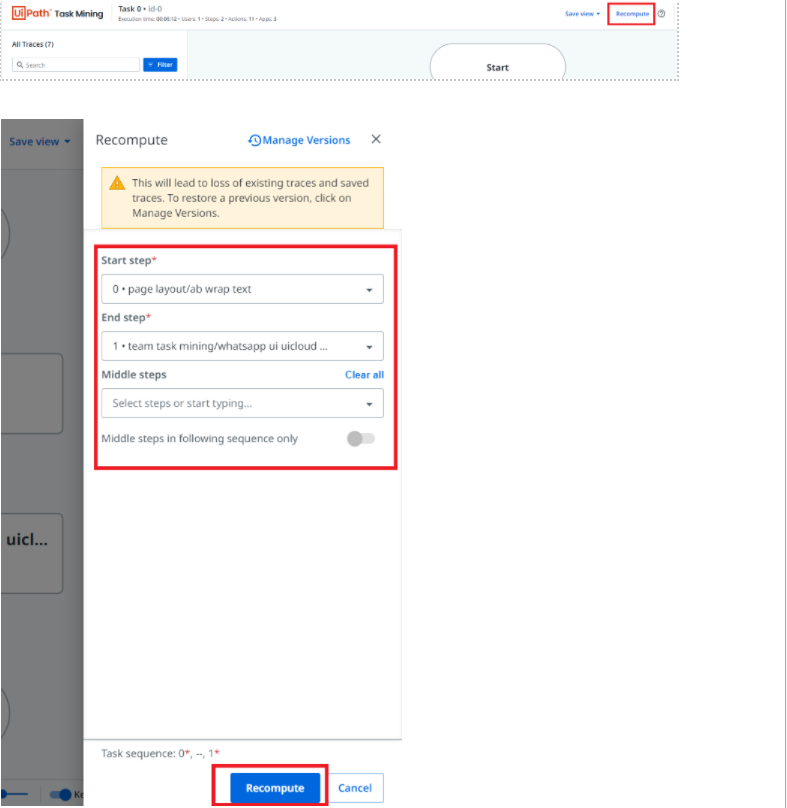
Click Recompute and if any steps in the flows seem to be incorrect, the user can always correct them by rearranging the Start/End steps as well as the in the middle steps.
The machine learning models will go back to the collected activity data and based on the user’s input, machine learning models find the exact match and re-generate the graphs and metrics.
To get a complete overview of the task performed by the user, click on Task Zero. Here we can see the screenshots captured of each step and the flow of the user. We can also download the report in three different ways:
1. Exporting as Task Capture
2. Exporting as Word (PDD)
3. Exporting as Studio (Workflow)

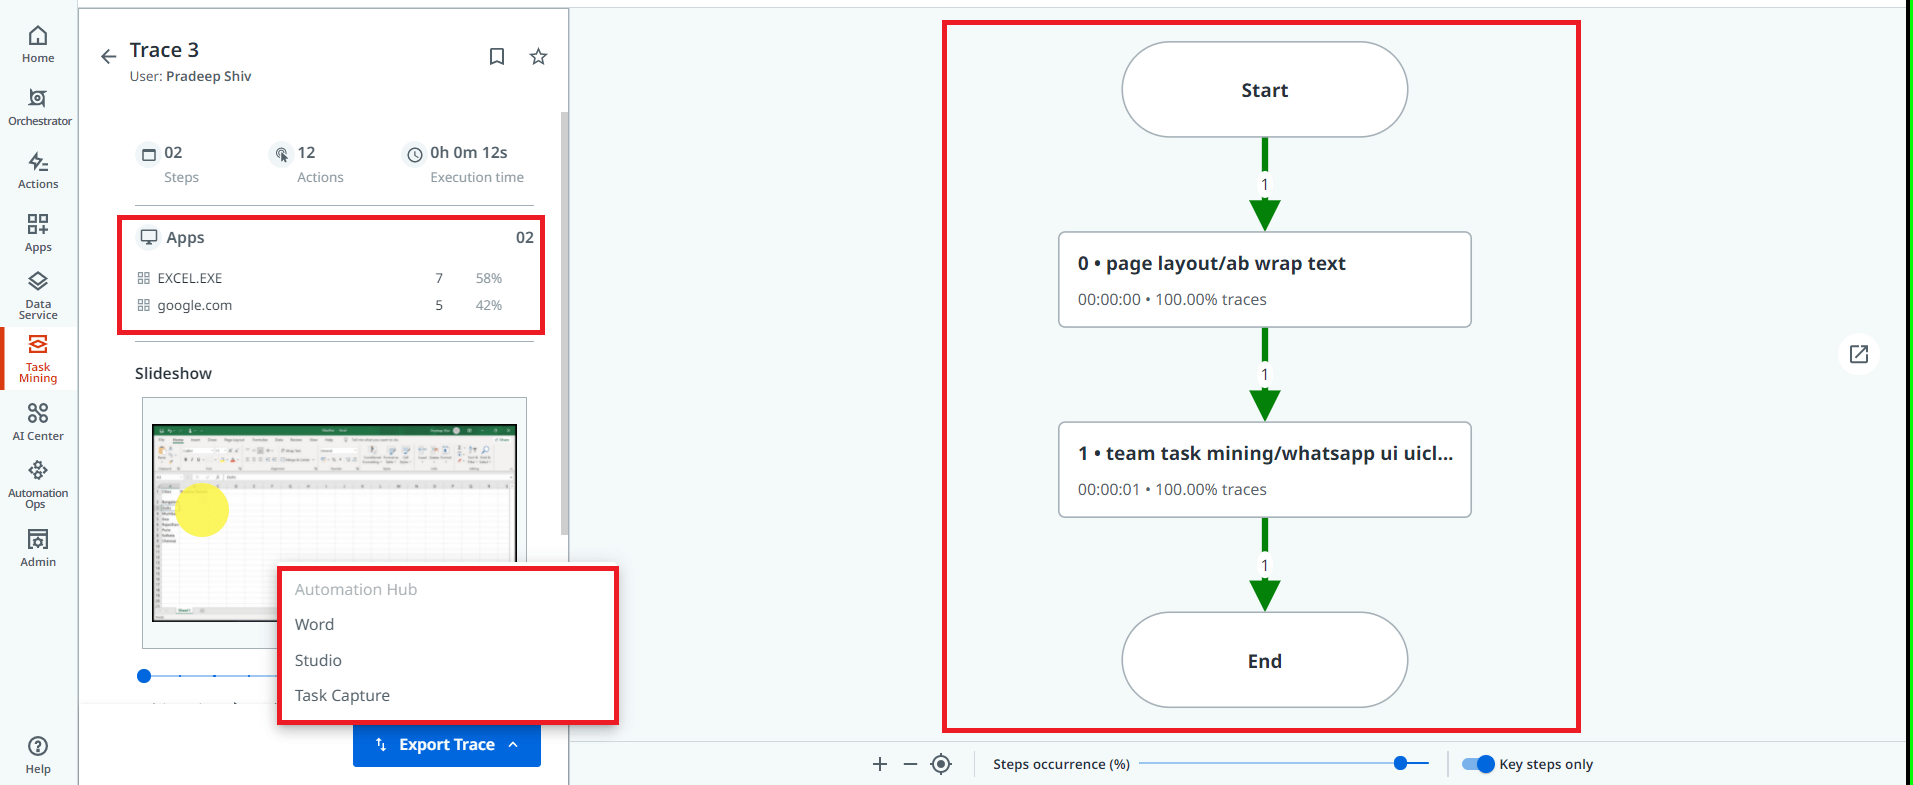
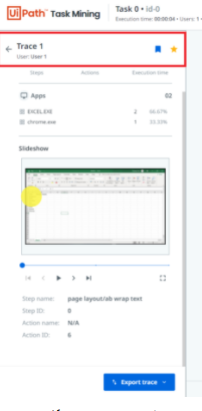
By going to All traces section, on a trace, click the right arrow on the left to view the trace details and the diagram is refreshed to only show the trace of the selected step.
Inside the Trace you can find metrics for:
1. Number of steps
2. Number of actions
3. Execution time
4. Applications used
5. Slideshow
6. Step name
7. Step ID
8. Action Name
9. Action ID

The slideshow provides a visual replay of this trace. If you select a slideshow, we can see the Step Name, Step ID, Action Name, Action ID and we can see how many actions and steps were performed by user in detail. If you consider the steps and the trace are not correct, recompute feature might be used.

Using the star icon on top of the trace panel lets you bookmark a trace so it can be found more easily when needed.
Selecting the chevron icon next to the bookmark option, will save this trace as the representative trace, and its detailed metrics are used in the Task tabular view.
To get back to All Traces, select the back arrow.
If you cannot see any screenshots in the Slideshow section, make sure to check the permissions assigned.
This can be verified as follows:
Select AI Center, on the left side menu from UiPath Automation Cloud platform.
Select the three-dotted menu, from the upper right side of the screen, near the tenant’s name.
Select View Profile from the menu.

In the Permissions tab, make sure the ML Packages rights are enabled for the current Account.

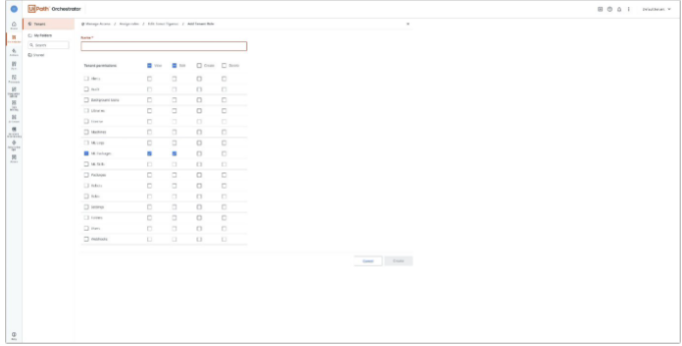
It's recommended for users to have Edit and View rights, if you don't have proper rights, please follow the below steps:
1. Select Orchestrator, on the left side menu from UiPath Automation Cloud platform.
2. Select Tenant, from the menu displayed.
3. Select Manage Access.
4. In the Assigned roles, search for your name.
5. Now that your account is displayed, select the three-dot menu and click on Edit.
Conclusion
UiPath Task Mining empowers AI to find the insights, helps you visualize how work gets done and quickly transforms automation into results.
Review UiPath and earn gift cards. Join us and help other professionals learn from your experience with UiPath. Your review can be anonymous.
Associate Consultant , KPMG India
Related articles


Get articles from automation experts in your inbox
SubscribeGet articles from automation experts in your inbox
Sign up today and we'll email you the newest articles every week.
Thank you for subscribing!
Thank you for subscribing! Each week, we'll send the best automation blog posts straight to your inbox.