How to Implement CICD Pipeline Using Azure DevOps Pipelines

Summarize:
Why do you need CICD pipelines for automation processes?
Continuous Integration (CI) and Continuous Delivery (CD) play a vital role in the cycle of software delivery processes. CI is the modern method employed by software developers to streamline code changes, which facilitates developers to work spontaneously and collaboratively in a more reliable way. Implementing CI helps uncover underlying issues early in the development cycle, which makes them less expensive to fix. Meanwhile, CD is an automatic process comprised of various technical stages, in which software is built, tested, and deployed to one or multiple test and production environments. Together, CICD advances software delivery in a more effective and expedient manner.
In the early stages of robotic process automation development, many companies opt not to implement a CICD pipeline. The lack of test features in RPA tools, coupled with the simplicity of most automation processes in the early days, allowed RPA developers to easily perform manual tests on the automation processes. However, the RPA suite has been expanded, now containing more sophisticated processes and innovative technologies. Hence, the need for fully and continuously tested automation processes is undeniable.
What is Azure Pipelines?
Azure Pipelines is part of the Azure DevOps tool suite developed by Microsoft to support the automation of software building and testing. Azure Pipelines comes with many advantages that help it stand out compared to other CICD tools on the market. For example, Azure Pipelines allows software developers to configure pipelines using YAML files, which is handy and easy to learn. Furthermore, Azure Pipelines works with most programming languages, so users can implement it with most applications on any platform like Windows, Linux, and macOS. In short, Azure Pipelines provides a simple, effective, and reliable way to automate software delivery.
Source: What is Azure Pipelines?
Let's talk about the foundational components that form an Azure pipeline. In Azure Pipelines, each pipeline consists of a series of stages, where each stage is a logical frontier in the pipeline and is used to disengage distinct concerns, such as building, testing, and deploying, etc. The components that make up a stage are jobs. Each job is a collection of one or many steps, and each step is responsible for executing a single action, like packing a project into a NuGet package, running a test, or building an artifact. A step can be a convenient pre-built script called a task. A task can be used to help developers quickly configure a step. Now that you know the basic architecture of an Azure pipeline, let’s move on to implementing building an actual working pipeline for your project.
Source: key concepts for new Azure Pipelines users.
How to implement a CICD pipeline using Azure DevOps Pipelines?
In this tutorial, I will illustrate a step-by-step working example of implementing a simple CICD pipeline for a UiPath project using Azure DevOps Pipelines.
Step 1: Set up an Azure DevOps organization
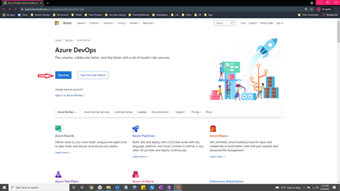
You can skip this step if you already have an Azure DevOps organization—make sure that you are the administrator of the Azure organization and the project that you want to use. If you do not have an Azure DevOps organization, go to Azure DevOps Home Page, click on Start Free, it will take you to the Sign In page.
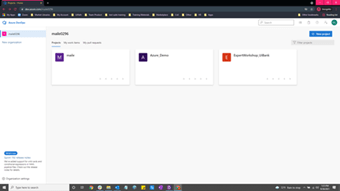
When you've successfully signed in, it will take you to your Azure organization's home page, where you can create new projects and change the organization's configurations.
Step 2: Integrate UiPath extension into your Azure DevOps organization
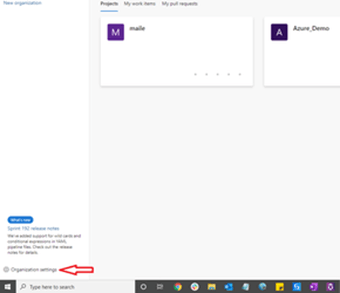
Next, we need to install the UiPath Integration extension to your Azure DevOps organization. The UiPath Integration for Azure DevOps comes with a pack of pre-created tasks that allow you to build and deploy UiPath automation processes. Note that you must be the administrator of the organization to complete this step. To do this, click on the Organization Settings link on the bottom left of the organization's home page.
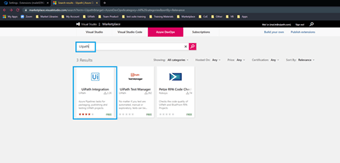
Go to the Extensions tab and check whether you have the UiPath Integration extension available. If it's available, go back to the Home screen and skip to the next step. If the extension is not available, click on Browse marketplace and search UiPath in the Visual Studio Marketplace, select UiPath Integration and click Get it Free. This will then be added to your extensions. When you finish, go back to the Home screen.
Step 3: Create a new project in Azure DevOps
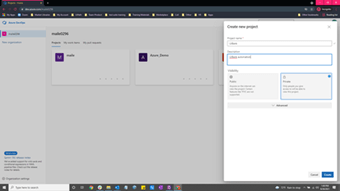
Now that we have the UiPath Integration, the next step is to create a new project in which you can build pipelines for your automation process. Click on the New project button in the top right corner of the home page.
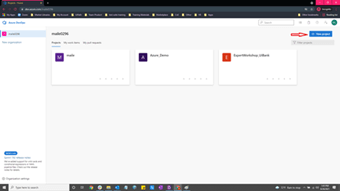
Provide the project name, description, then click on Create. In this example, I named my project "UiBank".
Step 4: Connect UiPath Orchestrator to Azure project
Once the Azure project is created, we need to connect it to UiPath Orchestrator so that the pipelines in the Azure project can trigger tasks in UiPath Orchestrator, such as executing jobs and running test cases. To achieve this, we will create a Service Connection in Azure DevOps and give the Service Connection authentication to Orchestrator.
We will use the External Application authentication method because it is the recommended authentication method in UiPath. Note that token-based authentication methods will be depreciated in the future.
If you do not have an External Application authentication for Azure DevOps in your UiPath account, you will need to create one. You must be the administrator of the UiPath account to complete this step.
Create an External Application to authenticate Orchestrator connection in Azure DevOps.
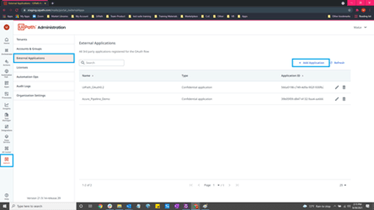
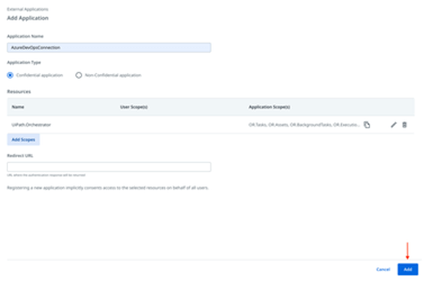
Open your UiPath staging/cloud account. Go to Admin → External Applications. Click on Add Application.
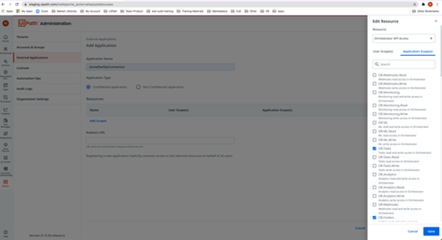
Next, provide the application name, select Confidential Application for Application Type, then click on Add Scopes, a window will show up that allows you to configure the scopes for the application. On the Edit Resource modal, expand the Resource drop-down and select Orchestrator API Access, click on the Application Scope(s) tab, and select the following scopes: OR.Assets, OR.BackgroundTasks, OR.Execution, OR.Folders, OR.Jobs, OR.Machines.Read, OR.Robots.Read, OR.Settings.Read, OR.TestSetExecutions, OR.TestSets, OR.TestSetSchedules, OR.Users.Read.
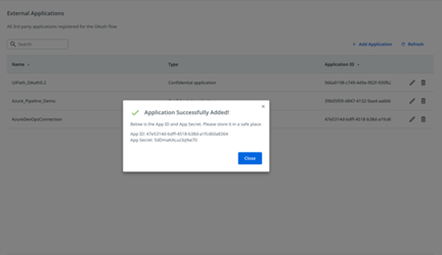
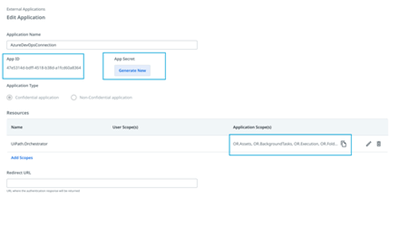
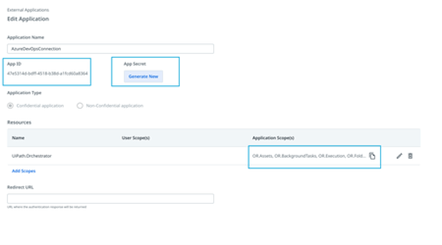
When the application is created successfully, you will see a pop-up showing up with the App ID and App Secret. You can also find the App ID and App Secret by clicking on the pencil icon next to the application name. Copy the App ID and App Secret to the clipboard. They are needed to configure the service connection for Azure Pipelines.
Create a UiPath Service Connection in Azure Pipelines
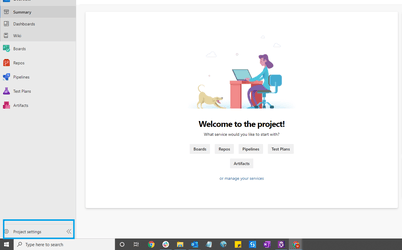
Once you have an External Application created in your UiPath account, go back to the Azure project and open up the Project Settings, which is located on the bottom left corner of the Project page.
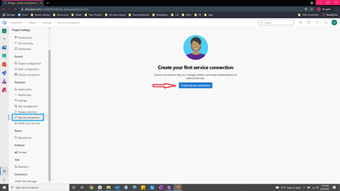
On the Project Settings page, go to Service Connections and click on Create service connection.
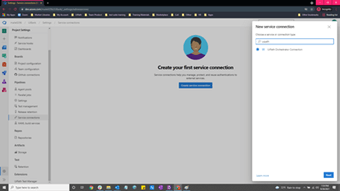
A pop-over will show up on the right, allowing you to search for a service connection type. Type "UiPath" into the search bar, you will see an option for UiPath Orchestrator, click on Next.
Under Authentication Method → select External Application → fill the authentication details in and provide the Service Connection Name.
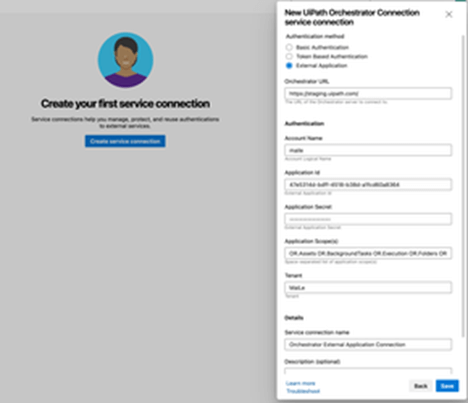
The Orchestrator URL, Account Name, and Tenant fields can be extracted from your Orchestrator URL.
The Application ID, Application Secret, and Application Scopes can be found in the external application edit window.
Step 5: Set up a Git repository in Azure DevOps
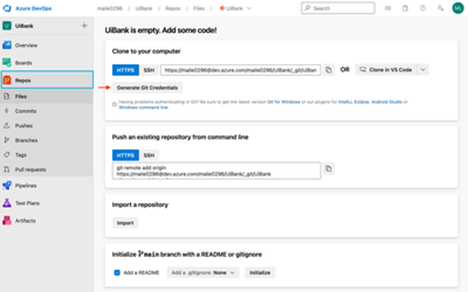
First, on the Azure project page, go to Repos and click on Generate Git Credentials. You will be prompted with a username and a password.
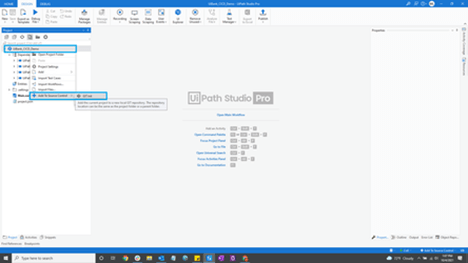
Next, in UiPath Studio, navigate to the automation project for which you want to create a pipeline, or create a new project from Studio if you have not created a project. Then, right-click on the project title, select Add to Source Control → Git Init → select the folder in which the project is store.
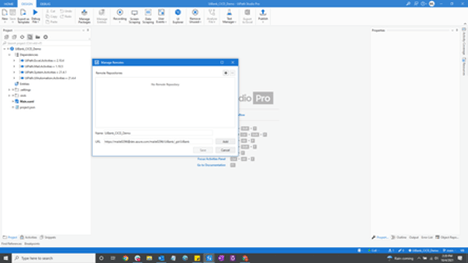
When a pop-up window appears, you can Enter a commit message and click Commit and Push. Then, you will be prompted with an option to Enter the repository URL, which can be found on Azure DevOps Repos page → provide a name for the repository→ Click Add → Click Save.
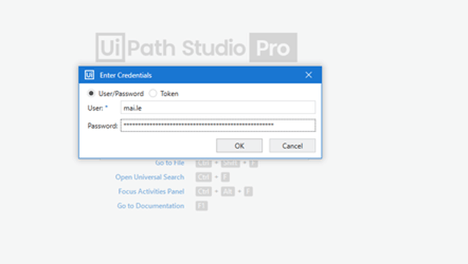
After that, another pop-up window will appear, which allows you to Enter the credentials for the repository. Enter the credentials generated in the previous step here.
Once complete, your project should be committed to the Azure DevOps repository. Make sure to double-check if it has been successfully committed.
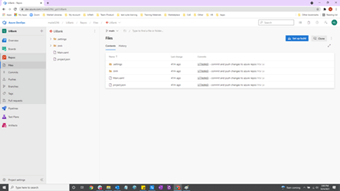
Finally, add a new test case to your RPA project in Studio, commit and push, then go back to Azure Repos to verify that the new commit is updated. If you can see the newly added test case in Azure Repo, you are ready to move on to the next step.
Step 6: Create a Build pipeline
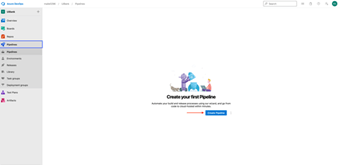
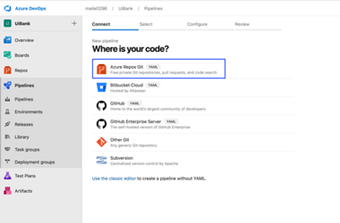
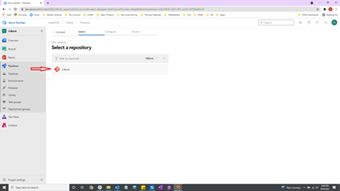
In this step, you will learn how to create a simple pipeline to execute test cases and create an artifact to feed to a release pipeline. First, go to the Pipelines section, click on Create Pipeline. In the Connect tab, select Azure Repos Git, then select the repository connected from the previous steps.
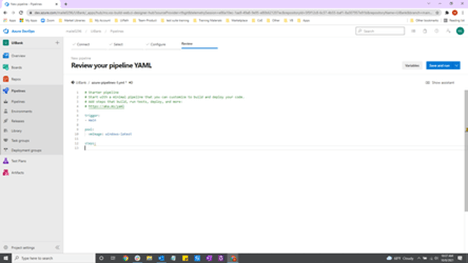
Then, choose the Starter Pipeline under Configure tab. This will automatically generate a starter YAML file where you can configure a new pipeline.

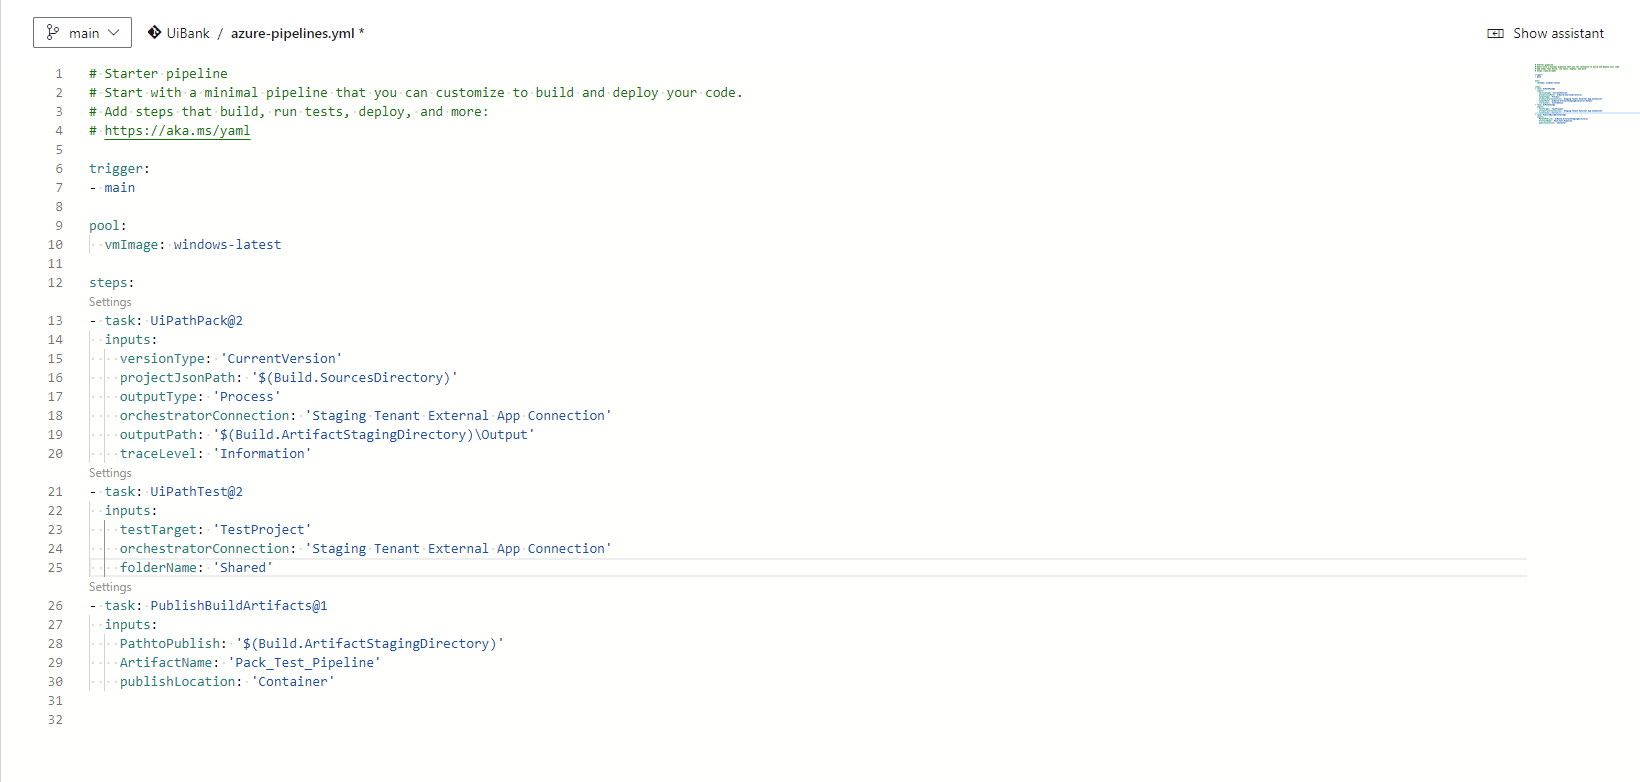
Next, you need to add three tasks to the YAML file. The first task packs the process from the repository into a NuGet package. The second task triggers test execution in Orchestrator to verify that the code has no issues, and the last task creates an artifact that will be used as the source in a release pipeline.
For your convenience, the UiPath integration extension comes with a bundle of pre-built tasks that allow you to easily build and deploy automation processes, as well as execute test cases. To find the pre-built tasks, click on the Show assistant link on the right of the YAML file, below the Save and Run button. Then, type UiPath into the search bar.
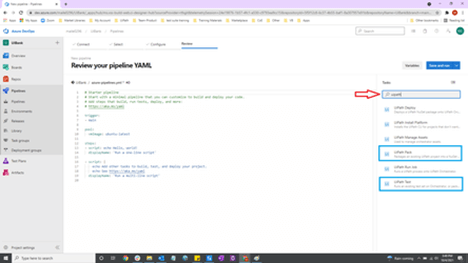
Before you add the tasks, in the YALM file, change vm image: ubuntu-latest to vm image: windows-latest Remove all scripts below steps and place the mouse in a new line.
Next, let's add the UiPath Pack task to the YAML file. To do that, click on Show assistant and search for UiPath Pack.
Choose your personal preference for the Versioning Method and Trace Level. Then, select the Service Connection in the Orchestrator Connection dropdown. Under Project(s) Path, type $(Build.SourcesDirectory). Finally, under Output Path, type $(Build.ArtifactStagingDirectory)\Output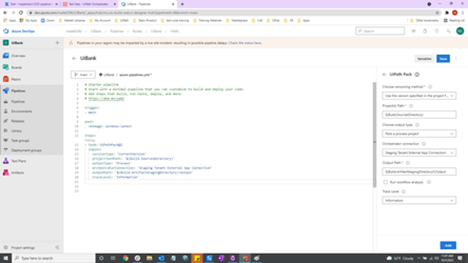
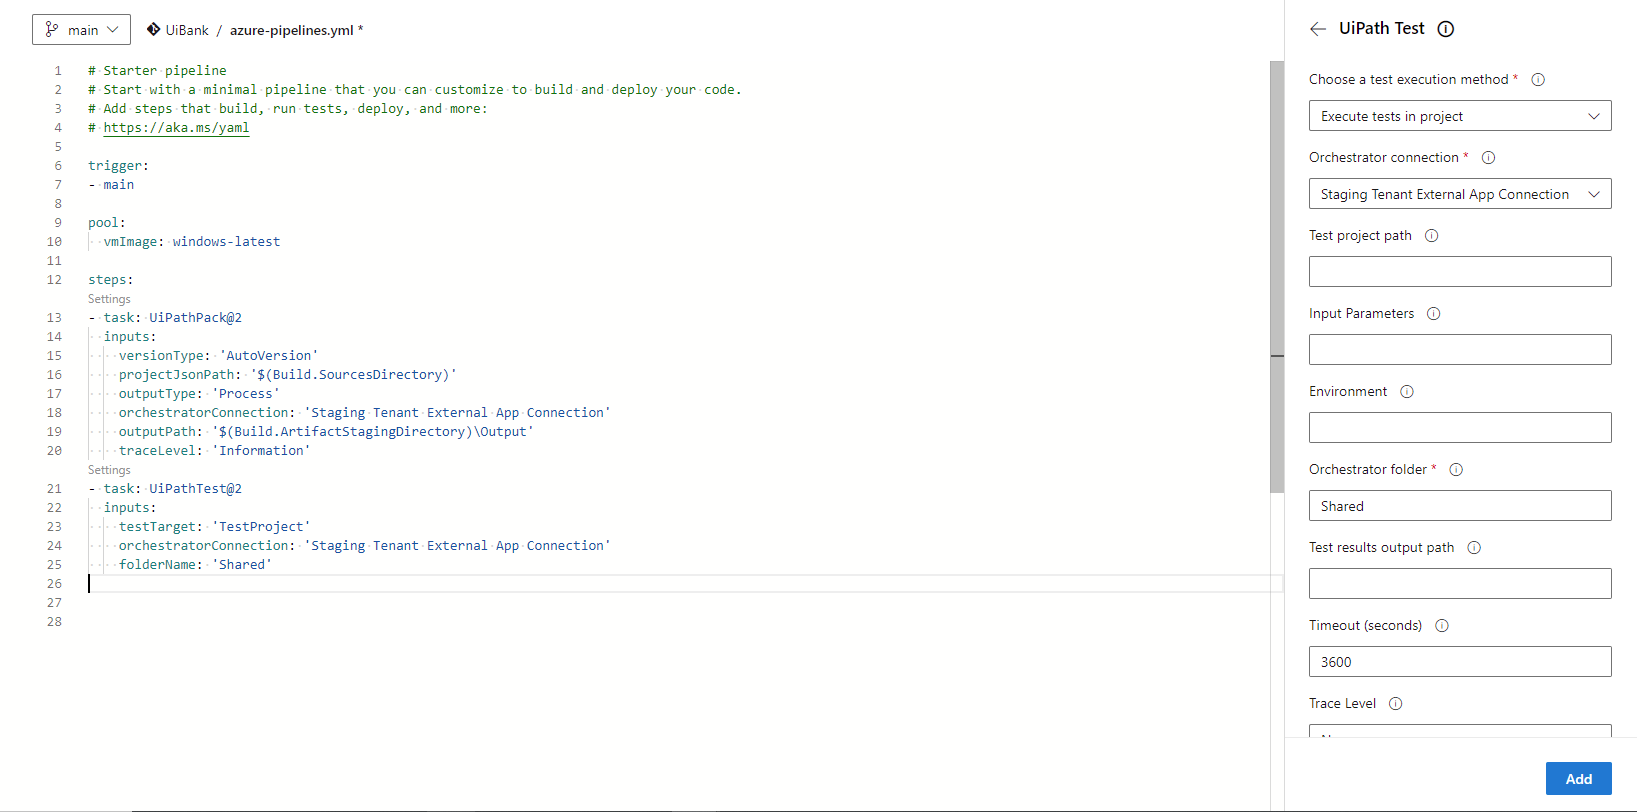
Next, let's add the UiPath. Test task to execute an existing test set in Orchestrator. Similar to adding UiPath Pack task, you can search for the UiPath Test task in Show Assistant. There are two test execution methods. The Execute test set method will run a preexisting test set in Orchestrator, while the Execute tests in project method will run tests in the transient project. If you select the Execute test set method, you need to create a test set in Orchestrator first, then provide the test set name in the Test set field.
In this tutorial, we will choose the Execute tests in project method. Specify your service connection and Orchestrator folder, then click on Add.
Finally, search for Publish Build Artifact task in Show Assistant, give the Artifact a name, then click on Add. Congrats, you completed the build pipeline for your automation project. Proceed with saving the YAML file. You can run the pipeline to verify the result.
Step 7: Create a Release pipeline
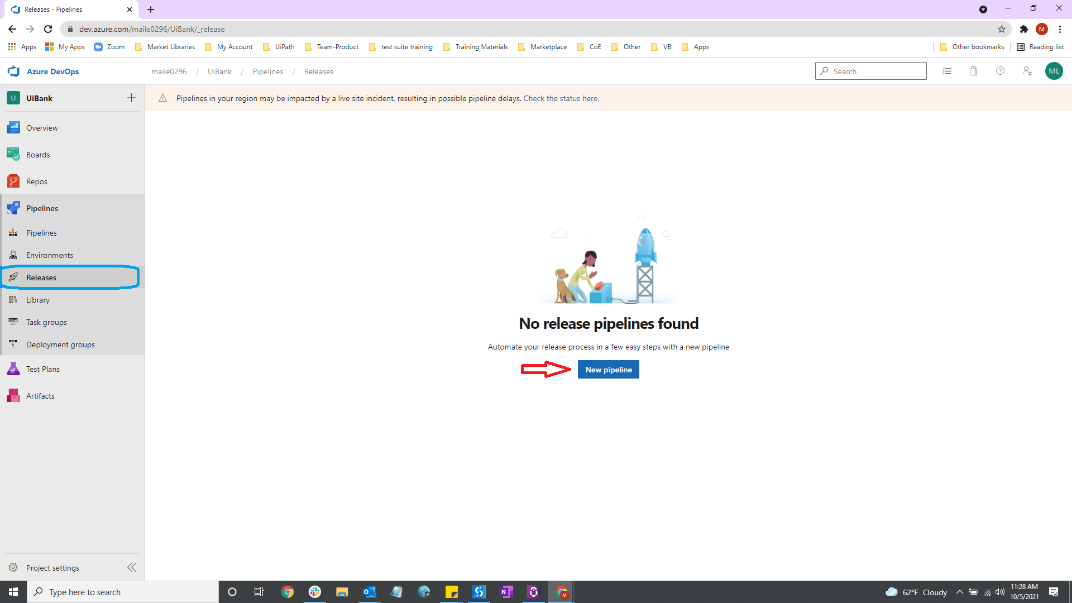
Finally, you will learn how to create a release pipeline for your automation process. At this stage, your automation process will be deployed to a production environment. First, go to the Releases tab under the Pipeline section and select New pipeline. It will ask you to select a template. You can close it for now.
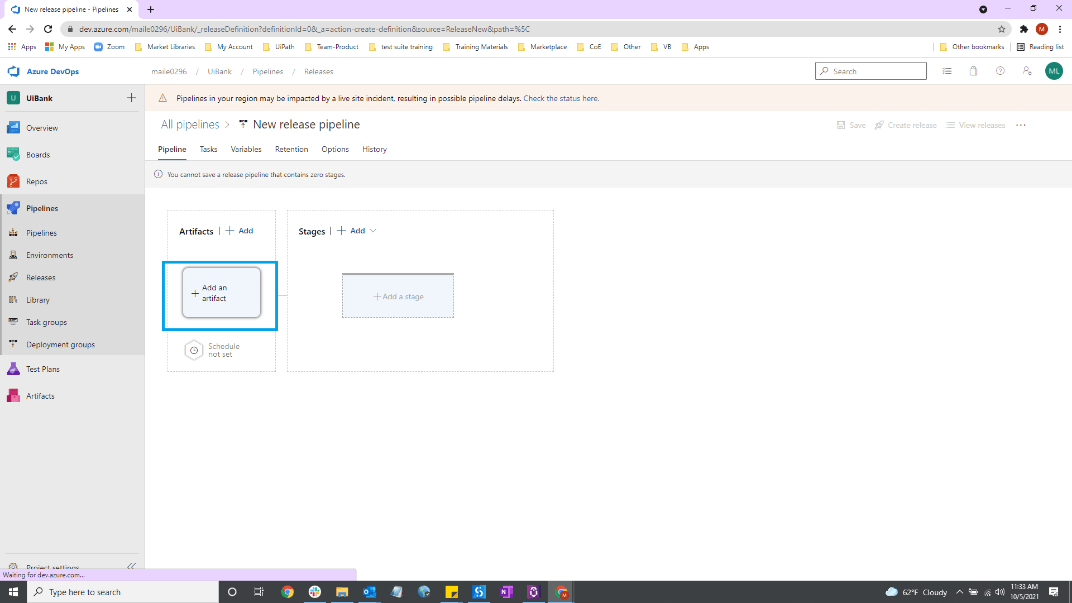
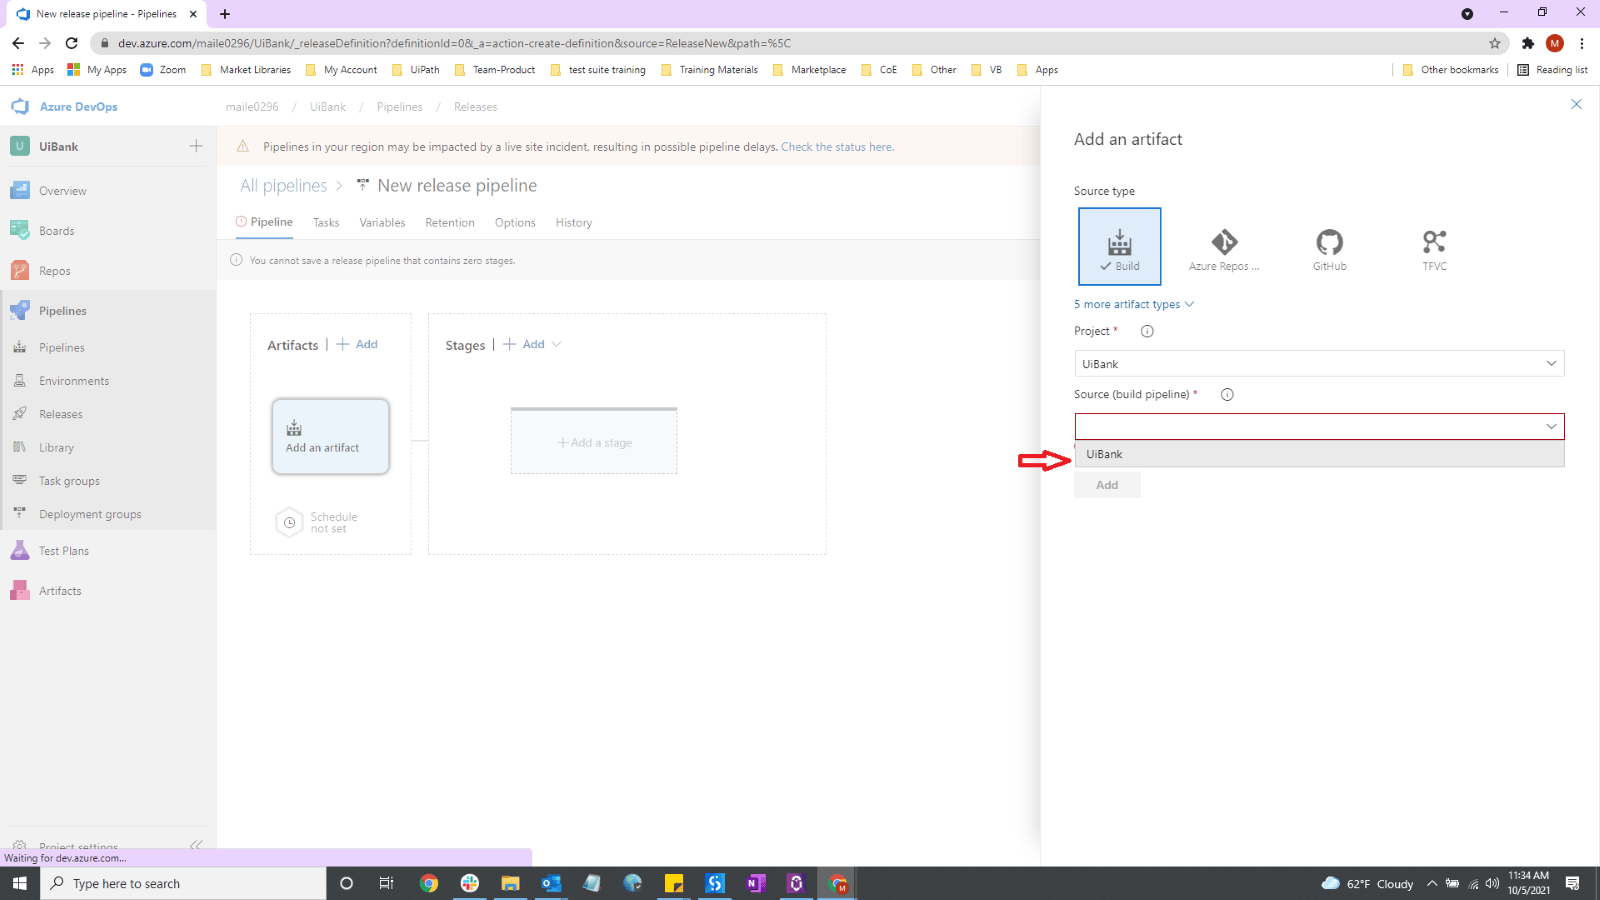
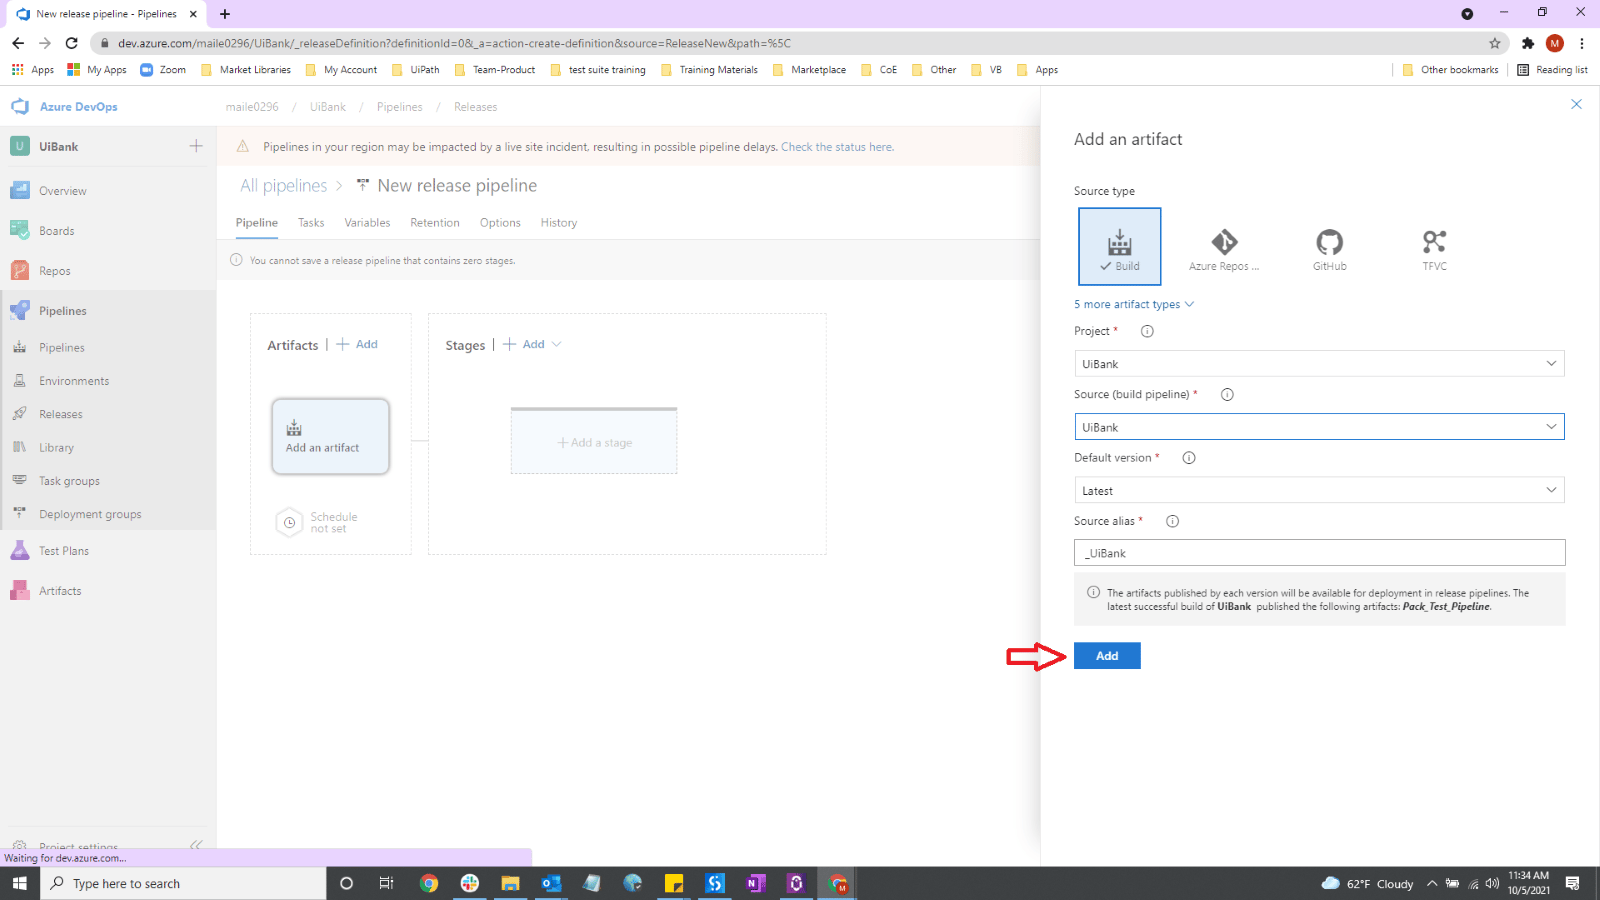
Click on the Add an artifact block, select the Source Type as Build, choose the project and the build pipeline that we configured in the previous step, and click Add.
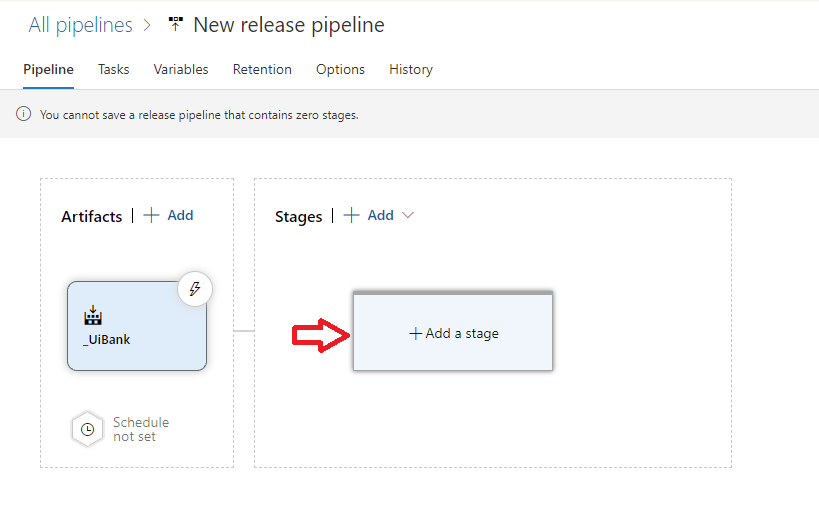
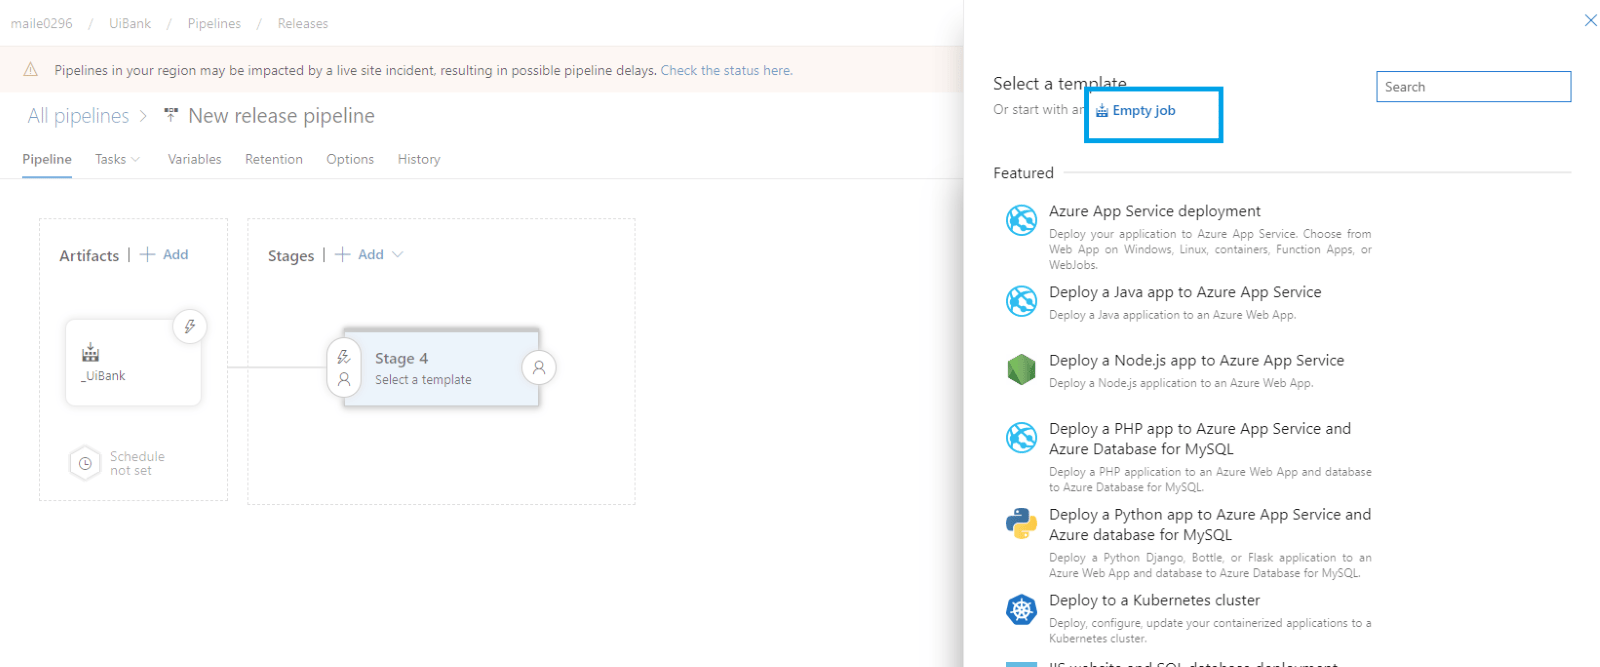
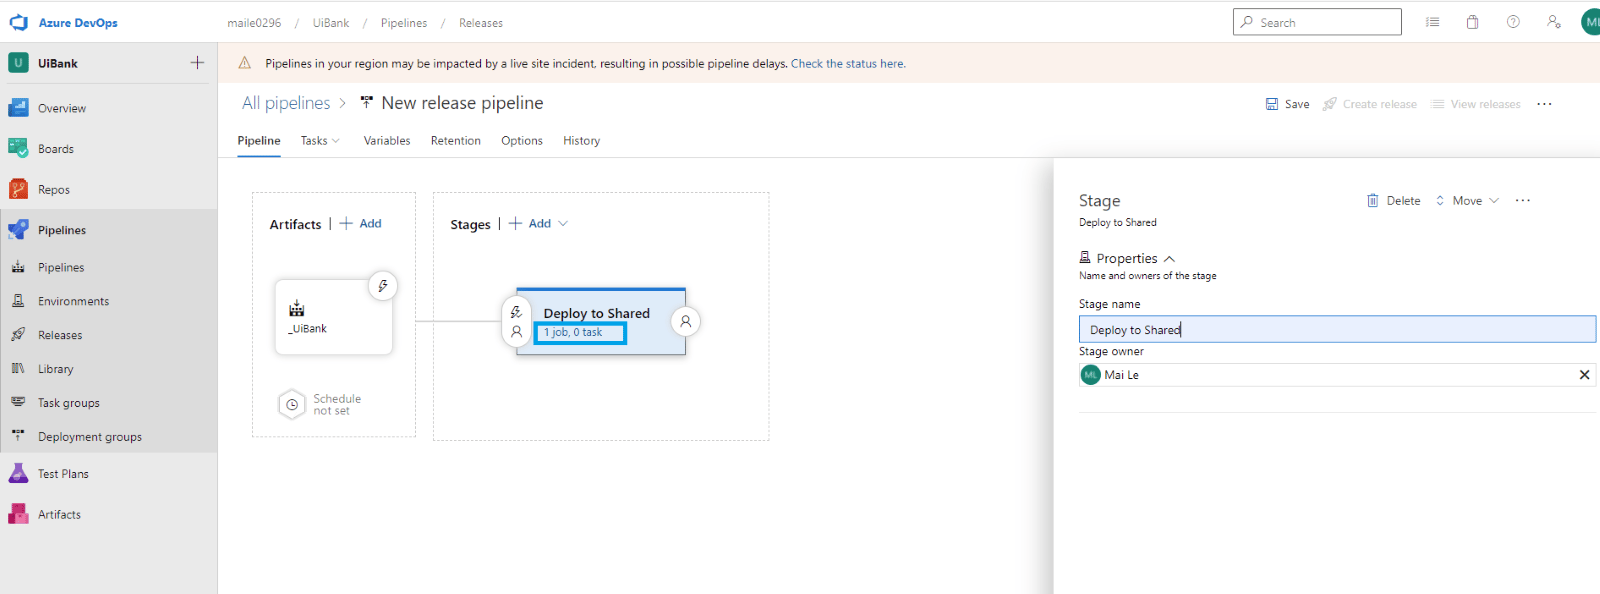
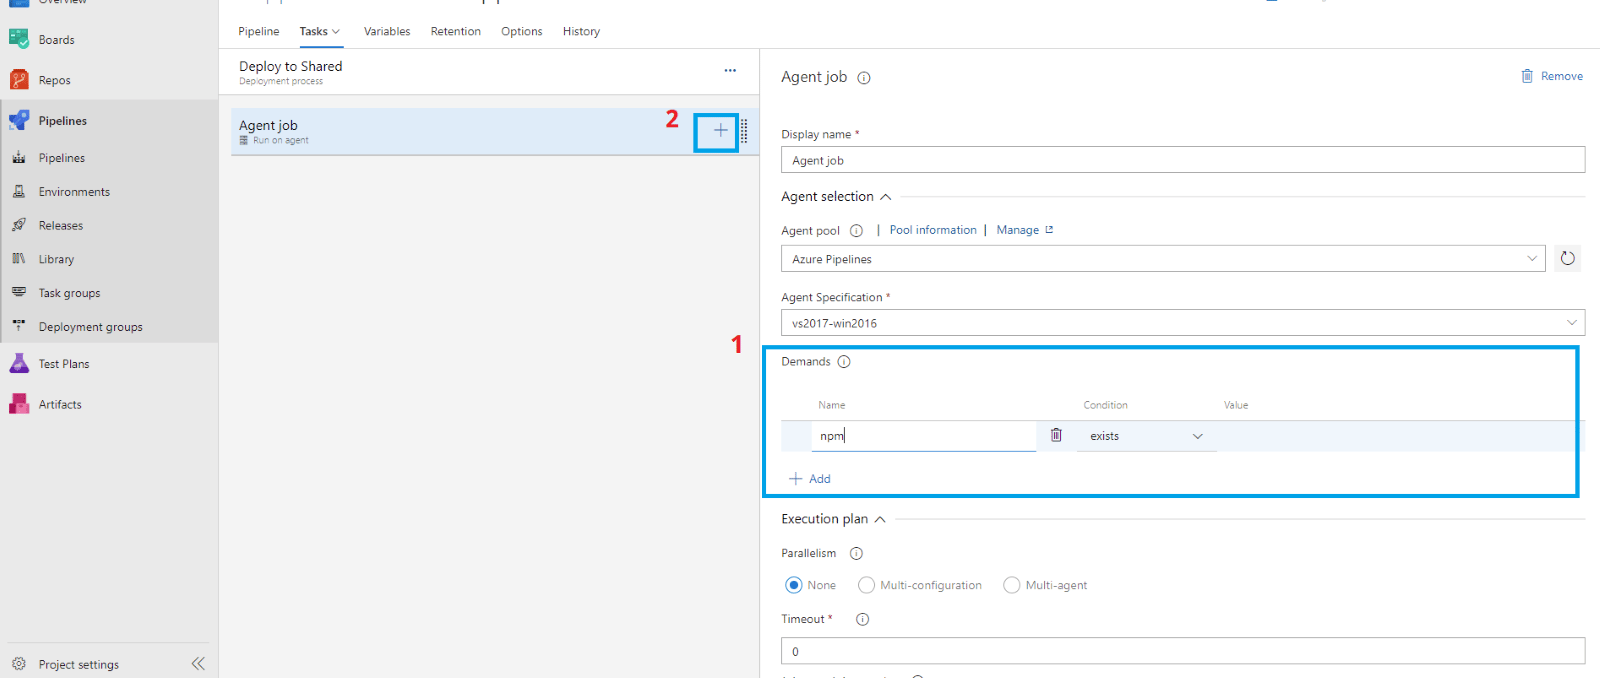
Then, move on to the Stages block and click on Add a Stage → select Empty job → click on 1 job, 0 task link.
You will see Agent job under the Tasks tab. Click on it to open the Agent job page. On the Agent job page, under the Demands section, add "npm". Next, click on the "+" icon next to Agent job to add a new task to the agent job.
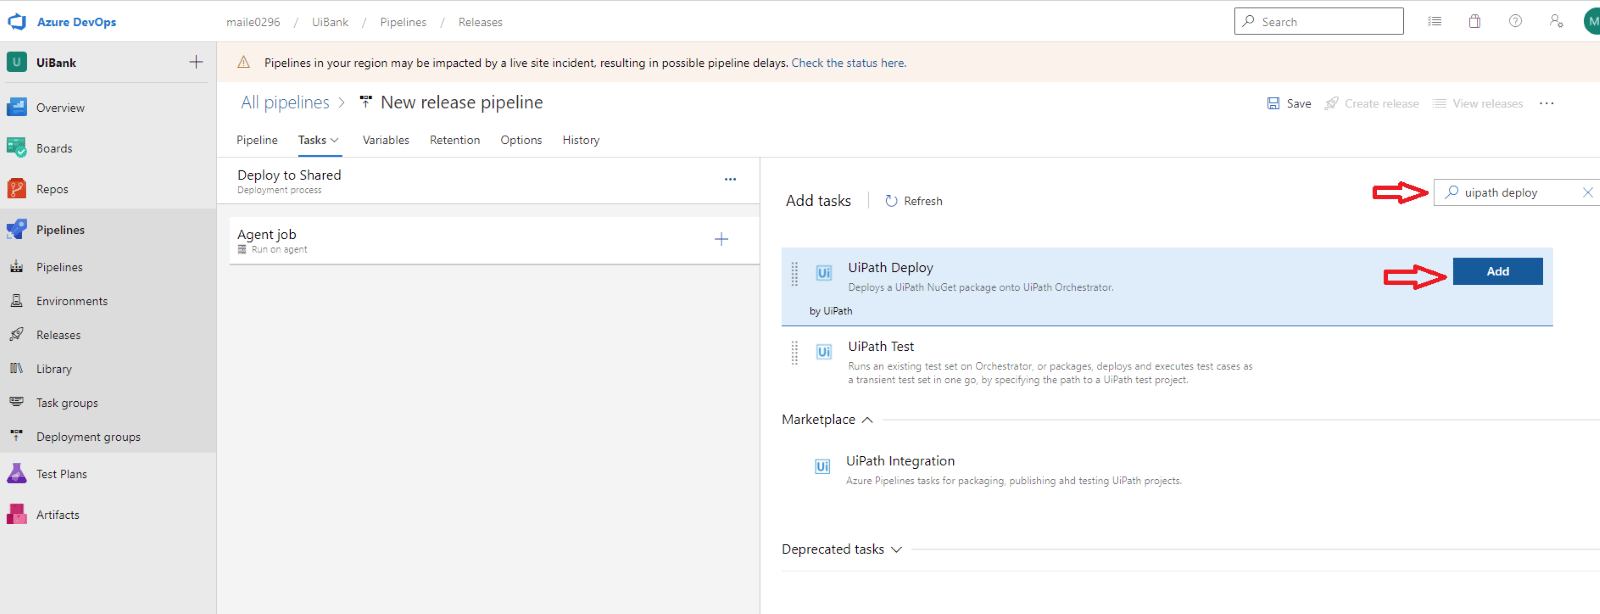
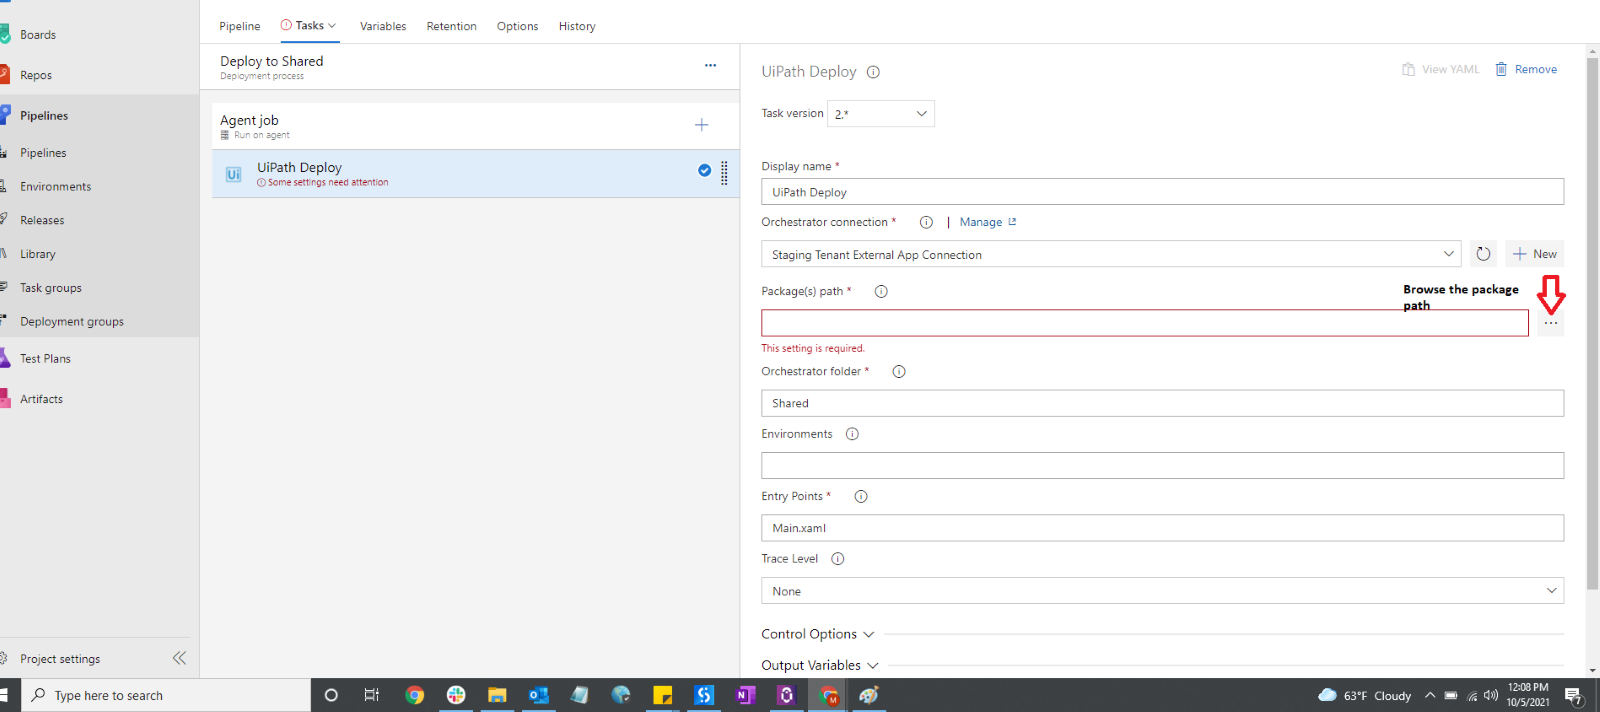
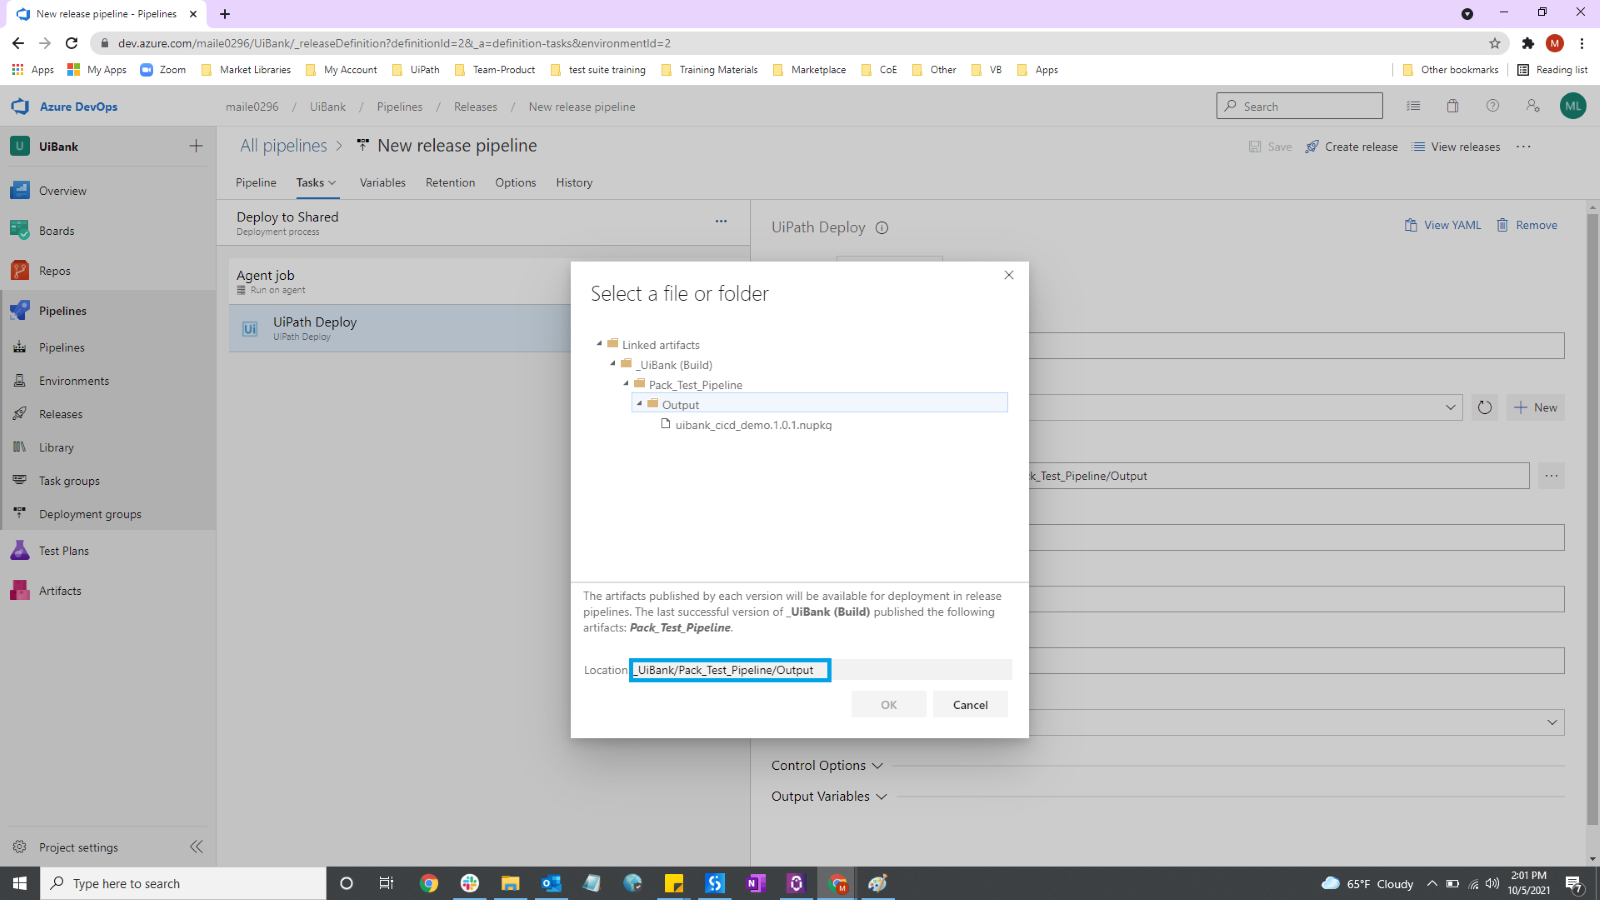
Search for "UiPath Deploy" here, add it, and configure the Orchestrator connection, Orchestrator folder. Click on "…" to browse the package path and point it to the Output directory of your folder. Click on Save.
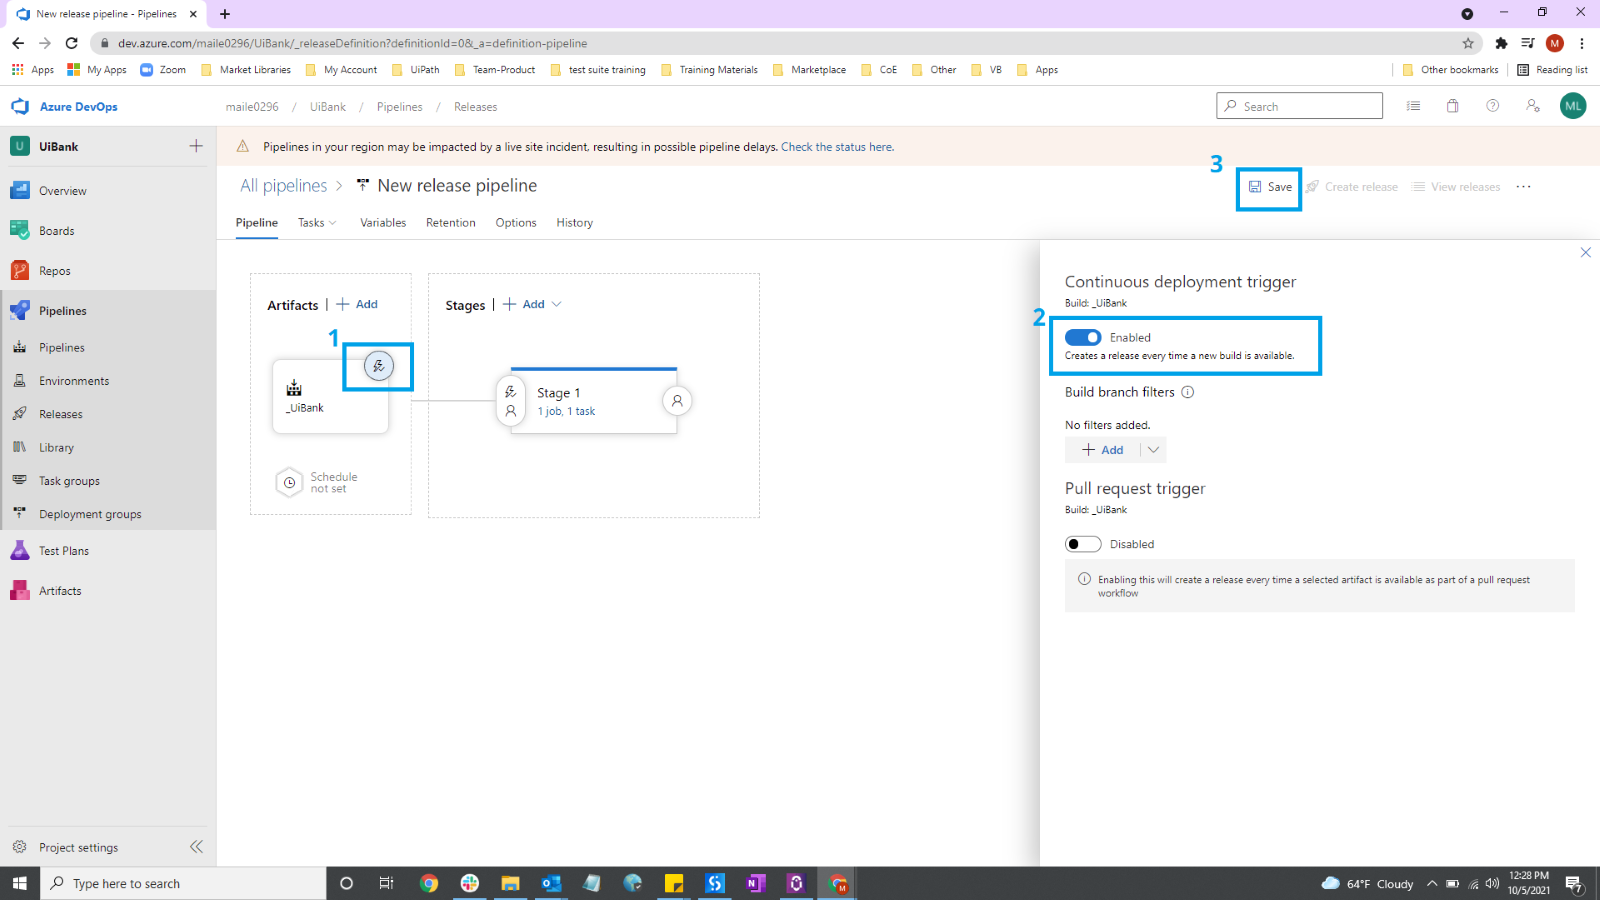
Then, go to the Pipeline tab, click on the lightning icon under Artifacts, and enable the Continuous Deployment trigger and save it again. This meant that whenever a build was created a release pipeline would be triggered. After that, click on Save to save all changes.
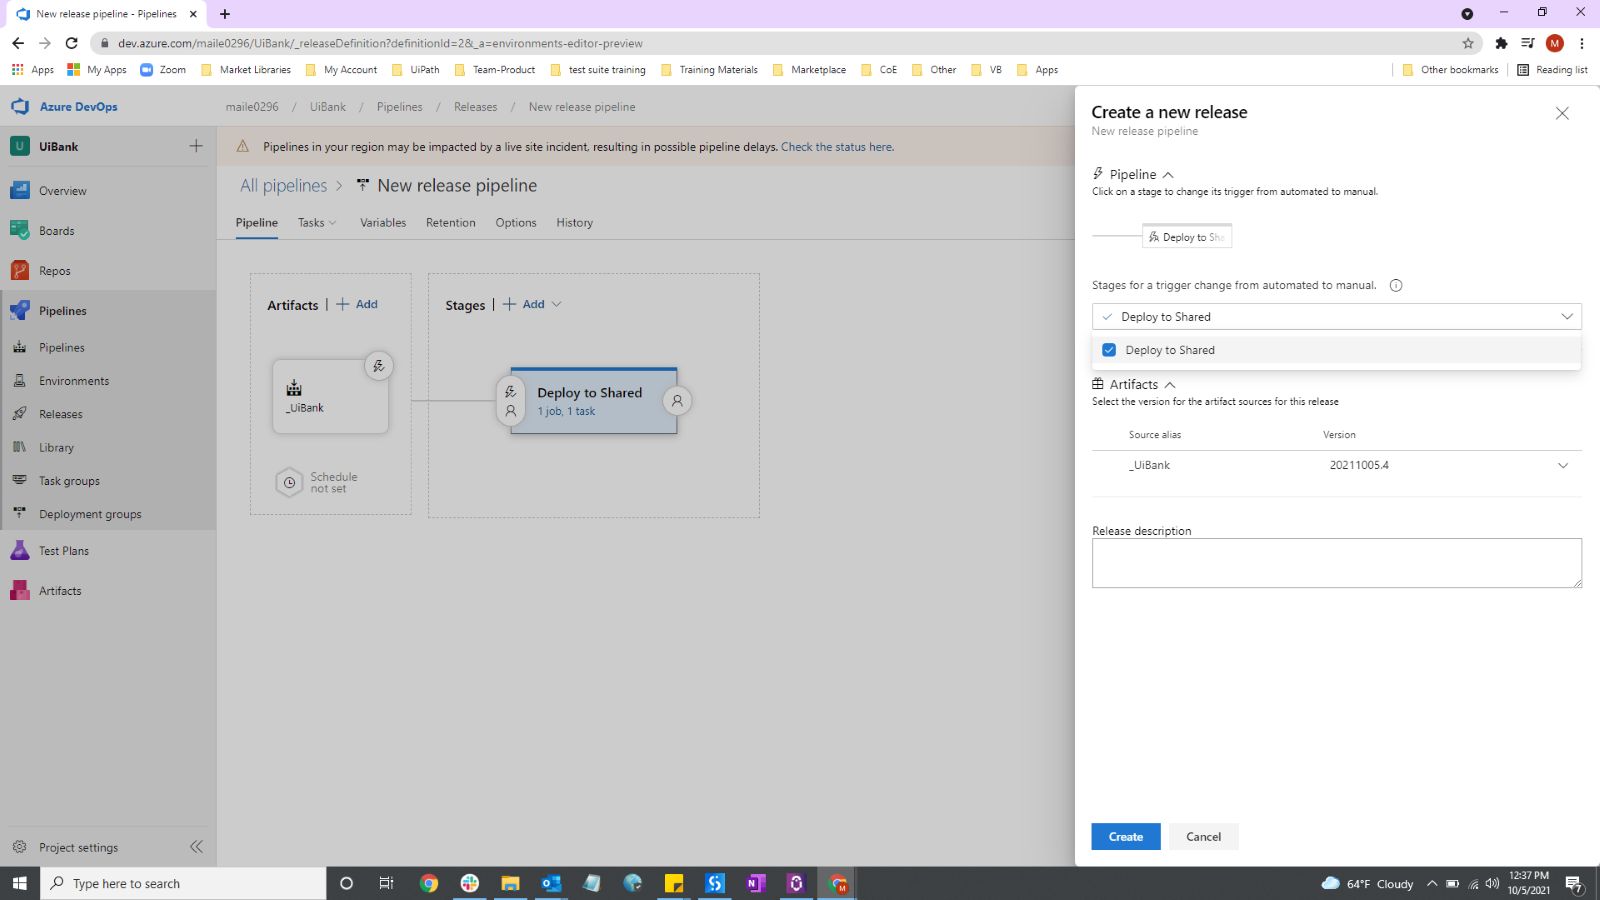
Finally, click on the Create Release button right next to the Save button. Select the stage you just created in the previous steps, and click Create.
Congratulations! You have both the build pipeline and release pipeline built now. To test whether the pipeline works, you can commit a code change in your automation process.
Then, you should be able to see the build pipeline is triggered, which will pack the automation process into a NuGet package and execute the test cases in Orchestrator. After the build pipeline runs successfully, the release pipeline will be triggered spontaneously to deploy the automation process to the destined folder in Orchestrator.
Topics:
OrchestratorAssociate RPA Developer, UiPath
Related articles


Get articles from automation experts in your inbox
Sign up today and we'll email you the newest articles every week.
Thank you for subscribing!
Thank you for subscribing! Each week, we'll send the best automation blog posts straight to your inbox.
Get articles from automation experts in your inbox
Sign up today and we'll email you the newest articles every week.
Thank you for subscribing!
Thank you for subscribing! Each week, we'll send the best automation blog posts straight to your inbox.