UiPath Apps new custom HTML control

Summarize:
Introduction
Custom HTML control for UiPath Apps was just recently released as generally available. It's a game-changer for customizing the user experience and extending functionality within Apps! Whether you're a coding pro or just starting out, this guide will help you learn the fundamentals of this new control.
With some simple examples, you’ll be wielding HTML, CSS, and JavaScript with confidence in UiPath Apps. Let’s roll up our sleeves and dive in! In this tutorial, we’ll build a simple counter with the HTML control. We’ll then synchronize the counter value to an Apps variable, showing the integration between custom HTML and Apps controls.
Prerequisites
To follow along with this tutorial, you will need: Access to UiPath Apps in Automation Cloud. Explore more details here.
Build a simple counter
Navigate to UiPath Apps and create a new app:

Give the App a name, such as “HTML Counter”.
Select “Blank Page” to get started since we’ll be building this example from scratch.
Add the HTML component
Click “+ Add Control” and drag the “Custom HTML” component from the Input menu on to the canvas.
We’ll add a couple style modifications:
Click on the HTML component in the canvas.
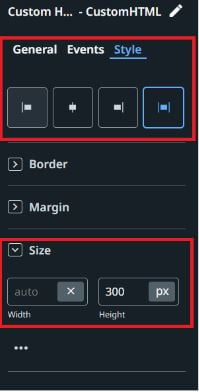
Go to the style tab on the right menu for the HTML component
Select the “Stretch” option for the alignment so the control spans the width of the page
Set the height to 300 px
The style menu should now look like this:
Next, we’ll start editing the code in the custom HTML component!
Insert HTML code for the counter display
Go to the “General” tab in the right menu for the HTML control
Click “Open code editor”
Add the following code inside the existing div container, the HTML section of the code editor:
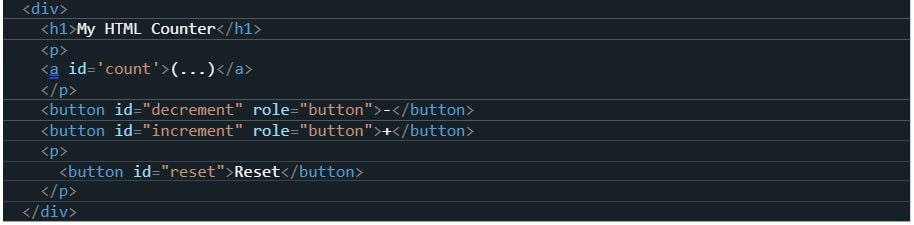
Great! We have a header for the title, an ‘a’ tag to display the counter value, and three buttons to add, subtract, and reset the counter. The HTML section should look like this now:

You can save and close the editor to see a preview of what the counter display will look like:
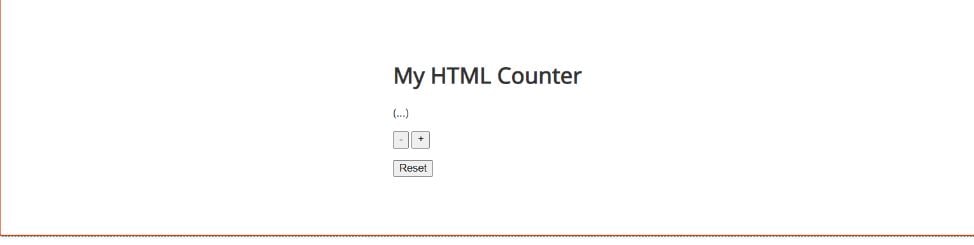
Note – we’re not worrying about CSS or any styling in this exercise!
Add JavaScript code for the counter
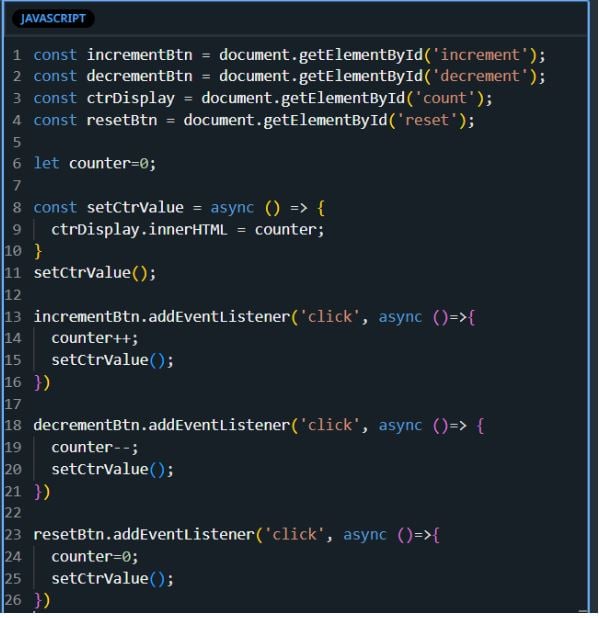
Our goal is to respond to click events for each button to increment, decrement, or reset the counter. Add the code to control these buttons:
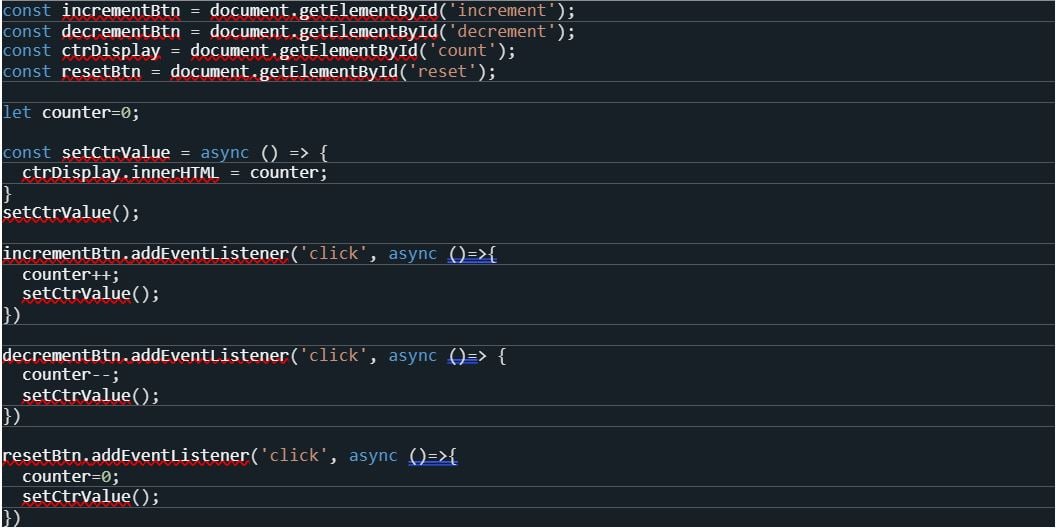
Note the functions have been set up as async functions — we’ll see why this was done in the next section! The JavaScript code editor should now look like this:
Congratulations! Now we can click save and preview the App. Clicking the increment, decrement, and reset buttons will control the counter display value.
Integrate the JavaScript code with Apps variables
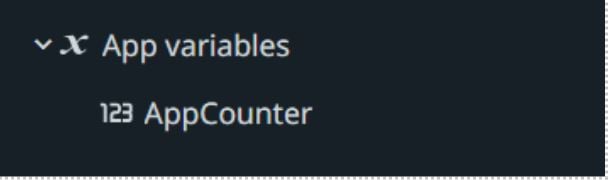
Writing custom HTML and JavaScript inside an App is great, but it becomes more powerful when we can establish communication between the HTML component and other controls. The HTML control provides functions to create this integration to Apps Variables – you can read more about these functions here. First, we need to set up a variable that will be synchronized with the counter that resides in the HTML control. We’ll create controls to display the App variable, and control the increment and decrement. Lastly, we’ll use JavaScript functions to connect the App variable value to the HTML counter value. Create an App Variable called “App Counter” of type “Int64”
Add a label control and two buttons below the HTML control. Don’t worry about the layout for now, but feel free to use containers and modify the style as you wish.
Add the following expression for the label text:

Add “+” as the label text for one of the buttons and “-“ for the other.
Add increment and decrement rules to each button:
For the decrement button, click Events and then Create rule.
Add a Set Value to decrement the AppCounter variable, like below:
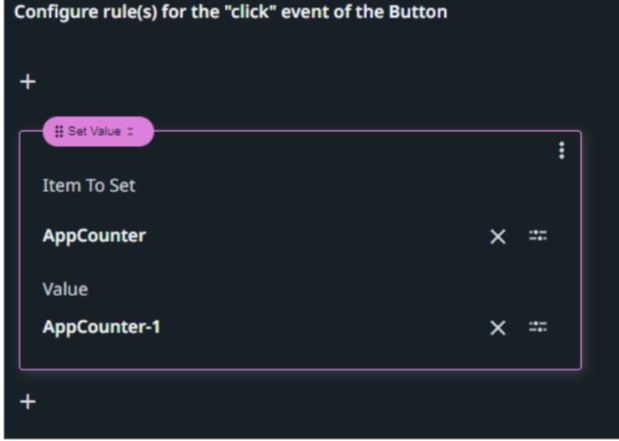
Add the analogous rule to the increment button, this time setting the value to “AppCounter + 1” to increment the value.
Great! Now we have a similar counter display, and this time it was created with standard App controls and rules. All that is left to do is connect the AppCounter variable to the HTML control counter variable.
Open the code editor for the HTML control.
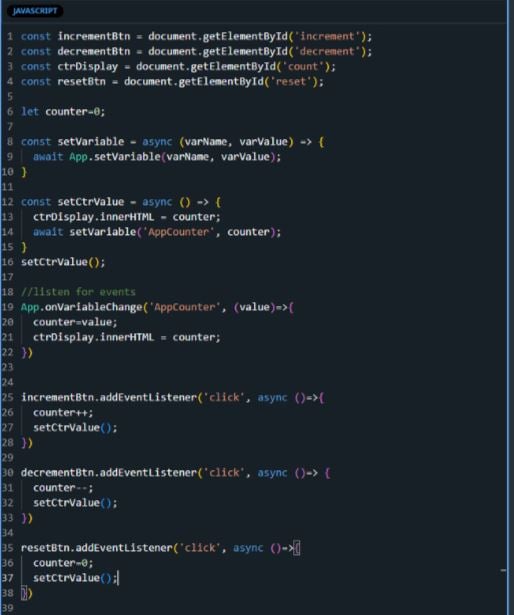
We’ll start by adding a function that we can re-use across the JavaScript editor anytime we want to set the value of an App variable:

3. To synchronize the value of the HTML “counter” variable to the AppCounter variable, we can call this helper function inside setCtrValue():

The above works well for setting the value of AppCounter when the value of the HTML counter changes, but what if we want the reverse to also work (i.e. change the HTML counter if we modify the AppCounter value)? Fortunately, we can include code to have our HTML control listen for events that occur on App variables. This means anytime the value of an external variable changes, some code will execute to perform an action inside the HTML control. Add this function to the JavaScript editor:

This code listens for any changes to AppCounter, updates the value of the “counter” variable, and updates the display. The final JavaScript editor should now look like below:
Click to preview your App and test changing the counter from within the HTML control as well as through the App control buttons. You should see the two counter values staying completely synchronized.
Why is this important?
This is a powerful capability, as we can now design rich user experiences that leverage custom code inside a low-code environment. Moreover, the get, set and event-based functions let us design simple connections between the custom code and the drag-and-drop controls native to UiPath Apps. Want an App button that updates the filter of a custom chart? Or how about a custom progress bar that is driven by the execution of an attended process? All this is possible by connecting JavaScript variables to App variables.
Conclusion
With the UiPath Apps Custom HTML Control, the possibilities are as vast as your imagination. By exploring these examples, you've gained a solid understanding of how to leverage the HTML control within UiPath Apps, and also unlocked a whole new realm of creativity and functionality for your projects. Keep experimenting, keep innovating, and keep pushing the boundaries of what's possible with UiPath Apps!
Topics:
Apps
Senior Sales Engineer, UiPath
Related articles


Get articles from automation experts in your inbox
Sign up today and we'll email you the newest articles every week.
Thank you for subscribing!
Thank you for subscribing! Each week, we'll send the best automation blog posts straight to your inbox.
Get articles from automation experts in your inbox
Sign up today and we'll email you the newest articles every week.
Thank you for subscribing!
Thank you for subscribing! Each week, we'll send the best automation blog posts straight to your inbox.