
Files and Folders Automation Scenarios in UiPath StudioX
Share at:

Introduction
UiPath StudioX allows you to easily automate file and folder tasks such as creating, copying, moving, renaming, and deleting. You can also use StudioX to automate advanced business logics such as finding number of files in a folder, checking if a folder is empty, etc. In this article, we'll look at the most typical scenarios we encounter when working with files, and folders, and how to automate them with StudioX.
Pre-requisites:
UiPath StudioX Community version 2021.10 release
UiPath.System.Activities version 2021.10 release
1. Create dynamic folder with today’s date
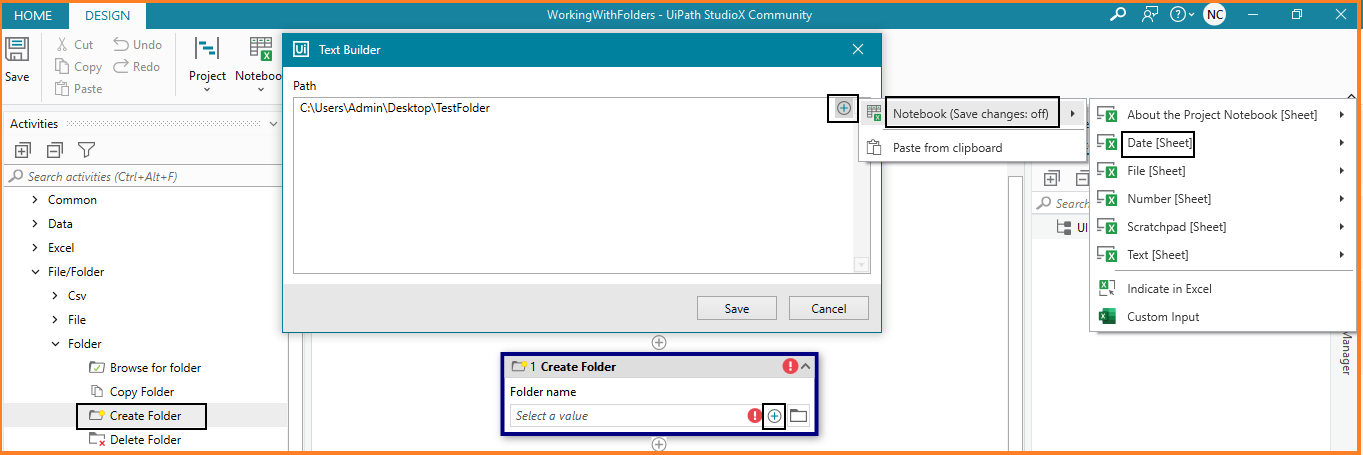
1.1 We will use ‘Create Folder’ activity to create the folder. Mention the folder path and name in the 'Folder name' field. In below picture (C:\Users\Admin\Desktop) is the destination path where we want to create the folder and (TestFolder) is the folder name.
Some automations require us to create daily folders and download reports to that specific date's folder. Let’s see how we can dynamically append today’s date to the folder name.
1.2 Next, Click (+) in Text builder and choose Notebook.
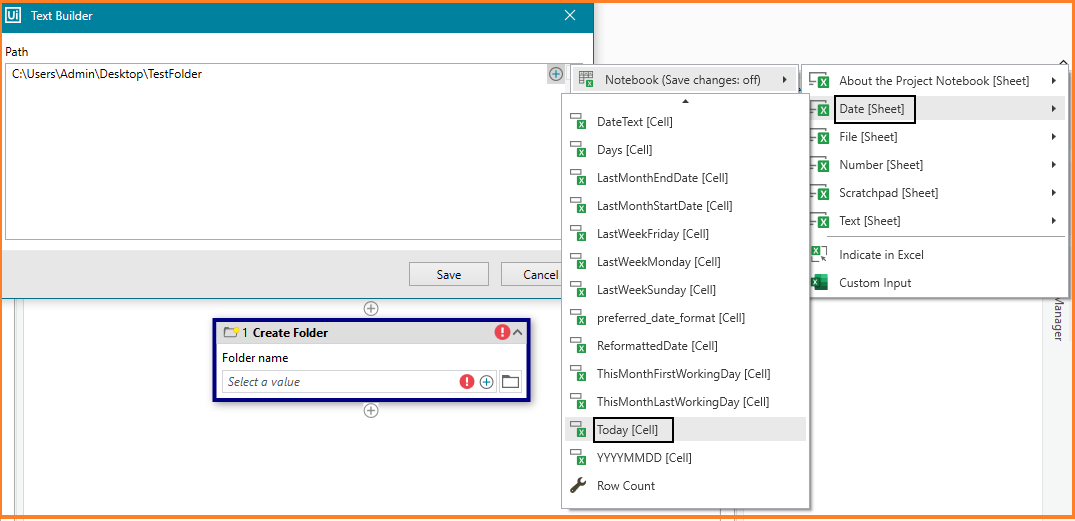
1.3 To get today's date, we're using Project Notebook. Follow the screenshot below to read the particular cell of Notebook and add it to the folder path.
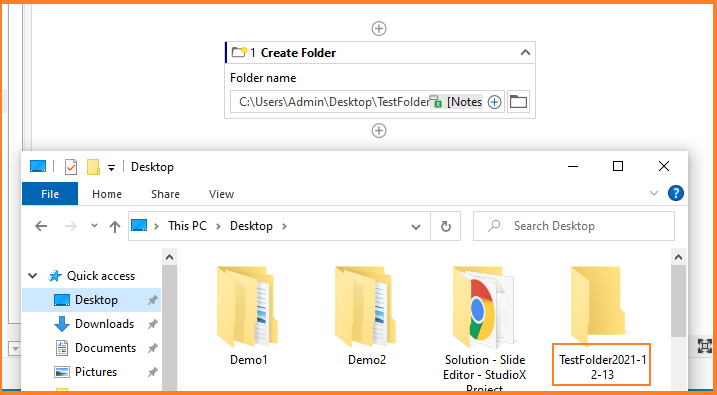
1.4 Finally, we have a complete path that includes the destination path, folder name, and current date. Let's save and run the automation.
2. Filter files with specific file extension from a folder
In some automations, only specific files are required to be processed based on their extension. Hence our automation should be able to filter out the required files from a specific folder. Let's try to filter files with .ppt extension in the example below.
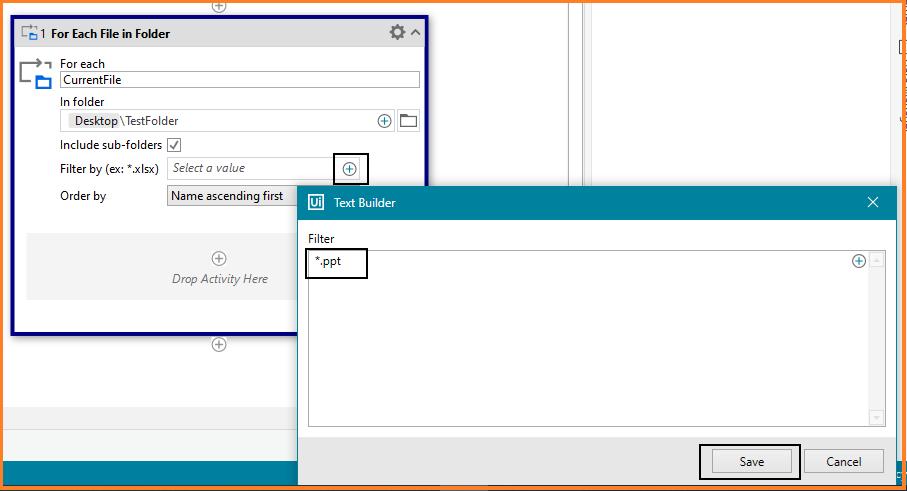
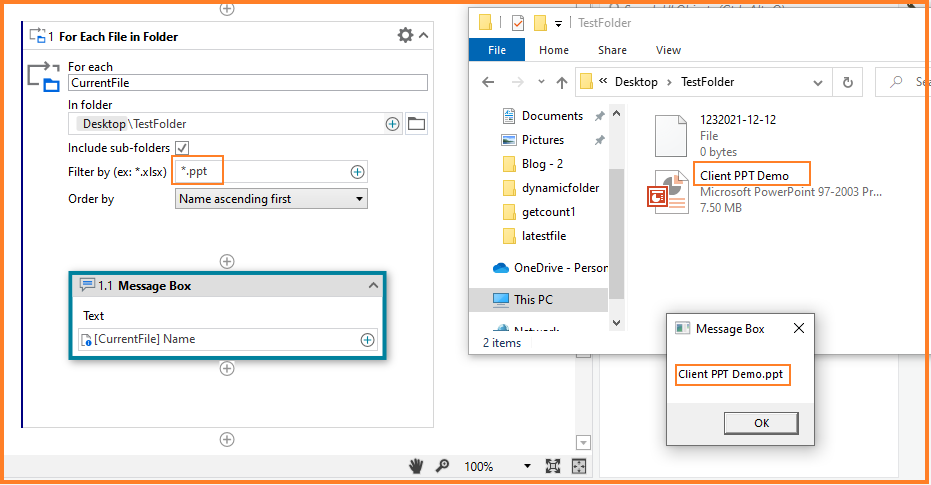
2.1 We will use the 'For Each file in Folder' Activity to loop through all the files in our folder. Select the folder in ‘In folder’ field and in ‘Filter by’ field mention. *.ppt
2.2 Let's use the message box Activity inside for each loop to display the file name in each iteration.
Based on the action you want to perform on each.ppt file, you can replace the message box Activity with any other Activity relevant to your use case.
Finally, when we run the automation, it will skip other files and will only print files with .ppt extension.
3. Get latest file from a specific folder
Let's find the latest file from the download folder in the example below.
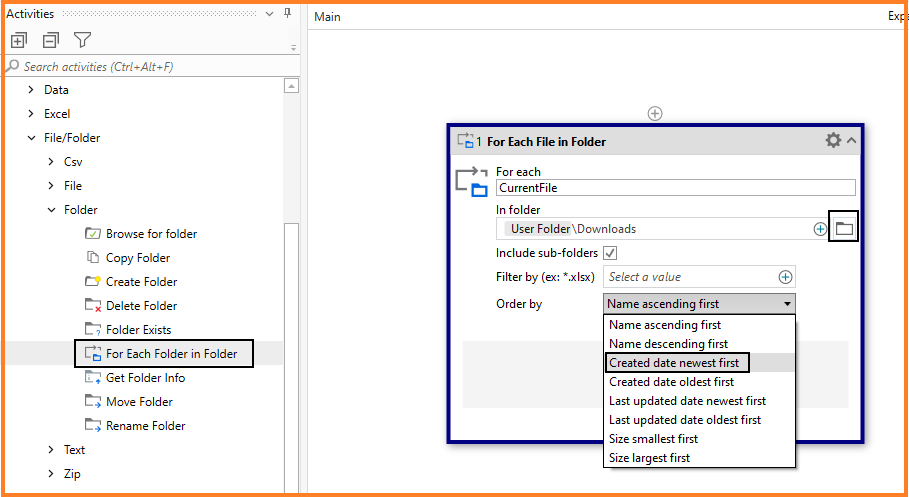
3.1 Take 'For Each file in Folder' Activity to loop through all the files in download folder. In the 'In folder' field, select the folder, then in the 'Order by' field, select 'created date newest first.'
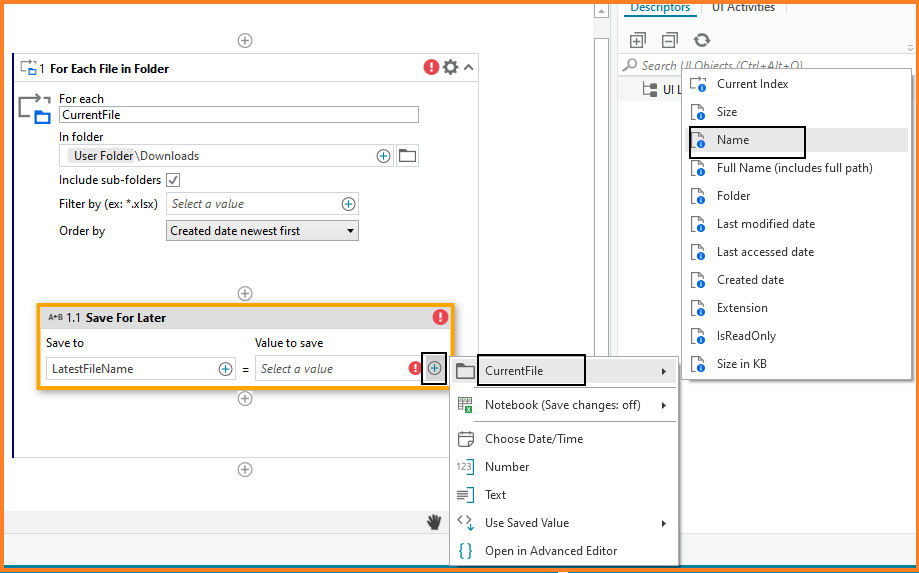
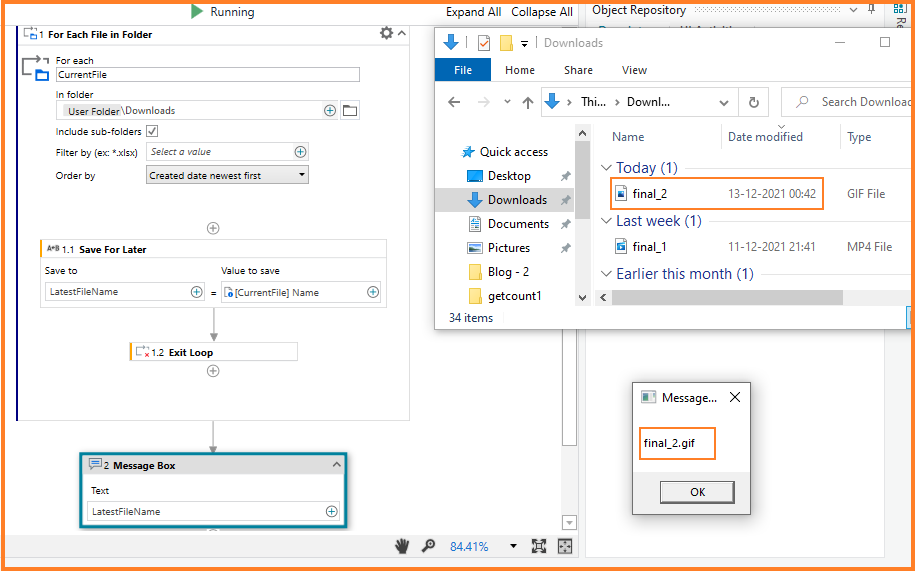
3.2 Next, Use 'Save For Later’ Activity, save the file name as 'LatestFileName' inside the 'For Each file in Folder' Activity.
3.3 Then, add the ‘Exit loop’ Activity to break further iterations of the loop. Now, in the message box, print the result (Latest file name).
4. Check if a specific folder is empty, or find out the number of files in that folder
Validating if a folder is empty before performing further operations is a common practice in automation. In this example, we will check if a particular folder is empty. If yes, we will delete the folder, or, find out the count of files in that folder.
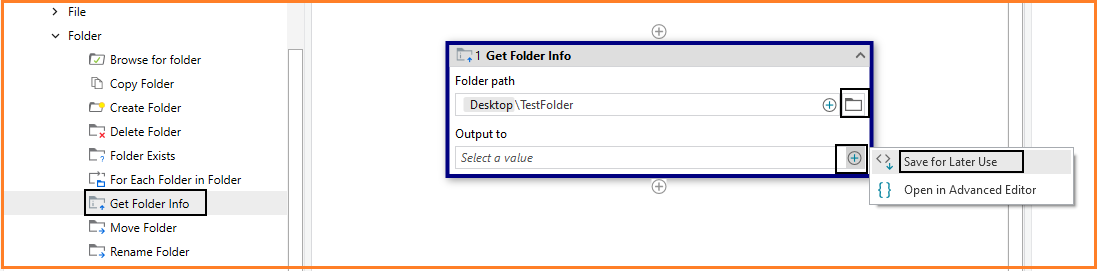
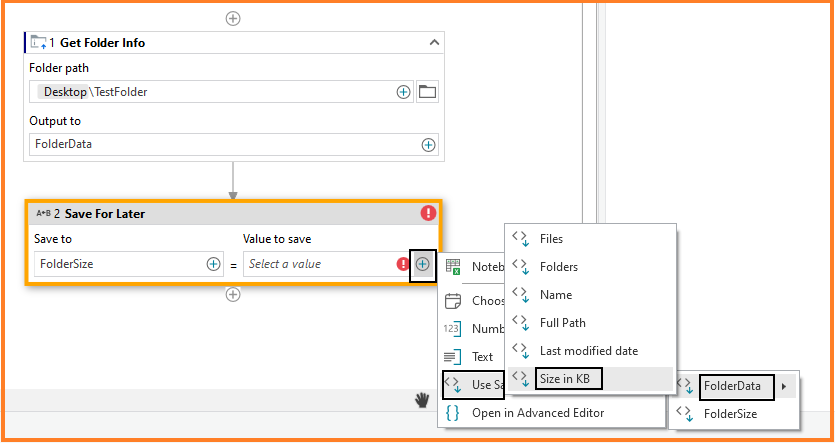
4.1 We will use the 'Get folder Info' Activity to retrieve all of the information of our folder (Desktop\TestFolder) and save it as 'FolderData' for later use.
4.2 Next, we will retrieve the size of folder from the information saved above in (FolderData).
(Use Saved Value -> FolderData -> Size in KB)
4.3 Next, we will use the IF activity to check if the size of the folder is 0, for example: if the folder is empty.
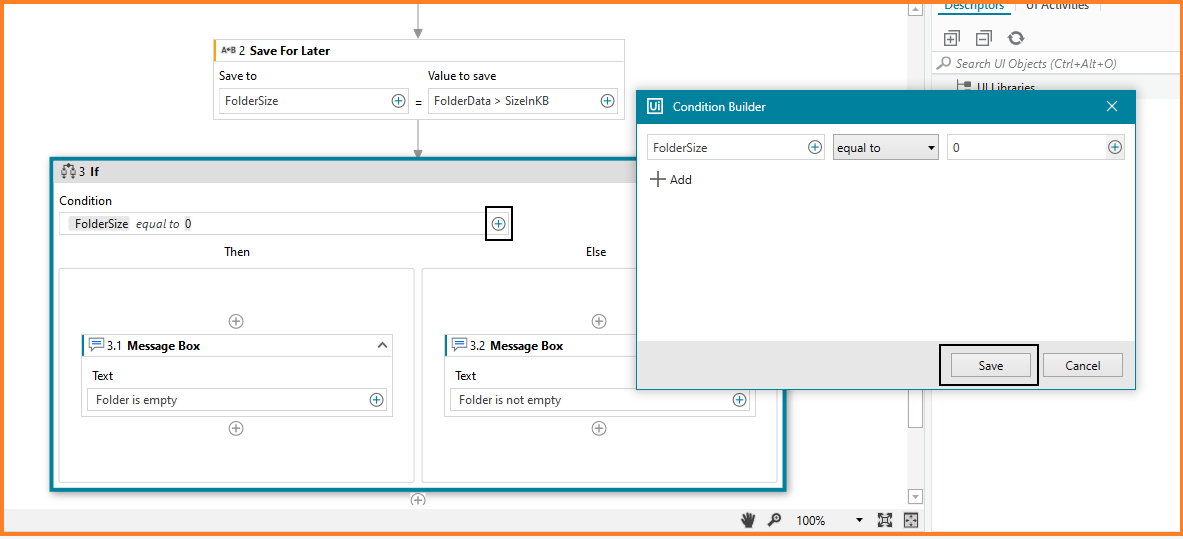
4.4 Then condition will be executed if the folder size is zero, and if that is the case, we want to delete that folder. So, let's include the delete folder Activity in the IF activity's 'Then' section.
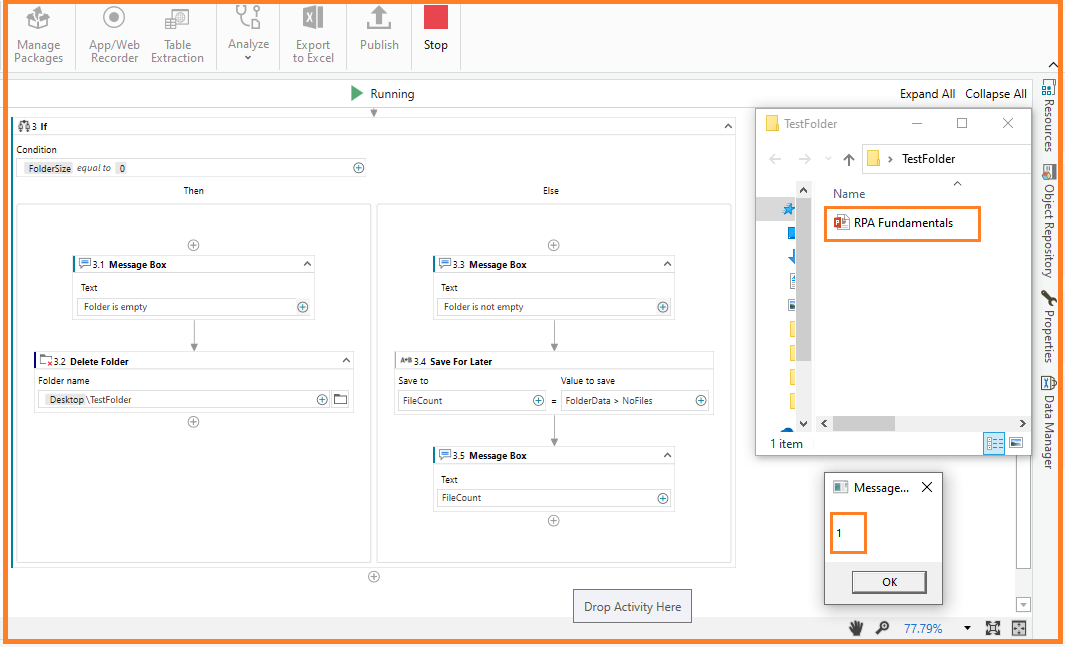
4.5 And, Else condition will be executed if the folder size is not zero, which means it contains files. In that case, we would like to count the number of files in the folder.
4.5.1 We will retrieve the count of files from the folder information saved above in (FolderData) and save it as 'FileCount' for later use.

4.5.2 Finally, let’s print the file count in message box.
5. Zip/Unzip files or folders
We generally compress files/folders to send them as attachments in email. Similarly, when we receive these attachments via email, we unzip them before we can use them. In this example, we will see how to easily perform zip/unzip steps in our StudioX automation.
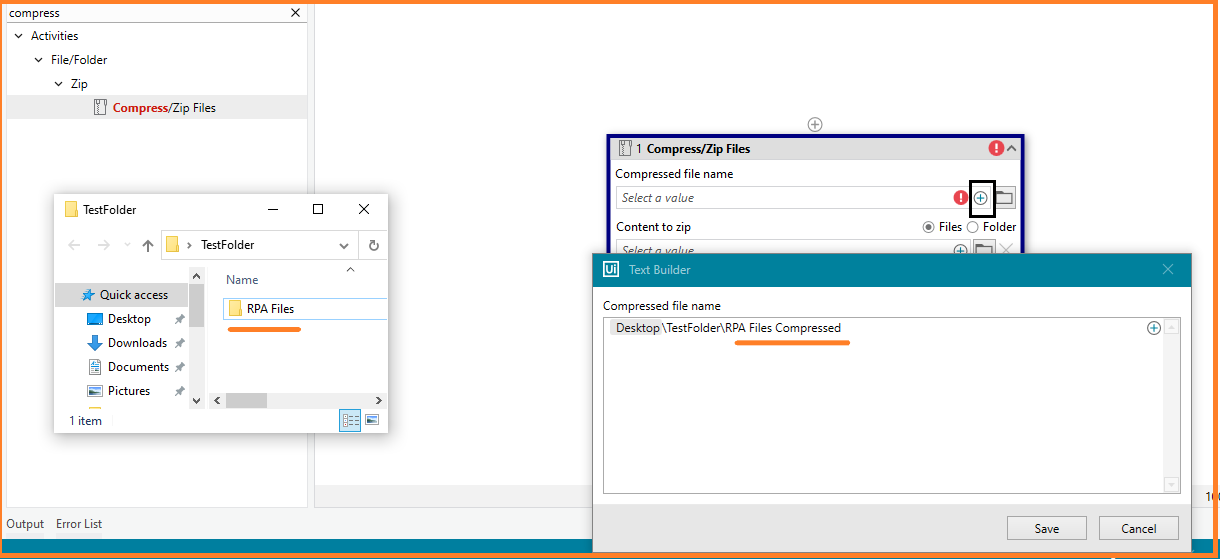
5.1 We will use the 'Compress/Zip Files' Activity to zip the folder named ‘RPAFiles’.
In ‘compressed file name’ field, we will mention where we want to save the compressed file (Desktop\TestFolder\) along with name of file after compression (RPA Files Compressed).
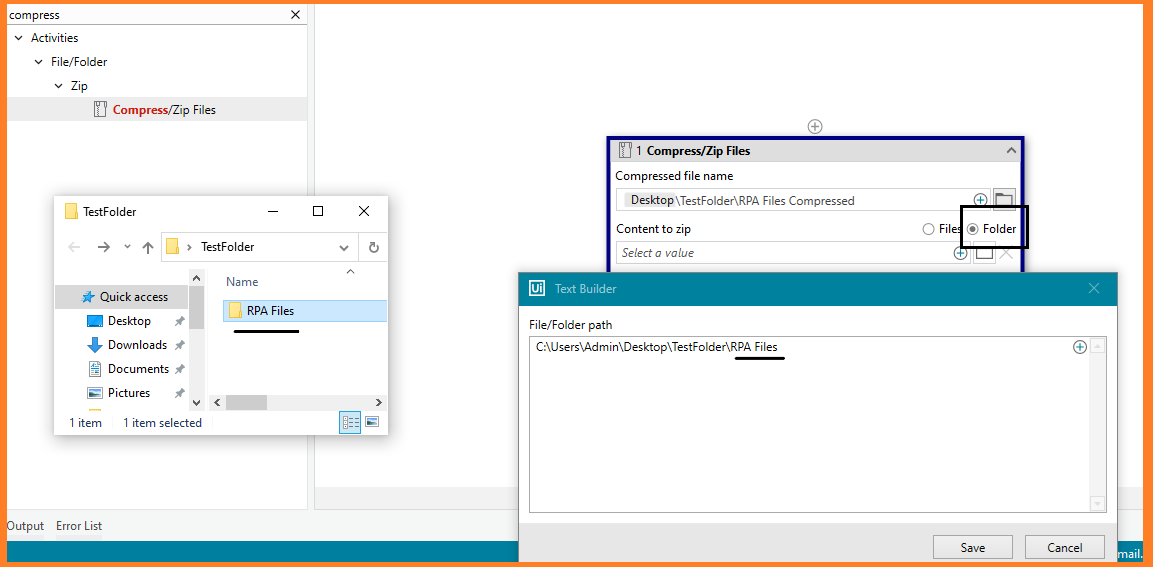
5.2 We will Enter the full path to the folder that needs to be compressed in the 'Content to zip' field (Desktop\TestFolder\RPA Files). Toggle the 'Folder' option as well, as we want to zip the folder.
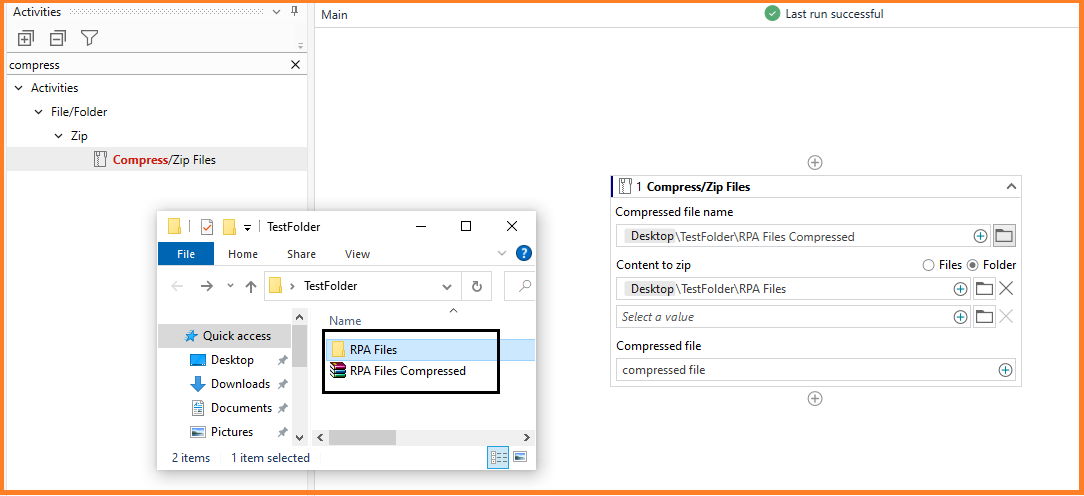
5.3 Compressed file’ field is optional. This is used to save a reference to the compressed file as a variable, which is not required in our case. Now, let’s run the automation and see if the folder is successfully compressed and placed in the desired location.
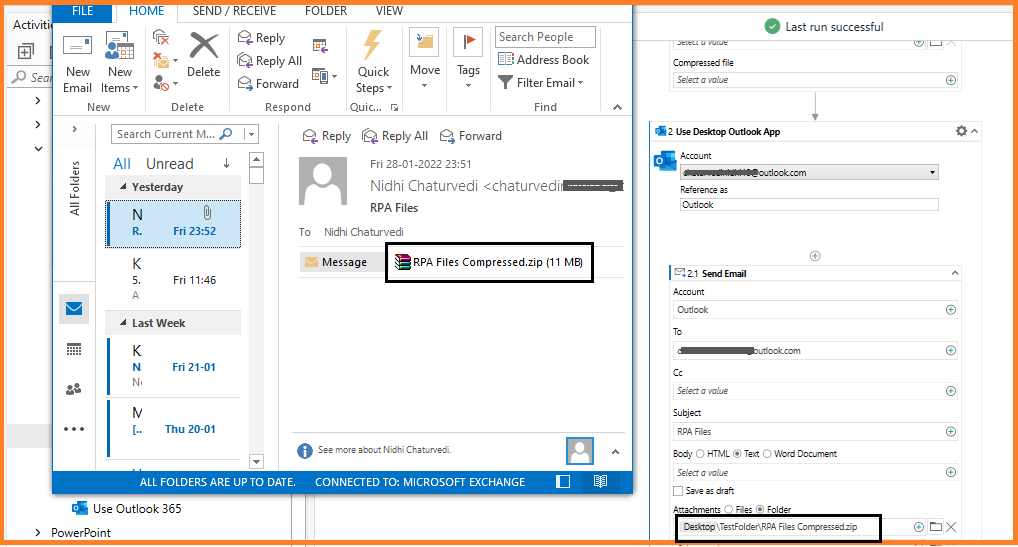
5.4 You can further extend this use case and add send email Activity to send the zipped/compressed file as an attachment in email.
Similarly, we can unzip the files from a folder in StudioX. Let’s see how.
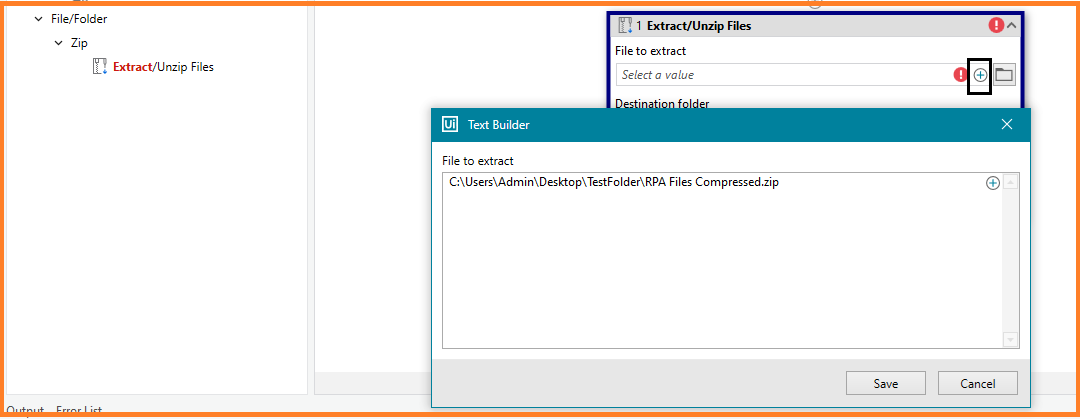
5.1 We will use the 'Extract/Unzip Files' Activity to extract the content from the zipped folder (RPA Files Compressed.zip). In ‘File to extract’ file, mention the complete path of the zipped folder.
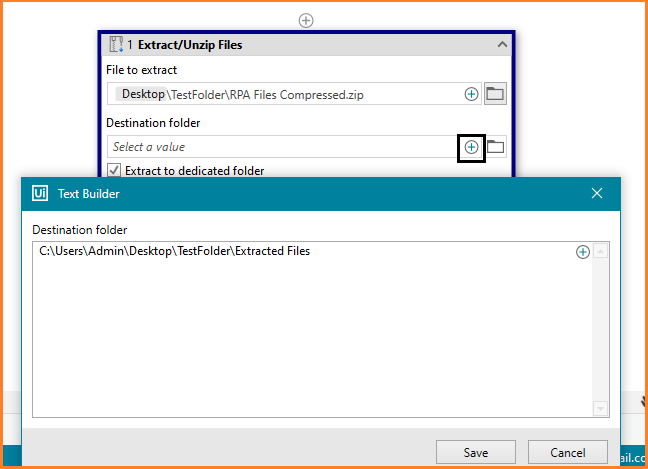
5.2 Next, in ‘Destination folder’ field, mention the path where you want to extract the contents from the Zip file.
5.3 Extracted contents folder’ field is optional, it saves the properties of the folder where the Zip file is extracted for later use in the project. So, we will skip this field as of now in our case.
Now let’s save the automation and run it.
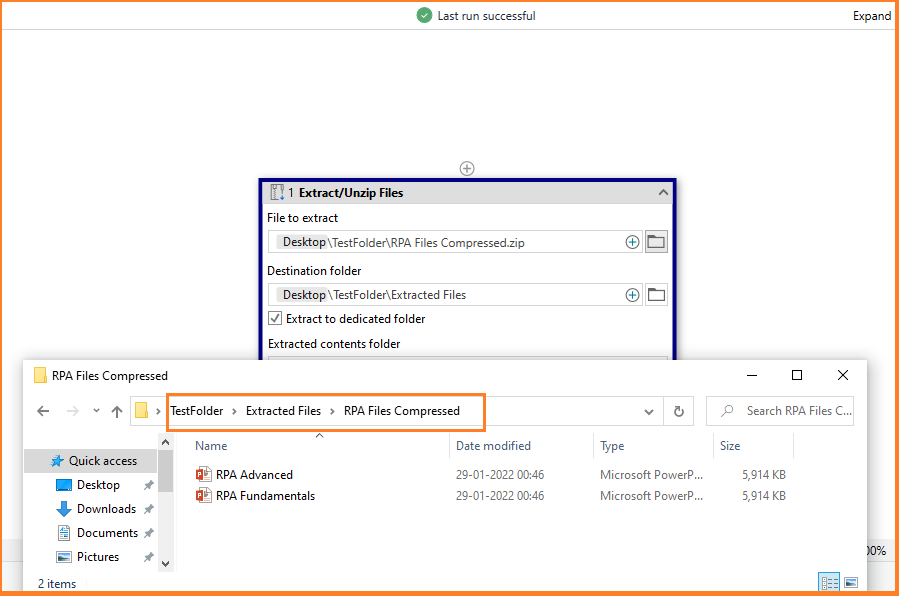
We have successfully extracted files from the zip folder to the desired location.
Conclusion
If you want to share your automation experience with StudioX and contribute to the community please visit the content contributor page.
To keep yourself updated with the latest release, visit UiPath Forum .
Curious to learn more about StudioX? Check out my YouTube Channel!
Topics:
StudioX
Solution Expert, RPA, Wärtsilä
Related articles


Get articles from automation experts in your inbox
SubscribeGet articles from automation experts in your inbox
Sign up today and we'll email you the newest articles every week.
Thank you for subscribing!
Thank you for subscribing! Each week, we'll send the best automation blog posts straight to your inbox.