Implement UiPath Projects Using Enhanced Robotic Enterprise Framework (REFramework)
Implement UiPath Projects Using Enhanced Robotic Enterprise Framework (REFramework)

Summarize:
In any automation project that involves single or multiple applications, there are always challenges such as errors and exceptions. So, we have to design our software robots most efficiently so that they can overcome those challenges gracefully. They need to have proper exception handling and recovery abilities, easy to handle and maintain, reusable and provide effective logging. Enhanced Robotic Enterprise Framework (REFramework) is a UiPath Studio template that can be used to build, test, and run attended and unattended business processes. It can be used for various types of processes and data types in a structured, efficient, and consistent manner to help us achieve these goals. Learn more in the community tutorial for this topic in the UiPath Academy.
In this tutorial, you will learn how to automate a business process by implementing this framework in a simple project.
Prerequisites
Basic knowledge of UiPath Studio, UiPath Orchestrator, and robot
UiPath Studio installed on your machine
Enhanced Robotic Enterprise Framework downloaded from UiPath Marketplace
Microsoft Windows application "DoubleUI" downloaded from the demo material in the community tutorial
Business process
It's essential that we understand the needs as a robotic process automation (RPA) developer before we start automating anything. Let us consider a simple business process to convert currency where there are two processes:
Find Total Deposit
Convert Total Deposit
The currency inputs Cash In, On Us Check, and Not On Us Check comes from a Microsoft Excel file. The first process in to identify the Total Deposit value using a Windows application as highlighted below.

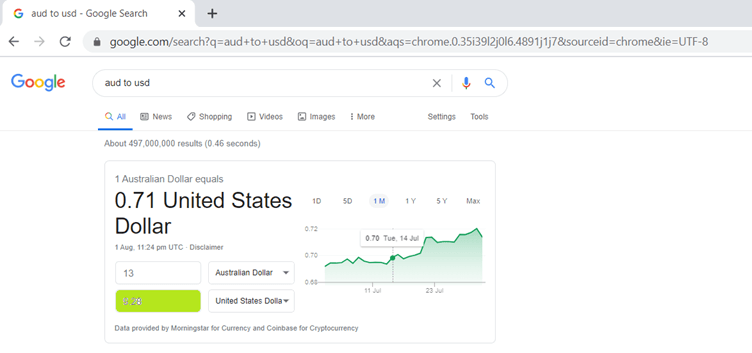
The second process is to convert the Total Deposit to the Converted Deposit value using a web application Google Currency converter (as highlighted below). The source currency, destination currency, and source value are already known from previous steps.
The output values are updated in the Excel file and Queues in Orchestrator. I expect the comments column to be updated in case of any business exception.
Framework overview
Alright, now let us have a look at the folders and file structures in UiPath Studio. I am using Community Edition of Studio Pro Version 20.6.0. The entry point to the REFramework is the main file that is run when the project is deployed and started by Orchestrator. The framework is made up of four layers (shown in the image below):
Framework Layer
Business Process Layer
Data Layer
Service Layer

In the Framework Layer, the settings are read from the Config file and stored in the Config Dictionary as a Key and Value pair (where the key is a String and the value is an Object). The application checks are performed to make sure all the prerequisites for starting the process are in place.
In the Business Process Layer, we perform clean-up and preparation activities. And business logic is implemented by creating reusable workflows.
In the Data Layer, the Config file and the data input file are placed for the Framework Layer to read and write data.
In the Service Layer, there are multiple tasks and each task is a framework on to itself that are invoked to perform unique action. For example, the GetDataTask is used to deliver the transaction data to the Framework Layer.
Framework concepts
This framework features work Blocks, State Transitions, and Exception Handling to perform the framework objectives most efficiently. It is essential to know about these concepts to understand this framework better as those are the basic building blocks of the REFramework.
Work blocks
The entire framework itself is a work block that has a parent work block and has many child work blocks. During the work block startup, information about the path are constructed and passed on to child work blocks. You can publish the input arguments that you want to make available in the logs for effective logging so that it is easy to debug in case of any exceptions.
State machine
State Machine diagram has four states:
Init
GetSet transaction data
Process transaction
End process
In the Init state, the robot reads the configuration and initializes all applications. If this step is completed successfully, the robot moves on to the next state, GetSet Transaction Data.
If a System Error is encountered and within the max retry limit, the robot tries to initialize one more time before it moves on to the End Process.
In the GetSet transaction data, either a new transaction comes next and is processed by the robot. Or all transactions have been processed and no more data is left, so the process comes to an end. In case of any soft stop signal from the Orchestrator, it moves to end process. The input arguments are usually transaction number and Config dictionary and the key output is the transaction Item.
In Process Transaction, after retrieving a new transaction, the process is executed. It can have three outcomes.
The first one is "Success," in which a loop is performed, and the next transaction data is processed.
The second possible outcome is Business Rule Exception, in which some specific action needs to be taken. And then, the execution loops back to the GetSet transaction data state.
If a System Error is encountered and within the max retry limit, it referred back to Init state for the robot to retry. Otherwise, it moves on to the end process. The transaction number, transaction item, and retry number are the key inputs and the key output is the transaction_ID.
Exception handling
The overall exception handling is already in place throughout the REFramework, which is why there are Try Catch activities in every state. The block where an exception is expected is executed inside the try block and there are two different outcomes. In a happy path, no exceptions are generated and finally block is executed. In an unhappy path, an exception is generated. Then, catch block and finally block are executed to handle the exception.
Let us dive a bit deeper into the Config file and Orchestrator.
Config File and UiPath Orchestrator
In Orchestrator, let us create a queue named "Decision" to store all project data and the asset named "Decision_Data" to handle the inputs from the Excel file.
Let us look at the Config file. In the Settings sheet, I have named the queue, "OrchestratorQueueName" as "Decision."
I do not change anything in the Credentials and Tasks sheets as am not using them in this project (which is usually used to handle most confidential data securely in Orchestrator). The Constants sheet stores "technical" settings that contain information such as the number of retries, timeouts, delay, etc.
MaxRetryNumber is used to retry the transactions that have failed with an Application Exception, or System Error. Instead of hard-coding timeouts or delays in our projects, we can use the Config object to handle variables dynamically. This helps improve the performance of the solution, and easily switch environments from Dev to Test, and then to Production. And, I have updated the assets sheet to consider the Excel data sheet "Decision_Data".
Create and modify workflows
Since we have setup all of the dependencies outside UiPath Studio, we are set to perform the actual design and coding of business processes.
By handling the input data and passing the output data, we need to create two workflows: one for desktop and one for web application processes (as given below). In the process transaction, make use of work blocks to set the Transaction Status and publish the output arguments that you want to make available in the log. The main idea behind this to keep the business logic code separate from the framework implementation.
Debug, test, and run
Once all the workflows are created, Debug and Test the workflows to make sure they are working as expected. Finally, click on “Analyze File --> Validate Project” to check the project for any validation errors.
In this project, I did not come across any such error and we are good for the demo. Please note that this demo is for the proof of concept (PoC) purposes but Enhanced REFramework is capable of handling much more complex tasks and handling various data sources (databases, APIs, etc).
Conclusion
So far, we have seen how we can make use of Enhanced REFramework to handle simple to complex business processes and how to perform the below steps:
Download and customize the framework specific to project needs
Work blocks, State Transitions, Exception Handling, and logging messages
Apply Config files and UiPath Orchestrator to read and write data
Create and modify workflows to handle business data and business processes
Debug, test, and run the project
I hope you are comfortable using Enhanced REFramework to implement your end-to-end business process. If you want to learn more, please consider the resources from the documentation of the framework.
UiPath Community MVP and RPA Consultant, AMP
Related articles


Get articles from automation experts in your inbox
Sign up today and we'll email you the newest articles every week.
Thank you for subscribing!
Thank you for subscribing! Each week, we'll send the best automation blog posts straight to your inbox.
Get articles from automation experts in your inbox
Sign up today and we'll email you the newest articles every week.
Thank you for subscribing!
Thank you for subscribing! Each week, we'll send the best automation blog posts straight to your inbox.