
A Perspective on Robot as a Service with UiPath Platform
Share at:

Editor's note: the following tutorial covers a use case developed by one of our community members in their organization, showing how effectively they can build the robot as a service (RaaS) model using UiPath products.
Introduction
In the pursuit of defining RaaS, let’s think about organizations, in the verve of implementing automation. To shape processes, you need to purchase licenses and set up favorable automation environments and investigate in depth hardware requirements. Now let’s imagine a model designed for organizations, regardless their size which provides them with robotic process automation (RPA), and a complete package of services including licenses, automation, maintenance, automation governance, scalability, all gathered in an interactive platform.
Why is Robot as a Service needed?
The answer is remarkably simple. In this era, in which companies strive to become fully automated enterprises, RaaS comes in as a stepping stone. It is cost-effective, and very suitable for small, medium or large organizations. UiPath provides a comprehensive service package together with an extensive product offer.
Use Case for RaaS model using UiPath
Let’s see a practical approach to the RaaS model using UiPath products. Dive in a use case for small-scale business involved in selling home appliances. The owner of the business has applied for a solution where he can manage his inventory.
Requirements
To build the solution we need the following setup:
1. An account on UiPath Automation Cloud™
3. UiPath Robot connected to Modern Folders
4. UiPath Apps
5. UiPath Data Service enabled for Automation Cloud™
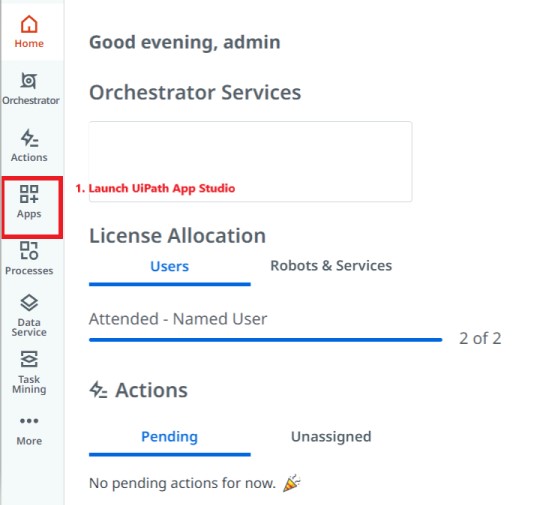
Before we dive into our solution, let’s start with basic settings in UiPath Orchestrator, connecting the robots to Orchestrator and user access management.
Wondering how to connect your robot to Orchestrator?
Watch a video or read the documentation to see how to connect your first robot.
Check out the UiPath Documentation Portal here.
Watch a short tutorial on YouTube here.
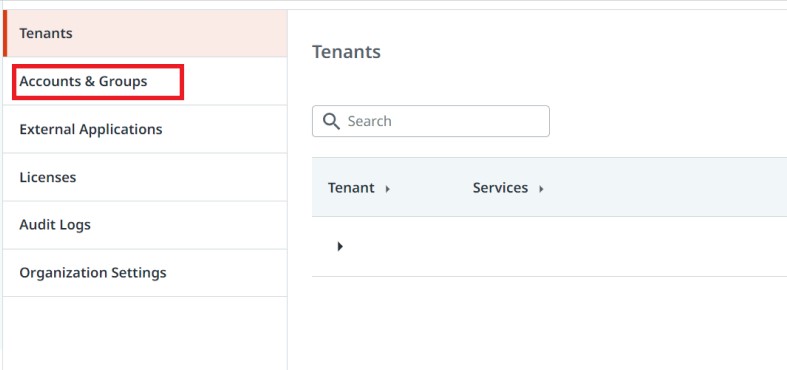
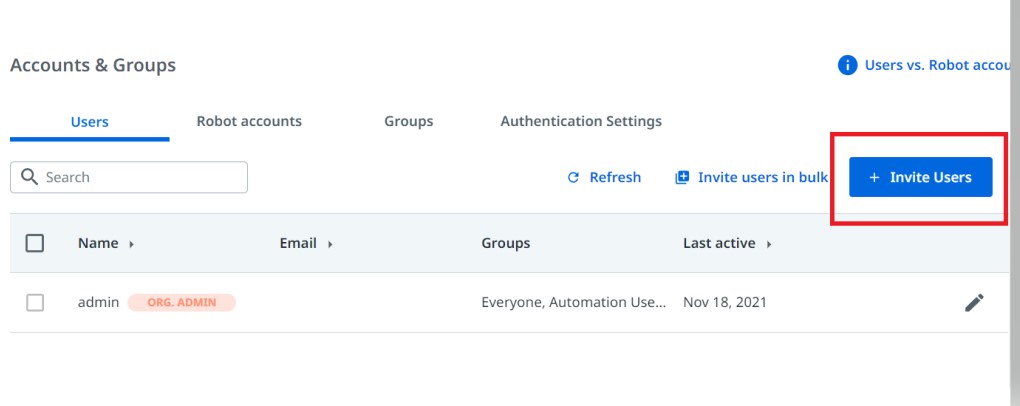
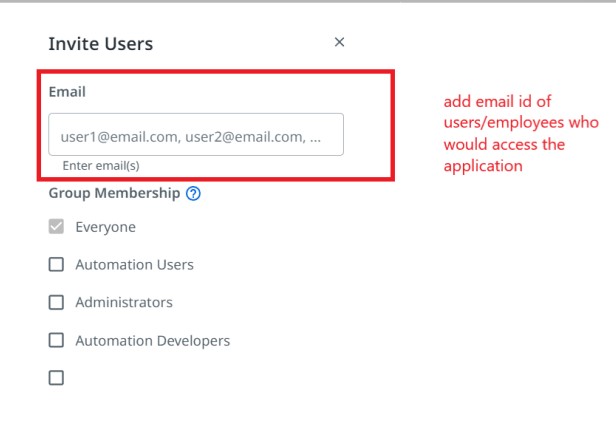
Let's look at user access management. Employees who will be accessing the solution should be added to Accounts and Groups. To do that, on Automation Cloud™, go to Admins page and move to Accounts and Groups. Now under the Users tab, invite all the users who would be accessing the solution. Alternatively, you can also add them as part of a group.

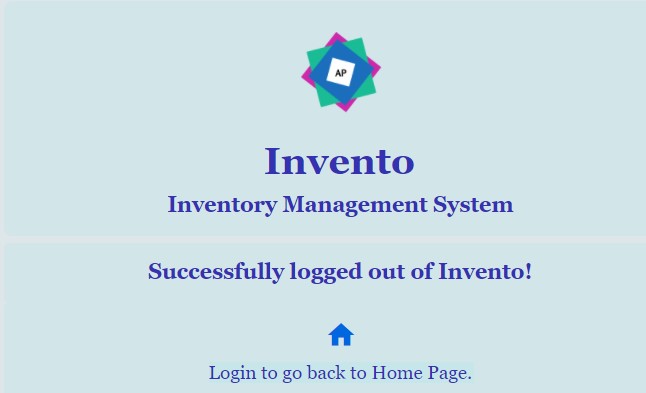
We named the solution "Invento", an inventory management app which helps the user interact with automation by keeping track of products in the inventory and raising orders when the quantity is below the threshold. The app also triggers reports to the admins based on inventory consumption.
This app consists of:
1. Sign up page
2. Sign in page
3. Forgot Password page
4. Inventory details page
5. Create and Cancel Order Page
6. View all orders page
7. Data Service entities to maintain the records
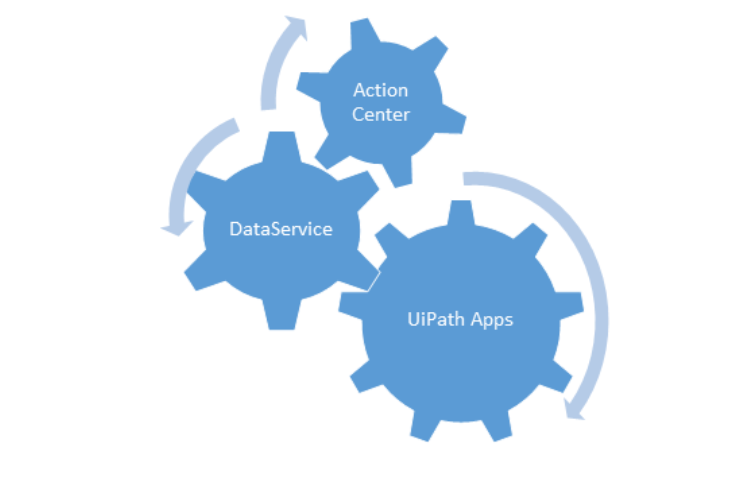
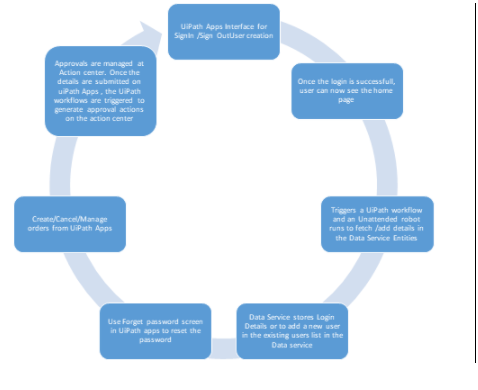
We'll explore the solution in three major steps: the interactive app or how our solution is presented, its back end made of Data Service and its entities or how our inventory data is stored and the UiPath workflows. Below you can see an overview of the complete process captured in a diagram. Here you can also see how UiPath products interact with each other.
Step 1
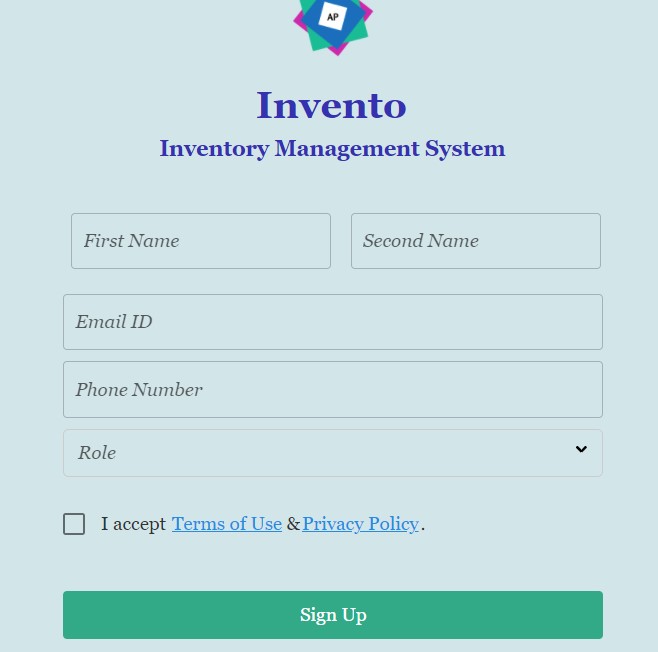
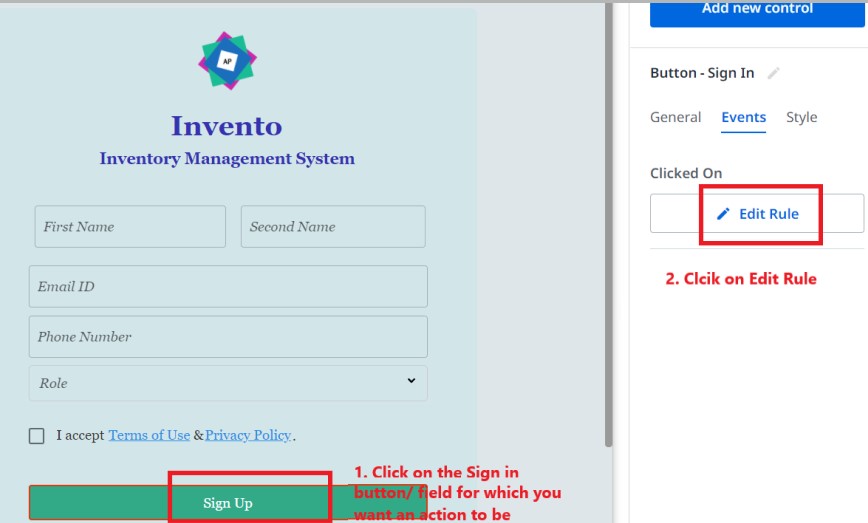
To build an interactive application using UiPath, the first step is to build a Sign Up page for the user. The idea behind this page is to register all employees before they start using Invento.
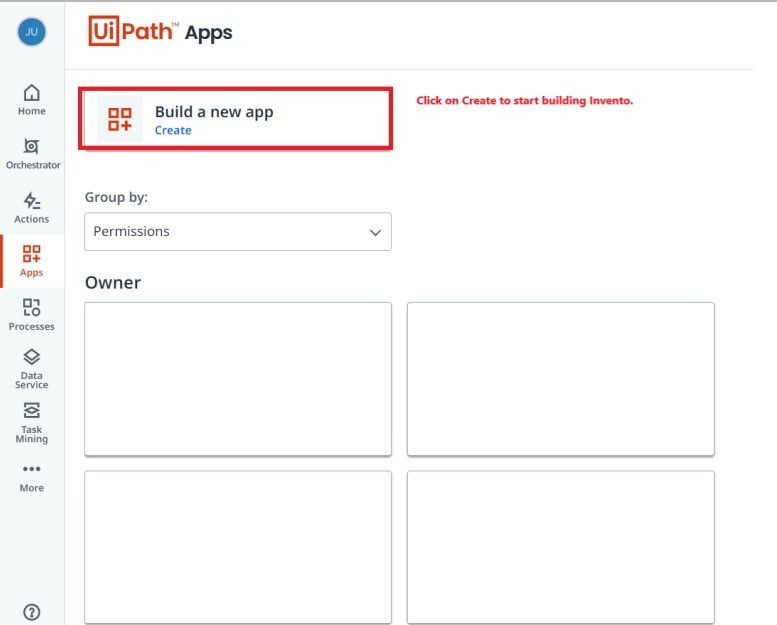
In Automation Cloud™, launch the UiPath App Studio and start by ‘Creating a new App’ and name it Invento.
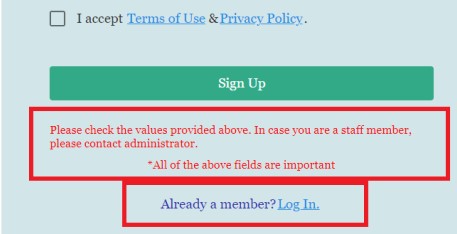
The Sign Up Page should capture information such as:
1. First Name
2. Last Name/Second Name
3. Email ID
4. Phone Number
5. Role
6. A Sign in Button
7. And check box to agree to all the terms of services
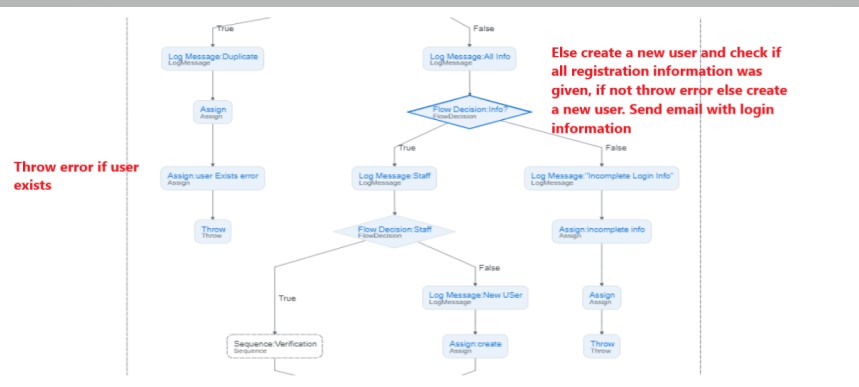
1. An employee won't need to register each time, just sign in. On the Sign Up page, there will also be a link to the sign in page. An error message will also be shown if the employee registration information isn't complete.
Once an employee registers, will receive an email with the password and ID that will be used for sign in. Let’s have a look at the sign in page.
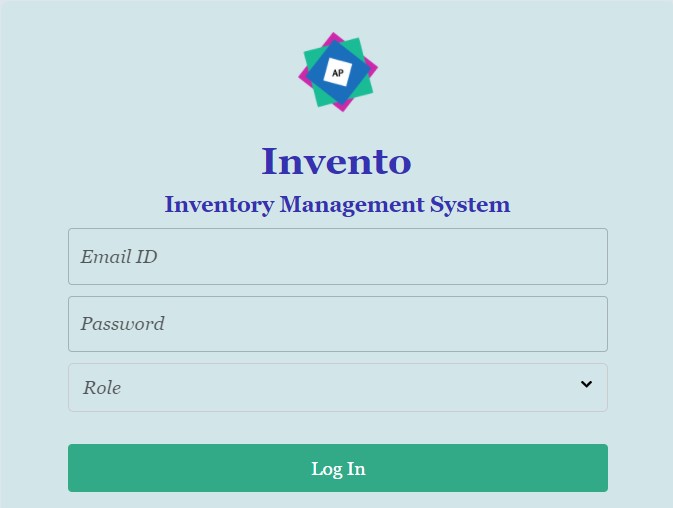
The login page will also contain an error message (hidden) if the login fail, and a link to reset the password.
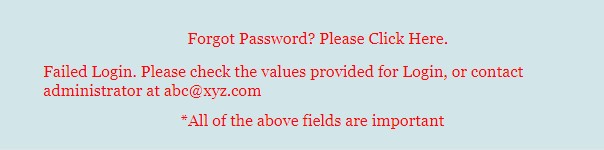
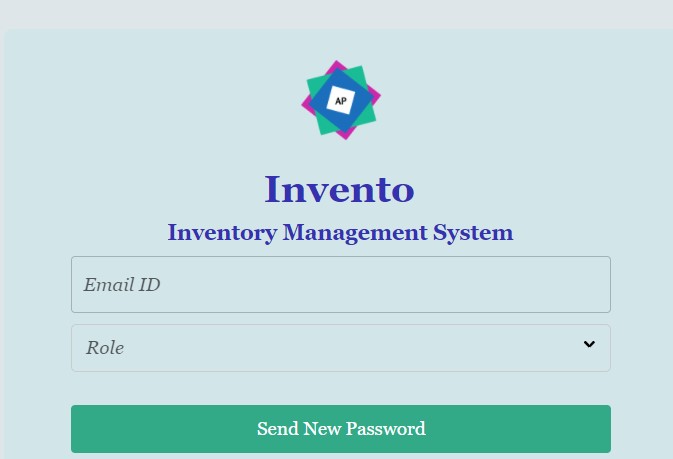
2. Let’s check the forgotten password page and sign out page. The new password will be sent in an email.
3. The home page of Invento gives the employee a range of selections where they can select how they want to use the application. They can choose to view the current inventory, check active orders, place or cancel an order. There's also a page where the user can view all kinds of orders (active, cancelled, or successful orders).

Let’s look at each of these pages individually.
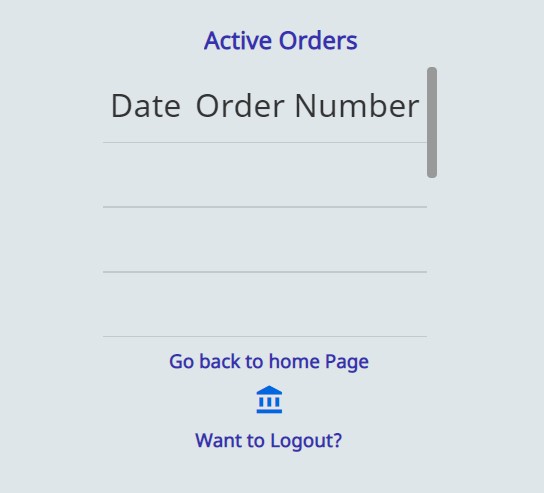
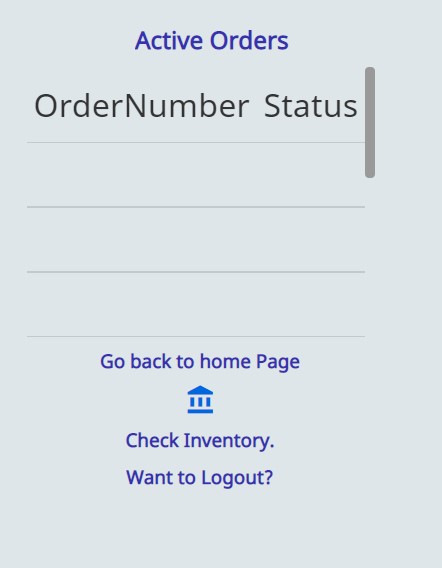
4. Active Orders Page contains information on the orders that have been placed recently or are yet to be delivered. Information such as order number and the date the order was placed is displayed on this page. There is also a link to go back to the home page or sign out.
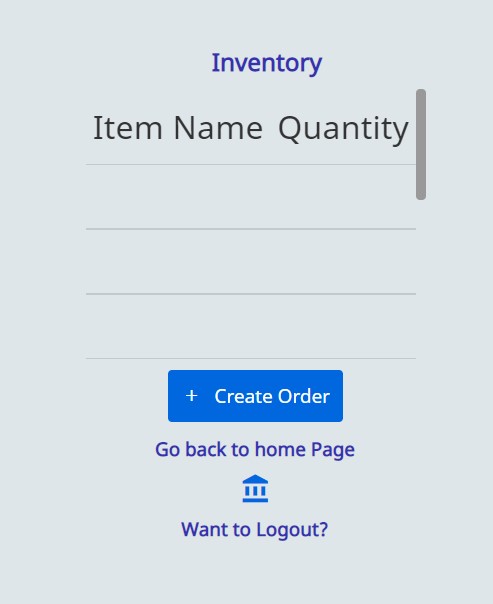
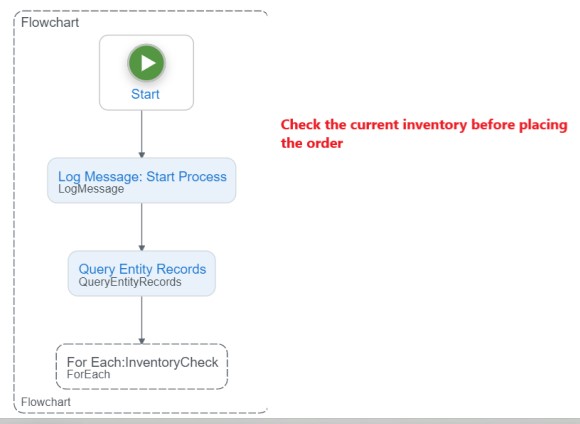
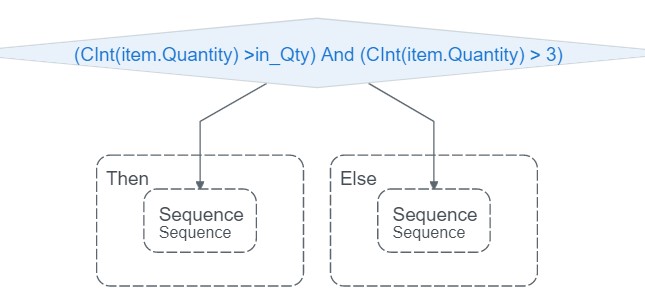
5. Current Inventor page is the heart of Invento as it contains all the items serial number, code present in the inventory. It holds the name and the quantity. If the quantity is below the threshold, an email will be triggered. Also, this information (current inventory) will be captured and emailed to the admins before closing the day for visibility. If the employees see that there is a need to replenish a certain item in the inventory, they can place an order using the Create Order button on the page.
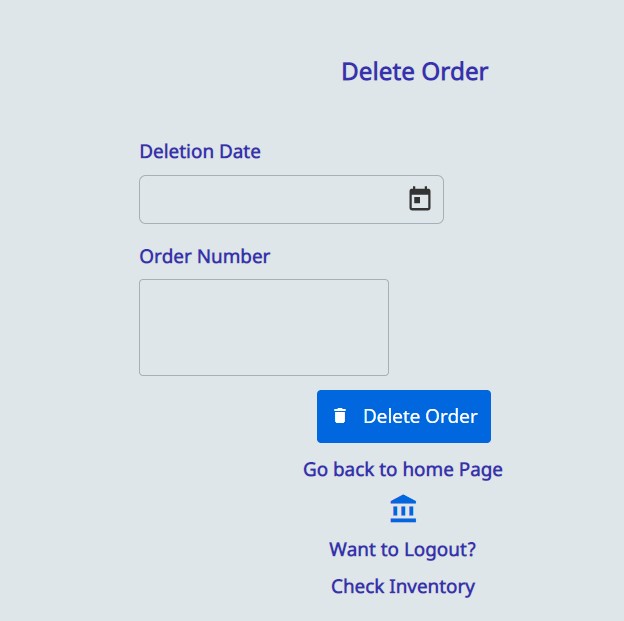
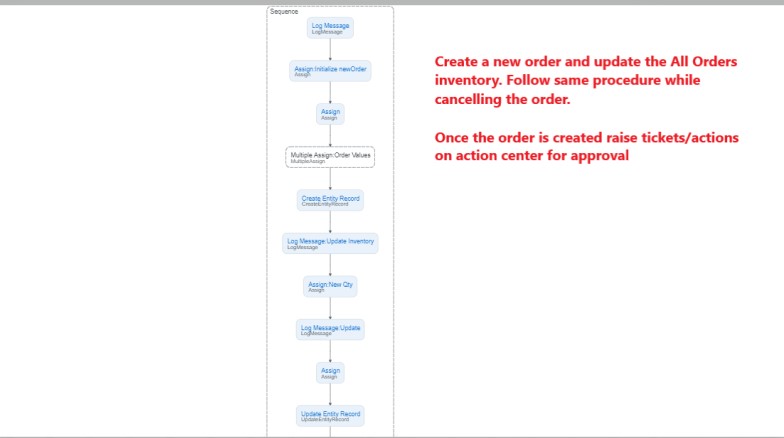
6. Create Order Page/ Cancel Order Page. To place an order, the employee needs to provide the date when the order is placed, item description (serial number/ code) and the quantity. Once the order is submitted, before it is finalized, it will go to the employee’s manager for approval.
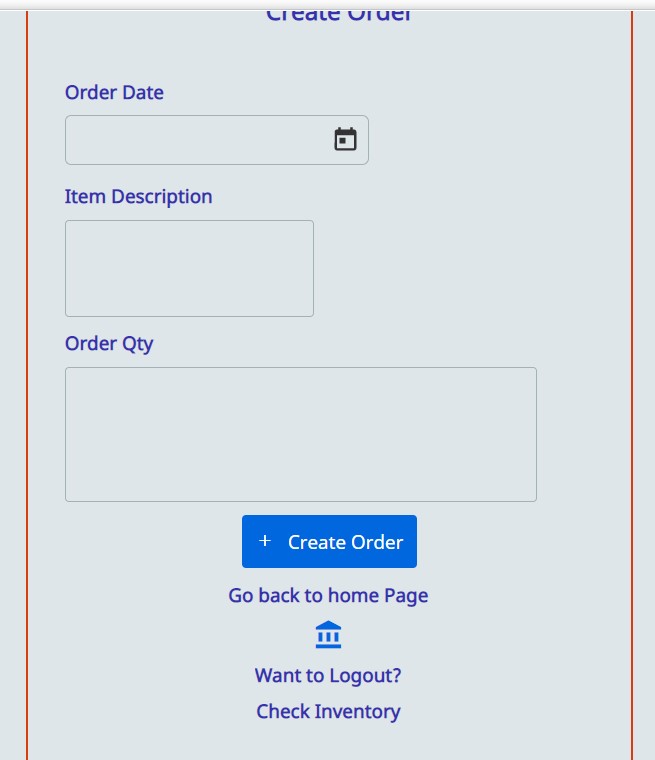
An employee can also cancel an existing order (based on the manager’s approval). To cancel an order, the order number and cancelation date need to be provided.
7. All Orders page makes it easy to view a list of all orders.
Now, let’s discuss where all the inventory data is stored. UiPath is indeed a one-stop platform if you are looking for Robot as a Service model. For this purpose, we will discuss about another product called UiPath Data Service.
Step 2
In step two of this solution, you will see the created entities. From the Automation Cloud™, launch Data Service and start creating similar entities.
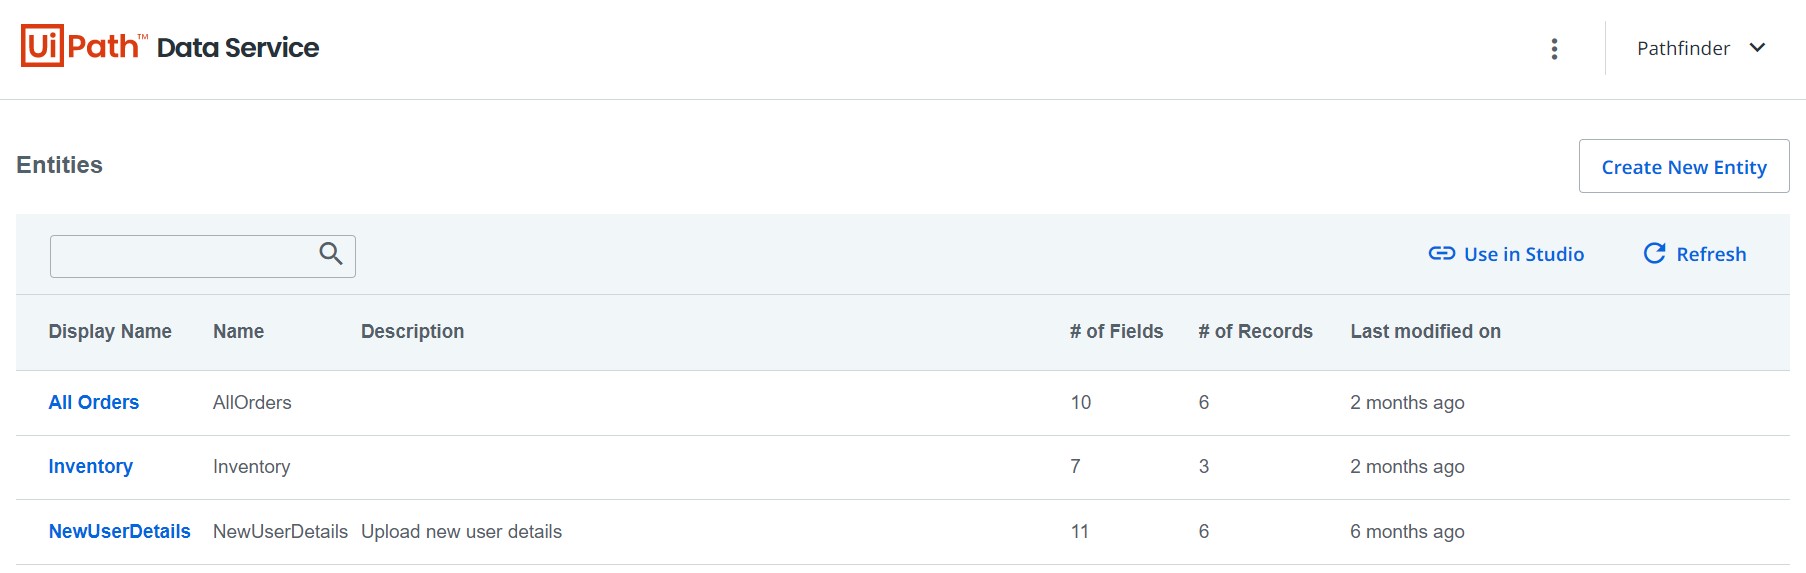
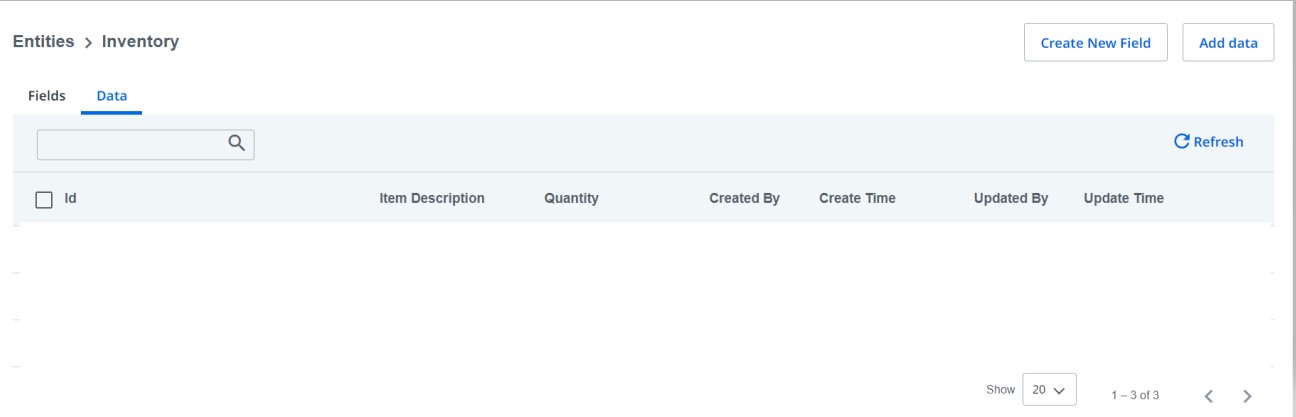
1. Inventory Entity contains details of the current inventory.
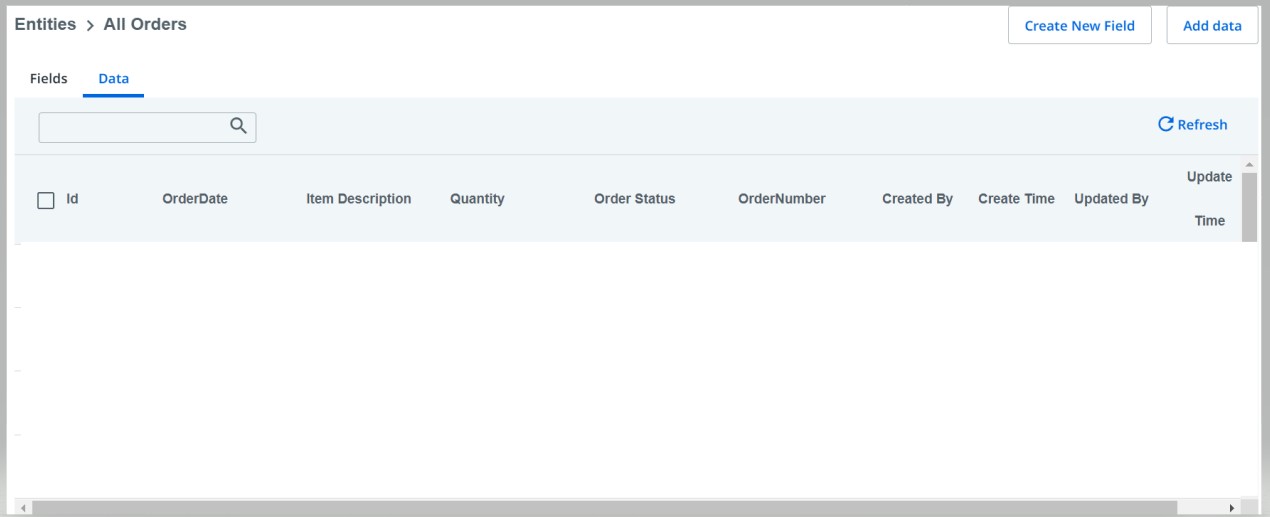
2. All Orders Entity contains details about active, successful, and canceled orders along with order number, order creation or cancelation date.
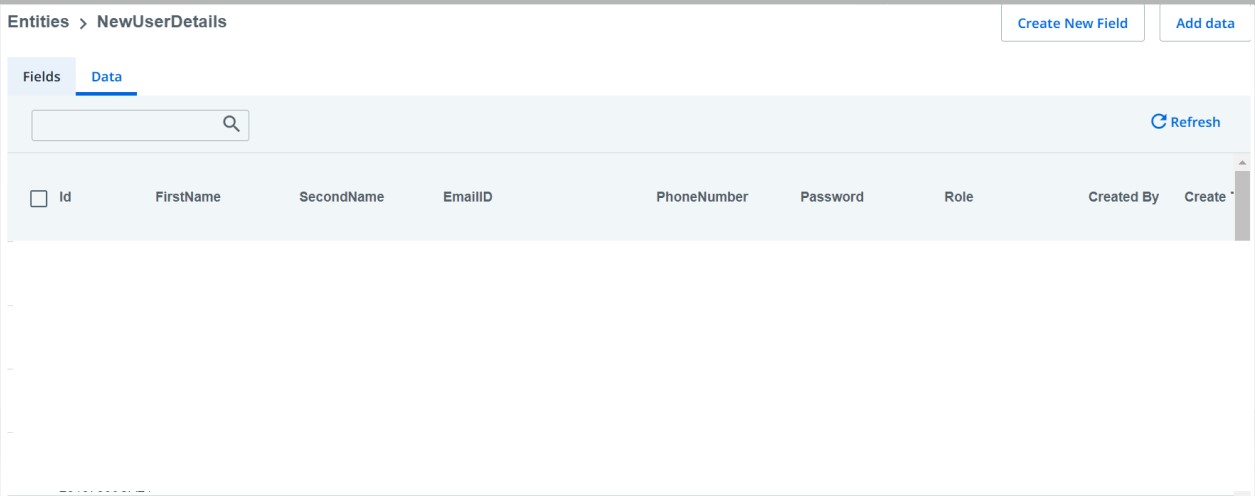
3. New User Details Entity maintains information about all the employees.
Step 3
Our final step is creating a middleware that communicates with both UiPath Apps and Data Service. Also, this should be capable of raising tickets or actions for the managers to control the creation and cancelation of orders. We'll take a slightly new approach to our middleware layer development and use UiPath Studio to create our flows.
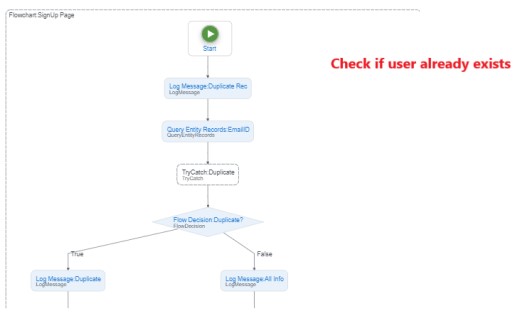
1. Sign in to Flow. The flow registers new users. Before registration, we'll query the New User Details entity to see if the user already exists. If not, a new user will be added and sign in details will be sent in an email.
2. Let’s take a look at the workflow to create or cancel orders.
Let’s bring it all together. In this section, we'll discuss how we can connect UiPath Apps and the workflows. Let us go back to our sign in page and look at it. We'll use this as an example to connect to all the other workflows discussed in previous sections. Now, we'll discuss how to connect our sign in workflows to the Sign in page of our application.
As soon as the user clicks on the Sign in button, I want to trigger a UiPath process. (Note: this can run unattended or as an attended automation. In my solution, I have used an unattended automation). Triggering a UiPath process either generates a new user and adds it to the new user list in our Data Service entity or verifies an existing user and logs in to the application. The flow has been discussed in the earlier section.
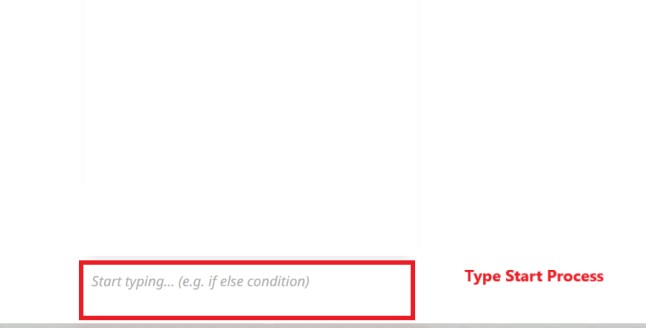

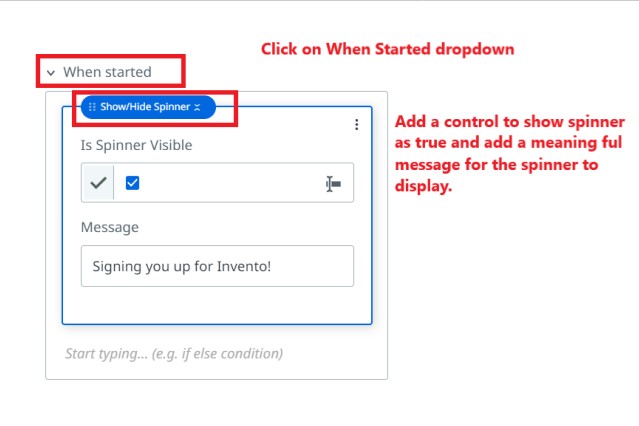
You can play around and add more controls once the sign in is completed. Let’s see what we can do.
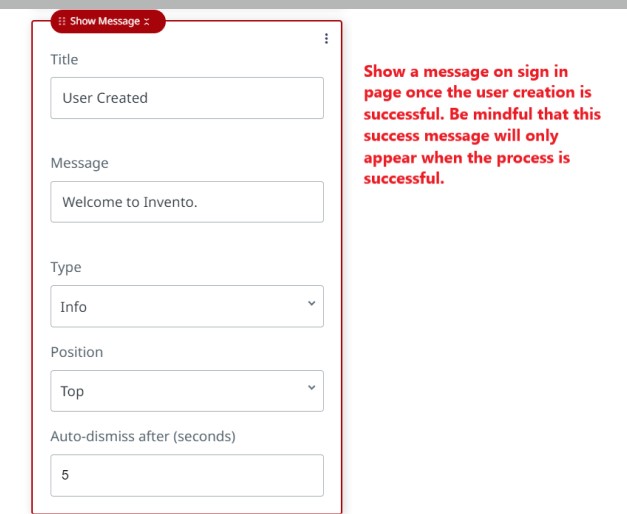
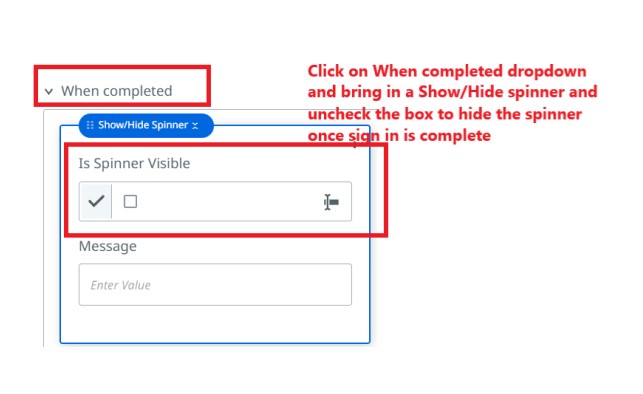
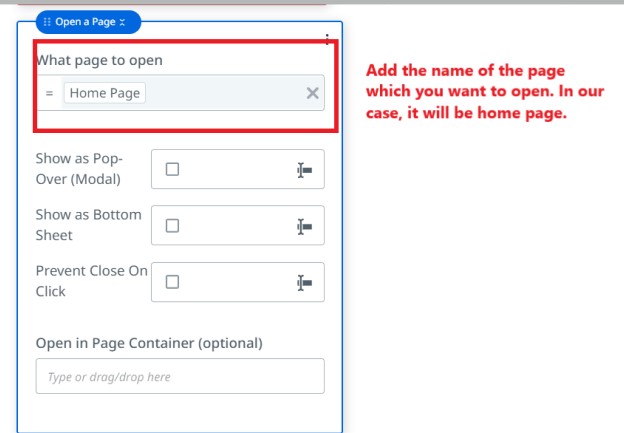
Once the user is created and logged in successfully, we want the user to see the home page. So add below settings in the drop down for ‘when completed’.
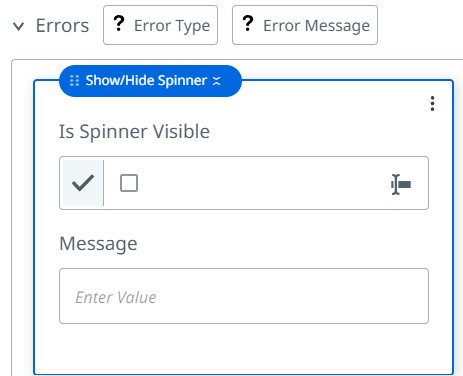
Now, let’s configure our error scenarios.
Click on the dropdown for Errors and proceed to hide the spinner and, as shown above, set a message to display that user login or registration failed and guide them to the “forgot password” page in the same way as shown above.
Follow these steps to configure controls for all the fields in your application.
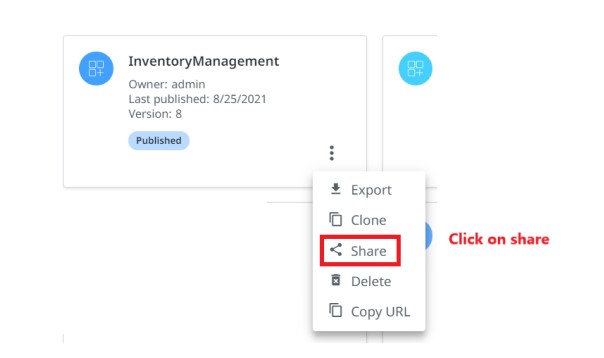
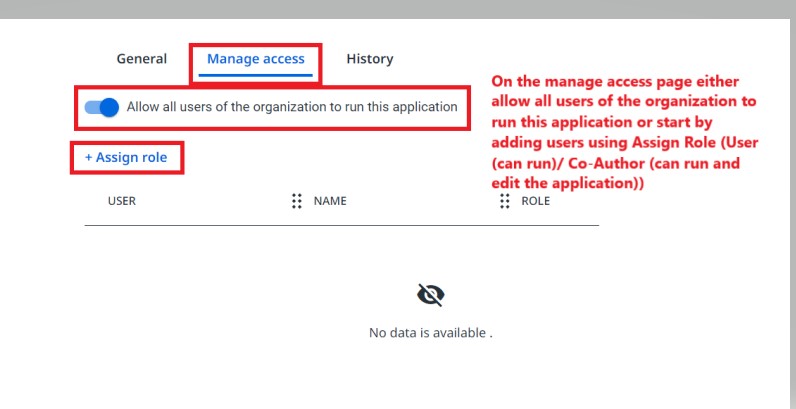
Share your Application
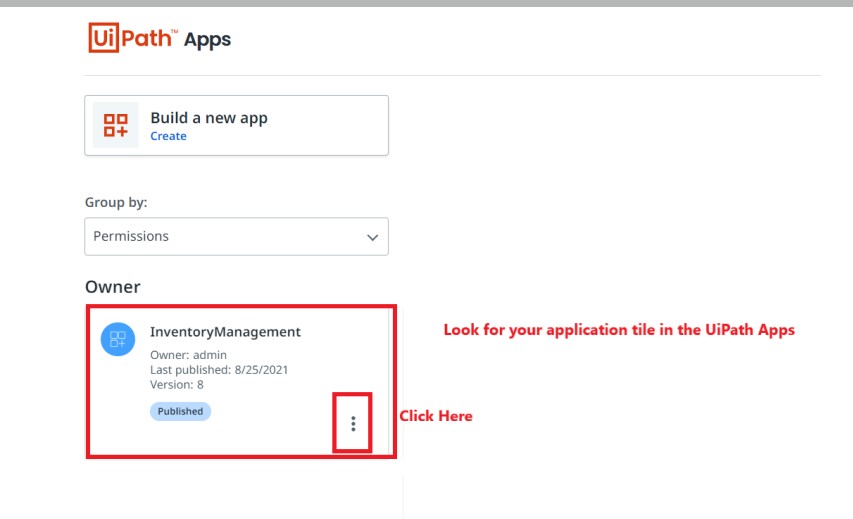
Let’s see how we can share our application. We already discussed how we could add users to Automation Cloud™ in the earlier sections. Once the application is successfully created, we can move ahead and publish it. To make the app available to all employees globally within the organization, we just have to follow a few simple steps shown in the below screenshots.
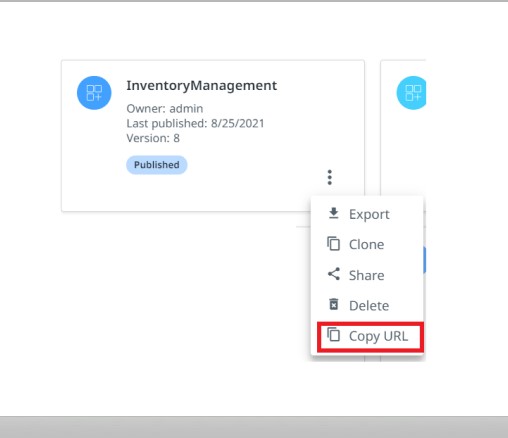
Share the application using the URL.

Conclusion
Invento is an application created using UiPath Platform. How does it fit into the RaaS model? The application is a complete cloud-based service.
Review UiPath and earn gift cards. Join us and help other professionals learn from your experience with UiPath. Your review can be anonymous.

RPA Consultant , Deloitte
Related articles


Get articles from automation experts in your inbox
SubscribeGet articles from automation experts in your inbox
Sign up today and we'll email you the newest articles every week.
Thank you for subscribing!
Thank you for subscribing! Each week, we'll send the best automation blog posts straight to your inbox.