

Summarize:
Introduction
The world of automation is changing, and citizen developers are looking for a quick and easy way to start their implementation journey. Here is where UiPath Studio Web becomes an integral part of quick and easy development. It is a web-based development environment that allows professionals without coding expertise to build and test automation workflows from within their browser window. Yes, there is no installation needed to get started and access is included as part of your existing developer license already. Let's look at the advantages of using Studio Web.
Easily accessible from browsers, removing the need to install it
Allows collaboration between multiple users
Cross platform compatibility (Windows, Linux, macOS)
Automatic updates
Built-in first-run experience
Compatibility with Studio Desktop
UiPath Studio Web navigation and templates
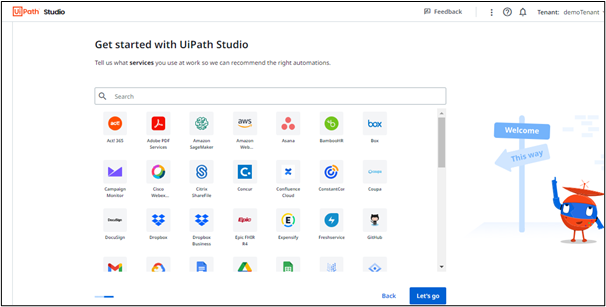
To navigate to Studio Web, click on the Studio Web option on the left panel of the UiPath Automation Cloud or go directly to studio.uipath.com. You'll be able to customize your first-run experience by selecting the department and services, applications mostly used. This will provide templates more relevant to you that can help you kickstart your automation journey. Templates are ready-made automations that can be configured and run straight away or customized further by adding or editing the existing ones. The following figures show the relevant first-run experience screenshots.
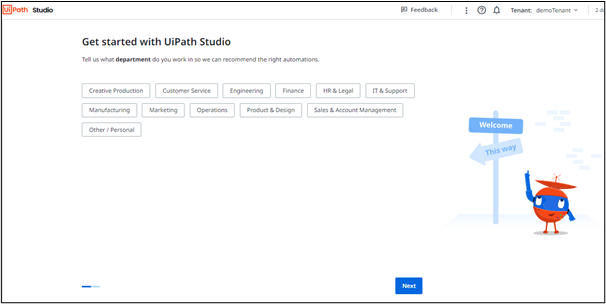
Let's see how to navigate Studio Web and some of the built-in templates that are ready to use. This list keeps growing as more and more templates get added by UiPath.

Studio Web connections using Integration Service
Studio Web projects can use connectors built by UiPath Integration Service. The Integration Service has a list of prebuilt connectors with the ability to add any new custom connector as well using the Connector Builder.
Let us understand this by creating a connection in Integration Service note: This is not mandatory, and you can directly start the automation project within Studio Web and then create the connections as needed as part of the project configuration.
Look at how to navigate to the Integration Service and then create a connection. We will connect to Gmail using the Gmail connector as an example. I am signing in using my account to create the connector. Once the connection is created, the connection status is shown as Success. This confirms that the connection is successful and ready to use in automation.

Sample Studio Web project
Let us now see how easily we can create the sample project using the Studio Web. In this automation, we will read the top five emails from the user’s inbox and print the sender's email id to a google spreadsheet. We will create the required connection that is required for this automation as part of the project from the Studio Web itself.

The following steps are required to create this automation.
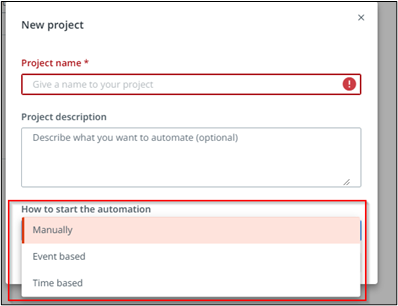
Start the project by clicking on the New Project button.
Give the appropriate project name and choose the default option of manually start the automation for the demo.
We then select the email activity for each email activity in the Microsoft 365 category. As we are using the Microsoft Office 365 activity, we also configure the connection by clicking the “Connect to Microsoft Office 365” connection button. This needs to be done one time either from the Studio Web or can be done alternatively from the Integration Service as well.
Select the Inbox folder and configure the option of “Limit emails to first” five emails from the additional options.
Create a counter variable and set the default value as 0. This integer variable will be used to increment the row number value of excel when using the Write cell activity. We use the Write Cell activity from the Google workspace category (as we want to write to the google spreadsheet) and configure the connection for it as well.
Select the appropriate sheet and in the cell use the value of “A”+ counter.ToString. We select the currentEmail.From.DisplayName as the “What to write” value to find the sender's names.
At the end of the process, we run this automation and verify the same by checking the output in the MyEmails spreadsheet.
Thus, this shows how simple it is to create an automation using Studio Web and test it.
Start automation options
For any automation, there are three options to start the automation. We have already seen the option of starting the project manually.
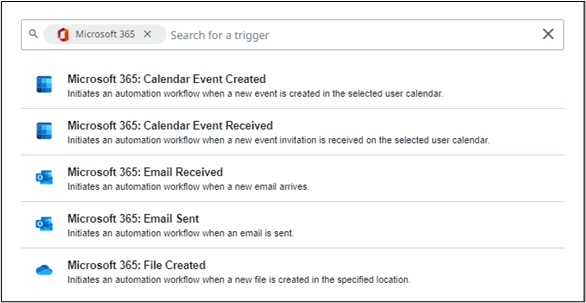
The other options are event-based and time-based automation. The event-based automation is invoked based on an underlying trigger that happens in the application that has been selected for the event. Currently, the following are the different categories for the event trigger.
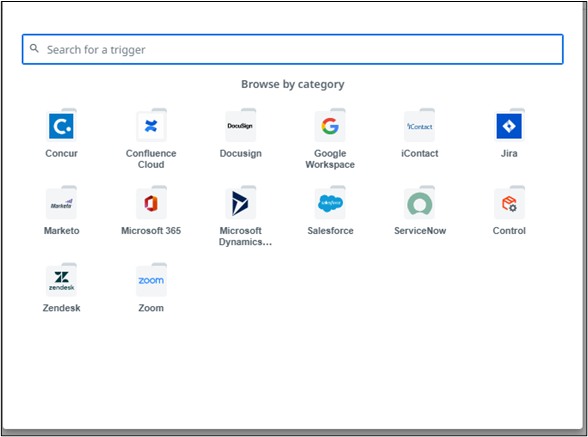
One can select the category and the corresponding event for the automation to start. For example, when you select the Microsoft 365 option, the following options are available for selection.
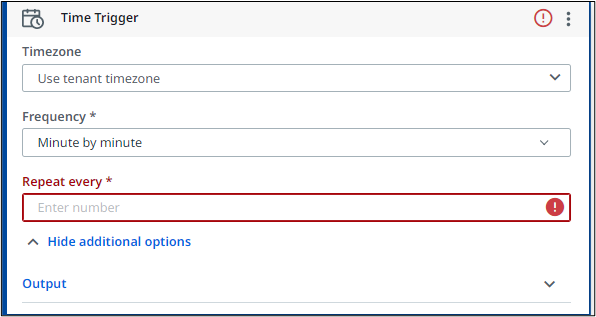
For the time-based trigger, select the frequency ( e.g. minute, day, hour, week etc) and the number of times it needs to be repeated based on the frequency, as well as allowing the user to select the time zone (default is the tenant's time zone) as shown below.
Debugging in Studio Web
Now, let us see how to debug the automation using the Studio Web. Below, you can set the breakpoints as needed and use the Run step-by-step option to run through the automation. You can also use the watches panel on the right side to check the value of any of the variables as well. Use the Continue button to run through the flow or use the Stop button to end the execution.

Studio Web project flexibility with Studio Desktop
The flexibility about the automation projects created in Studio Web is that they can be opened in the desktop environment as well when needed.

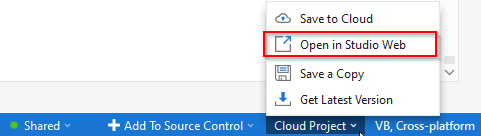
Similarly, the same project can be worked upon in UiPath Studio desktop and then later be again opened in Studio Web by clicking on the cloud project option in Studio desktop.
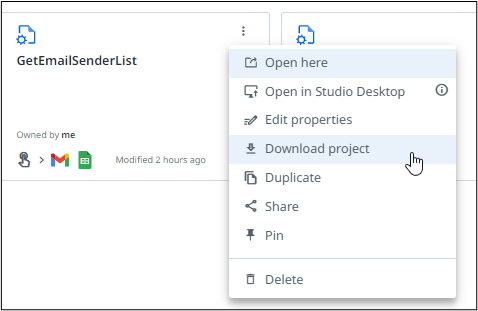
Thus, UiPath provides the flexibility to open and work on the cross-platform automation project both on the desktop and the web interchangeably. If the user just wants to work on the desktop, the other option is to download the project from the Project page, which will download the project with the. uip file extension. Then unzip this file and work on it accordingly.
Publish the Studio Web project
Once the automation has been tested and is ready to push it to the UiPath Orchestrator, use the Publish button to publish the project to the Orchestrator just like how it is done via the Studio desktop.

Conclusion
UiPath Studio Web makes the end-to-end life cycle of development and deployment automation projects easy and fast. Using integration services makes it even more powerful to leverage the automation with different end systems. The robust addition of Studio Web to the Studio family makes automation building toolchain even stronger and user-friendly. UiPath Studio Web is a low-code tool with high impact. Uncover the power of automation with simplicity and speed today.
Topics:
Studio Web
Architect , Applications Software Technology LLC (AST)
Related articles


Get articles from automation experts in your inbox
Sign up today and we'll email you the newest articles every week.
Thank you for subscribing!
Thank you for subscribing! Each week, we'll send the best automation blog posts straight to your inbox.
Get articles from automation experts in your inbox
Sign up today and we'll email you the newest articles every week.
Thank you for subscribing!
Thank you for subscribing! Each week, we'll send the best automation blog posts straight to your inbox.