Building a Remote-Friendly Learning Management System with UiPath Apps and Data Service
Building a Remote-Friendly Learning Management System with UiPath Apps and Data Service

Summarize:
I'm Ebru Sarıkaya, a Senior RPA Developer at NTT Data Business Solutions Turkey. With my colleagues, we participated in UiPath HyperHack 20.10 Product Release. We designed and developed a project that shows the full potential of the newly released products, UiPath Apps and UiPath Data Service. We focused on remote education problems and created a complete education management system based on these products. After a month of hard work, we learned the products deeply. And the most exciting result was to win first place in a UiPath HyperHack Hackathon.
We created a learning management system using UiPath Apps and Data Service. This project consists of three apps: Student, Teacher, and Management Dashboards. In this blog, I will demonstrate how to use Data Service and Apps with a small part of the Teacher Dashboard App. This app has a feature that allows teachers to write an announcement from their dashboard. With the help of the processes, we can add this announcement to Data Service as an entity record for further use.

Introduction
UiPath Apps is a cloud-based low-code application development platform. It enables us to build custom applications with the help of automated processes. With the custom apps, we can enhance user-robot interaction and provide engaging user experiences.
UiPath Data Service is a persistent data storage service, bringing powerful no-code data modeling and storage capabilities. We can say goodbye to numerous impractical Microsoft Excel files and can create relational data tables in Data Services.
UiPath Data Service
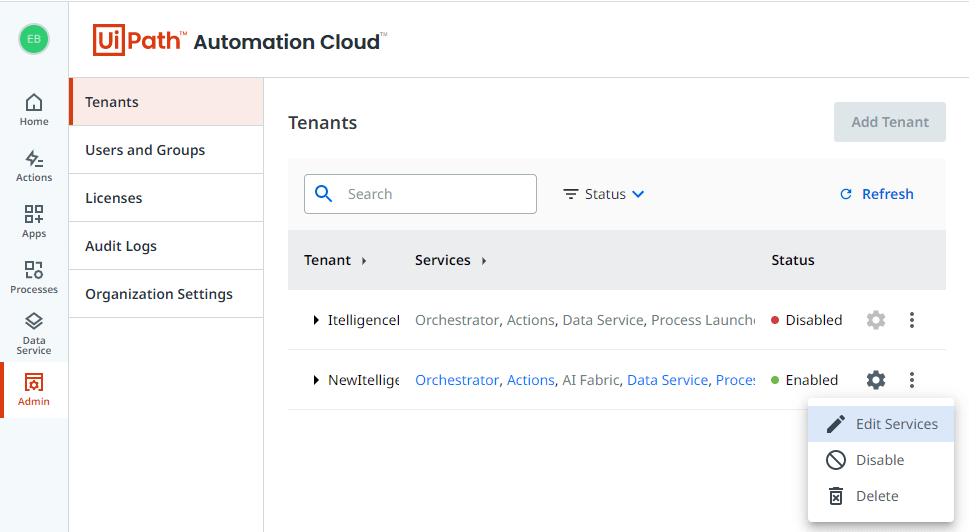
Open Automation Cloud™ and navigate to Data Service tab. If you don’t see the Data Service on the left, go to the Admin tab and edit your tenant's services, as shown below.
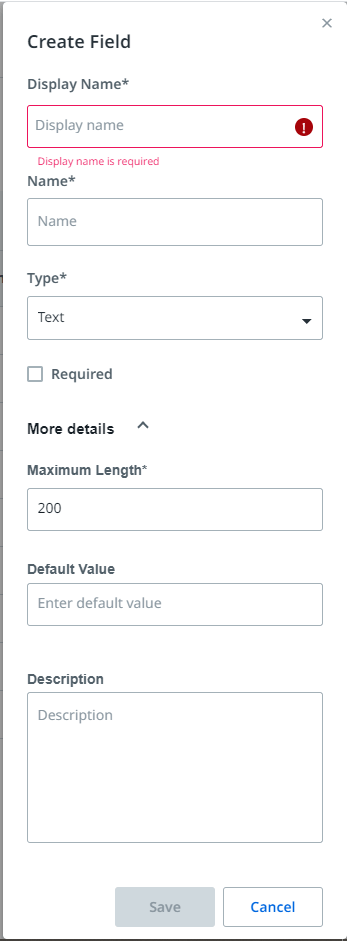
Click the "Create New Entity" button and create a new entity by filling the required areas. After that, you can get inside the entity and add new fields to establish your table. You can add more details and restrictions to the fields.
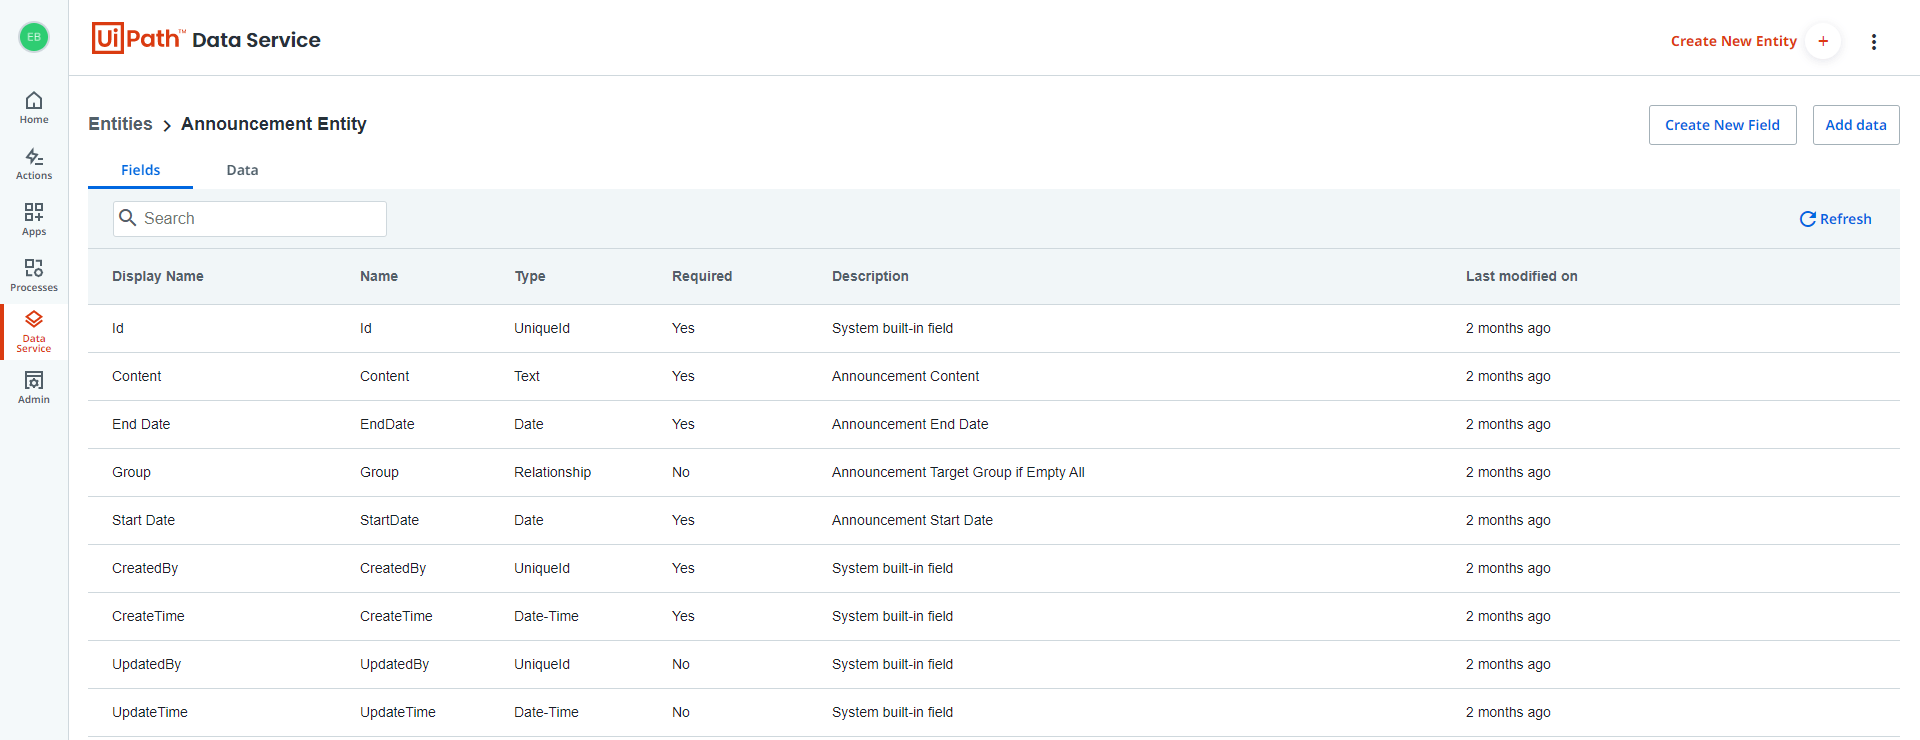
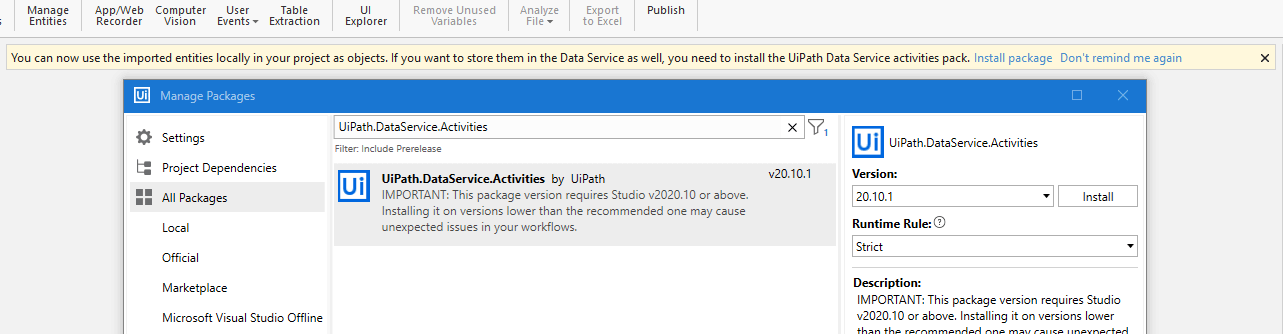
Once your table is ready, you can add data manually by clicking the "Add Data" button. To use the entities in your processes, open UiPath Studio and click the "Manage Entities" button in the top ribbon. In the Manage Entities window, select the entities you want to use in this process and click save.
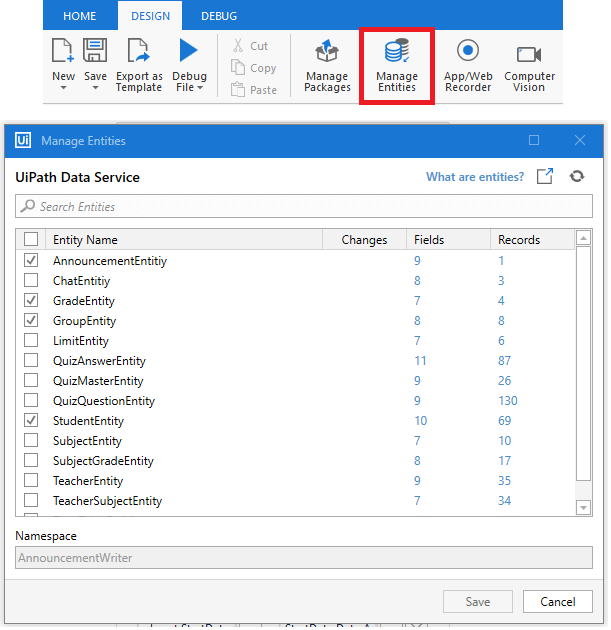
Studio shows an information message to warn you about the installation of the UiPath.DataService.Activities package. Install it to use the Data Service activities.
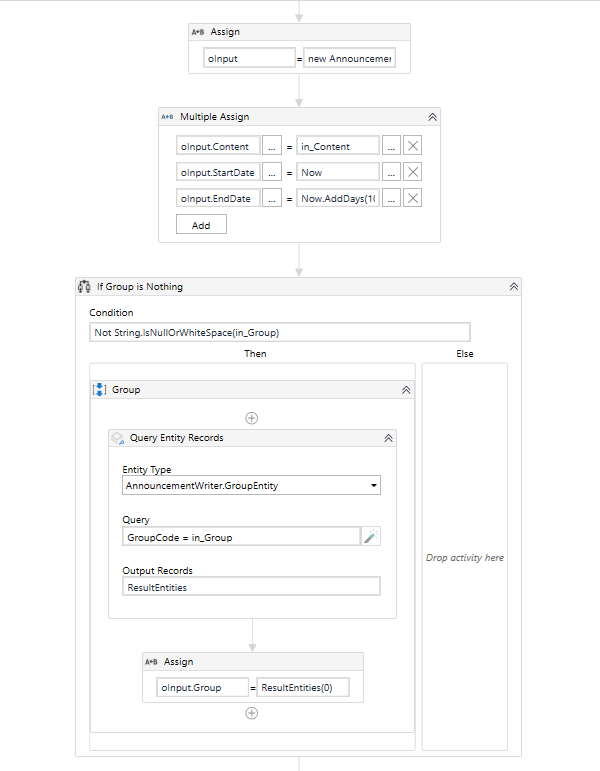
Now the Studio is ready to work with the entities. In our case, we'll add a new entry to the Announcement Entity. An Announcement Entity has four custom fields that we need to fill: content, start date, end date, and group relation. First, we create a new empty entity record (oInput) and then assign its properties. For group relation, we need the matched group entity. We use Query Entity Records activity to find the entity which has the same group code as our input. After that, the oInput record is ready to add to the Announcement Entity. We use the Create Entity Record activity.
When you’ve finished your process, you need to publish the process to Orchestrator and run it (from UiPath Orchestrator or UiPath Assistant) before adding it to an app. This will enable Orchestrator to read the input and output variables. It’s important to note that currently, you can’t pass entities to UiPath Apps directly as In, Out, or In/Out argument. You can pass the values as basic argument type (string, integer, etc). Also, you can convert the output of “Query Entity Records” (List<entityname>) to array of entity (entityname[]) using the ToArray function. By doing this, you can use the array (entity_name[]) in List, Tables, or Advanced List.
UiPath Apps
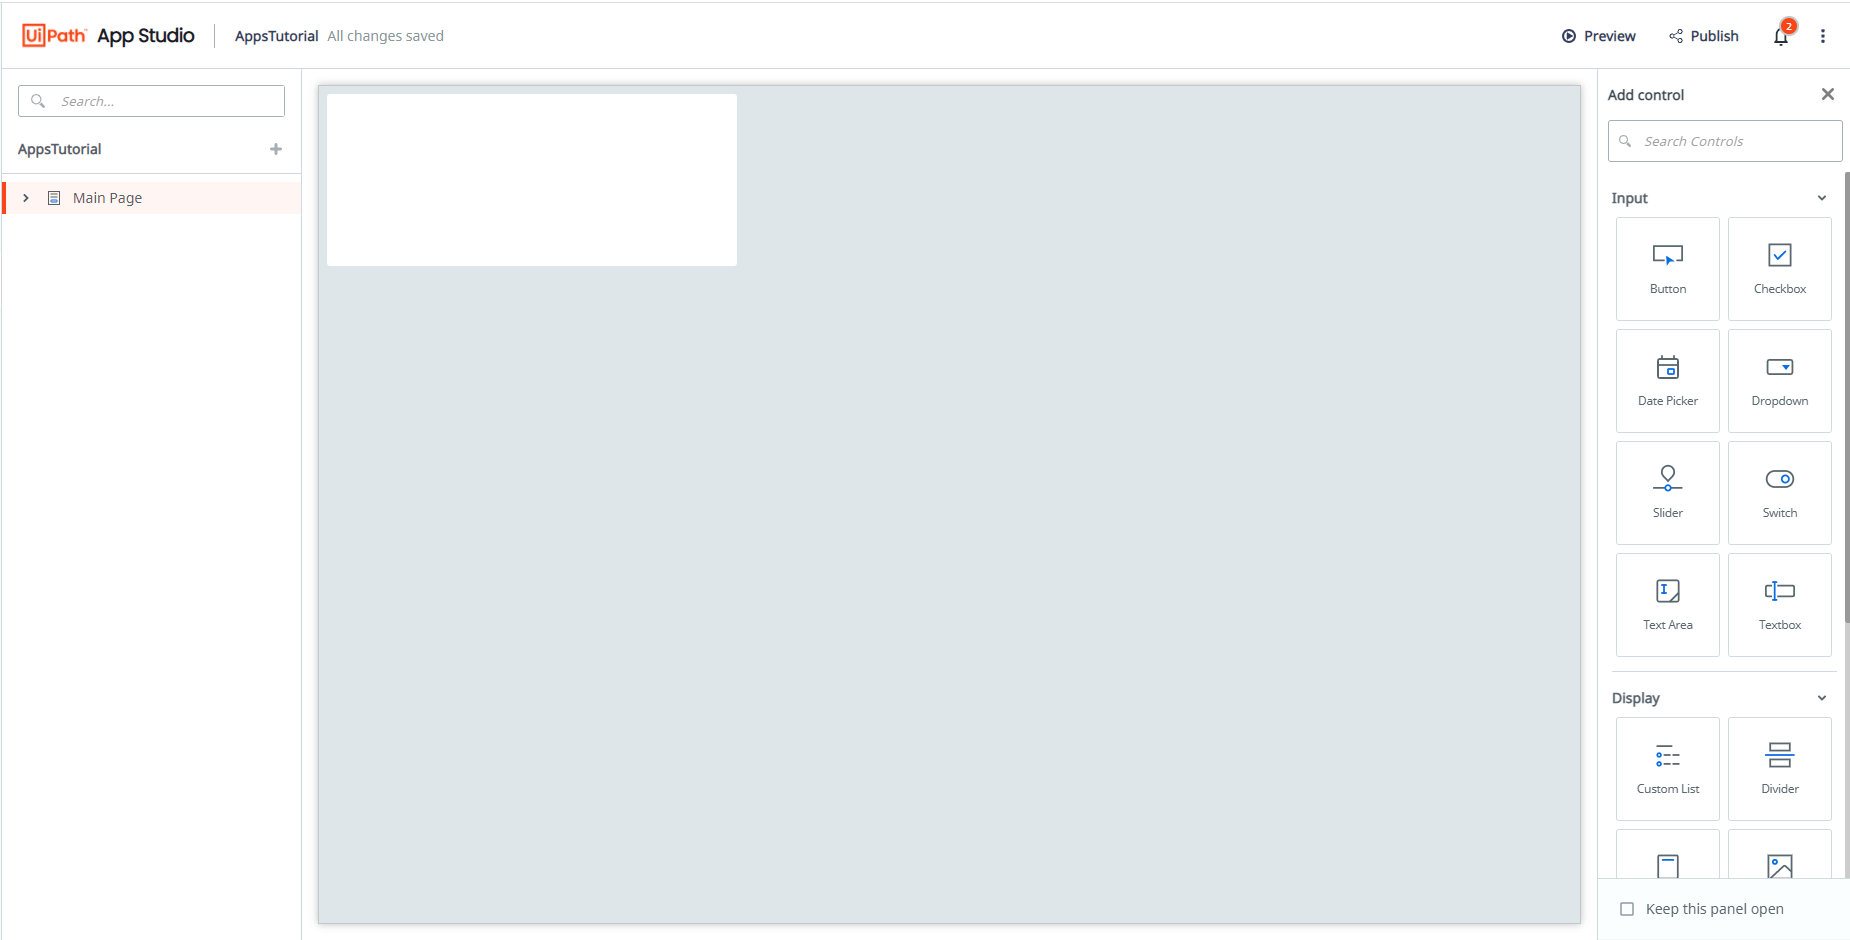
Open Automation Cloud and navigate to Apps. You can easily create your app by clicking the "Create new" button. The App Studio has three panes. On the left side, the pane holds page and processes sections. When you expand a page, you can see its containers and controls. Also in the processes section, you can see the added processes.
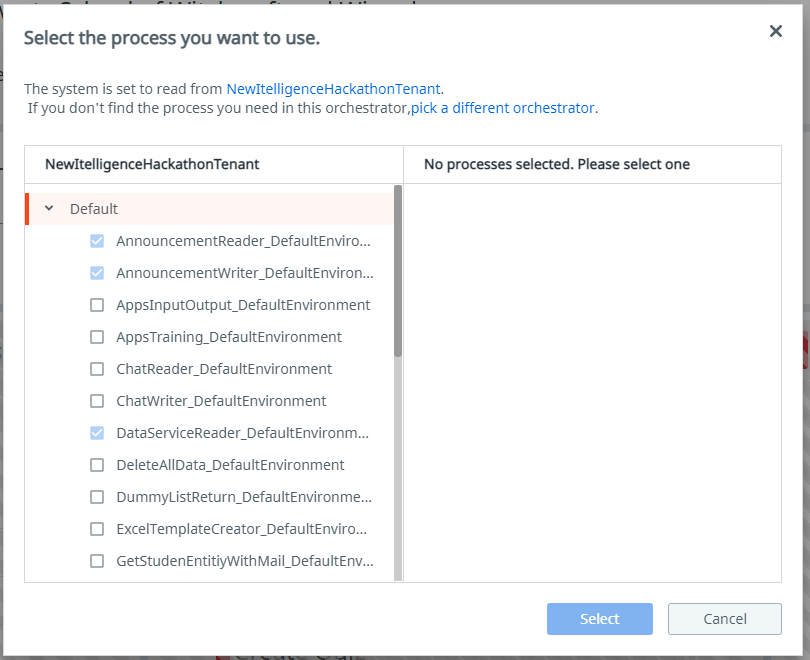
To add processes, click the plus button next to your app's name and select "Process". On the pop-up window, select your orchestrator. Then you will see the folders and processes of the tenant. Select the ones you want to add and click "Select".
In the center, you have the canvas. The canvas is where we actually design and create our app. To add a new control, click to "add new control" button on the right panel. This panel is divided into four categories: input, display, containers, and icons. You can add any of the controls simply by clicking and dragging to the app designer. After adding, you can select the component and see its properties on the right panel.
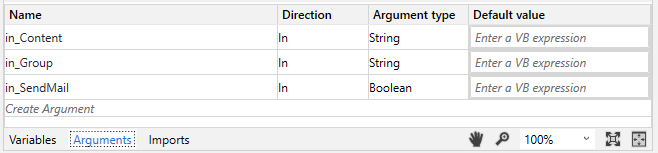
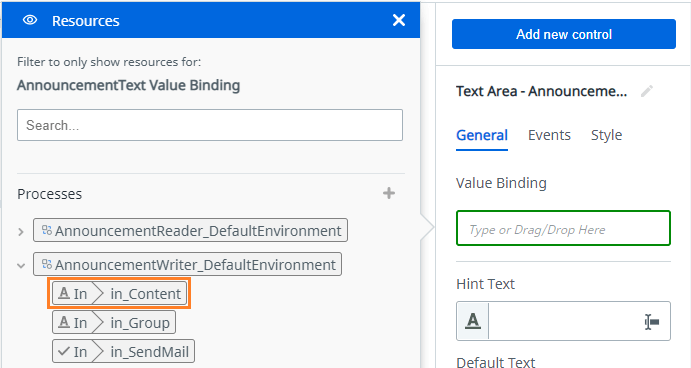
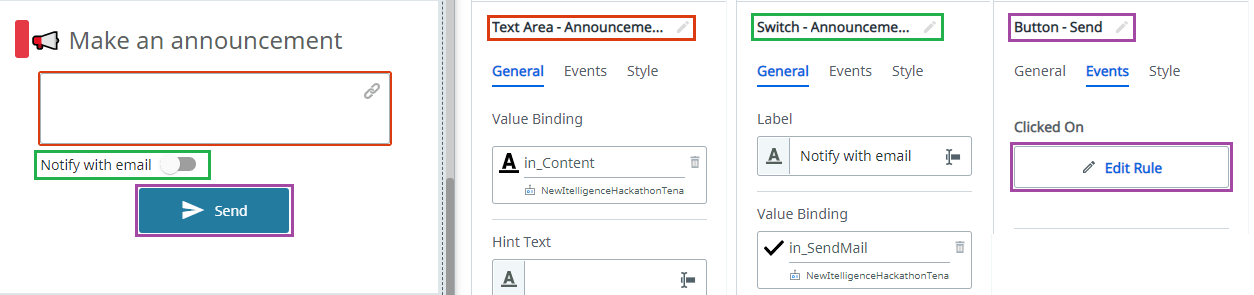
Let's continue with our example. We need a text area that allows us to write an announcement, a switch to choose whether to send an email to users or not, and a button to start the process. The process inputs are inContent (str), inGroup (str), and in_SendMail (bool). We bound the inputs to the related areas (see Data Binding). To run the process, we added an event to the button.
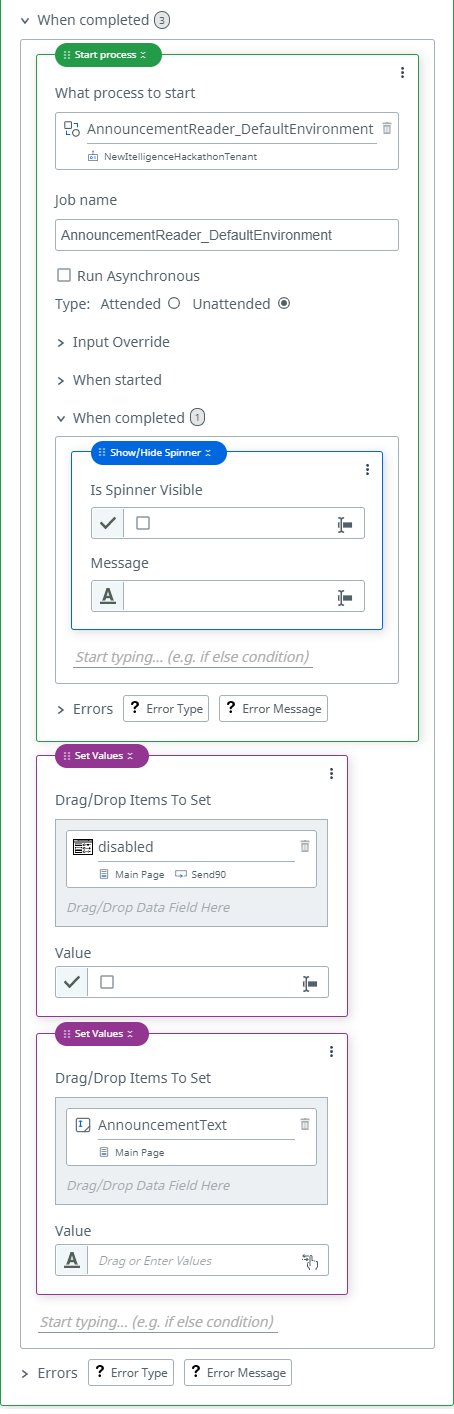
In the event editor, add the Start Process rule, then specify which process you want to run by double-clicking it from the resource panel. You can also set some rules for this event. For example, when the process starts, we disable the send button by "set values" and show a spinner on the page. This prevents the user from clicking to the button and start the process again and again. Once this process is complete, we "undo" these rules (enable the button and close the spinner), clear the written text and run announcement reader process.
In conclusion, by connection the automated processes, we can create business applications with many functionalities. We can use attended and unattended bots according to process needs. With UiPath Apps and UiPath Data Services, we gained a new path that offers lots of opportunities. I'm excited to see the new use cases of these products.
Senior RPA Developer, NTT Data Business Solutions Turkey
Related articles


Get articles from automation experts in your inbox
Sign up today and we'll email you the newest articles every week.
Thank you for subscribing!
Thank you for subscribing! Each week, we'll send the best automation blog posts straight to your inbox.
Get articles from automation experts in your inbox
Sign up today and we'll email you the newest articles every week.
Thank you for subscribing!
Thank you for subscribing! Each week, we'll send the best automation blog posts straight to your inbox.