
Accelerating Automation Preparation Using UiPath Task Capture
Share at:

Introduction
This article brings into the spotlight UiPath Task Capture, a useful tool that allows users to automatically record the processes they are executing to generate a skeleton for further automation in UiPath Studio or StudioX and a process definition document (PDD) in Microsoft Word format.
Getting started with UiPath Task Capture
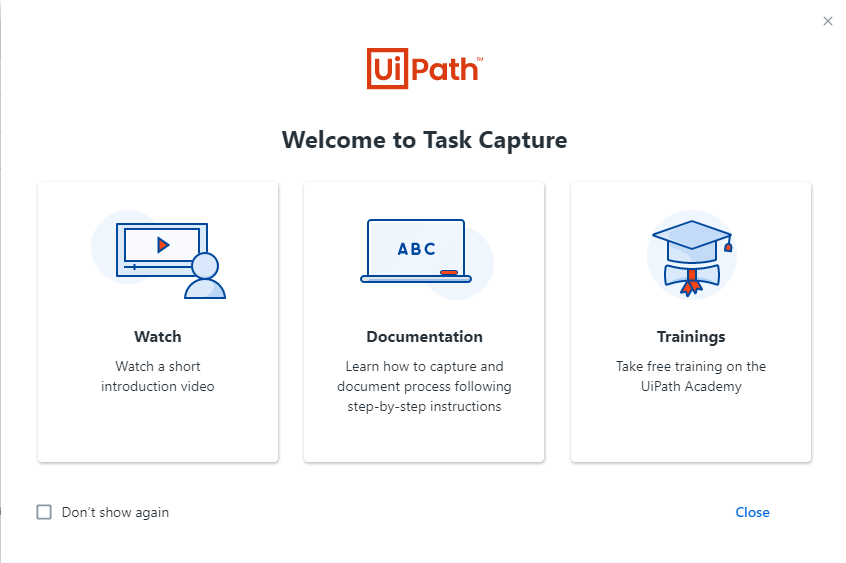
The first thing to start with is reading through the documentation portal about UiPath Task Capture. Secondly, download the UiPath Task Capture tool. Once you've downloaded Task Capture, you should be able to install it. When you run the product for the first time, you should be prompted with the option to activate the application. Choose community license to activate Task Capture in one click and have it ready-to-use!
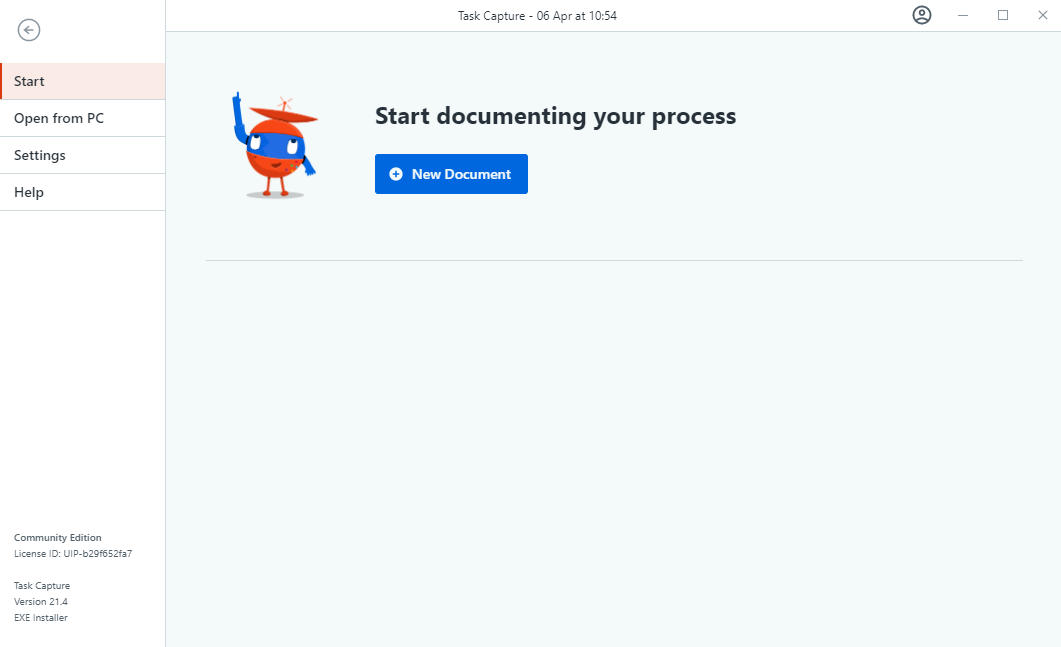
Once you get past the activation screen, opt to create a new document.
uipath-task-capture-new-documentBased on your need, you can either build a new diagram manually and record the screenshots in each step or capture the process as-is to let the app generate a process diagram automatically based on the actions you perform.
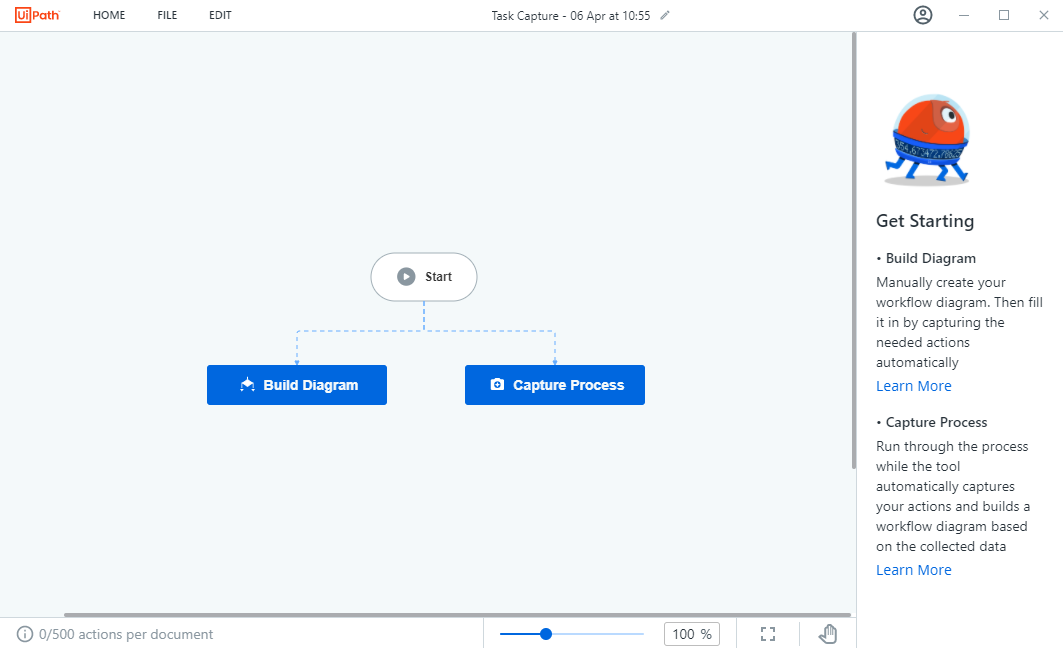
1. Build diagram
In case the process is complex and contains the decision points or exceptions, you can start by building the diagram with drag-and-drop ease and then capture actions for each of the business steps. Task Capture provides you with a set of elements you can use for building the process structure, such as sequence, decision, swimlane, and other elements of the BPMN standard.
2. Capture process
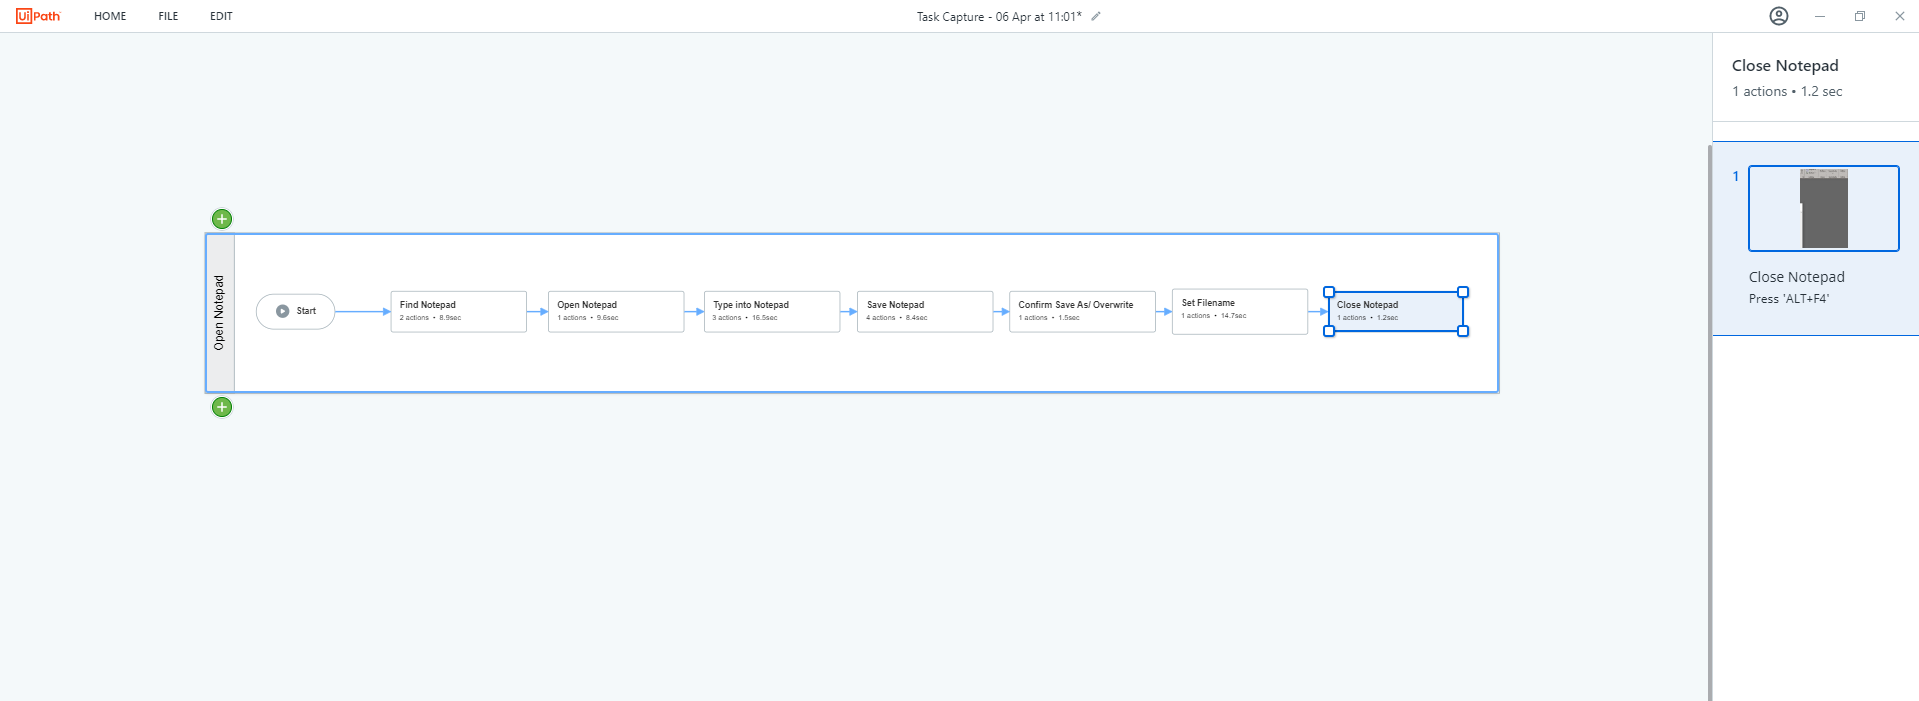
If the process is linear and straightforward, you can select "Capture process" option and click Start Capture on the panel to start the recording and generate screenshots on each action you perform: mouse clicks and keyboard entries. Besides, it allows you to give each action step a title and a description to provide more information about them. Actions, screenshots, titles, and descriptions pull through to the Task Capture document.
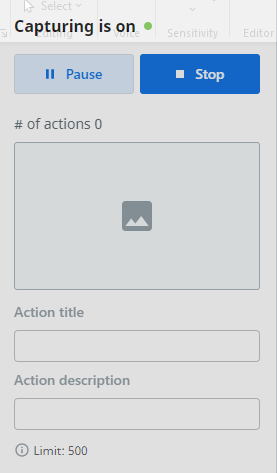
Continue executing the steps within the process you'd like to automate. When you've completed all of the steps, click Stop and review the steps in the Task Capture document. The captured actions are grouped into sequence blocks based on the names of recorded windows. You can click on each of the blocks to see the list of all actions at the right-side panel.
3. Edit the actions In case you want to add more details about each captured action or edit the recorded screenshot, you can do so by double-clicking any of them and going to the action editor page. Here, you can leverage the toolbar elements to highlight important areas on the screenshot, blur PII data or even use a text recognition tool to easily extract data from the image.
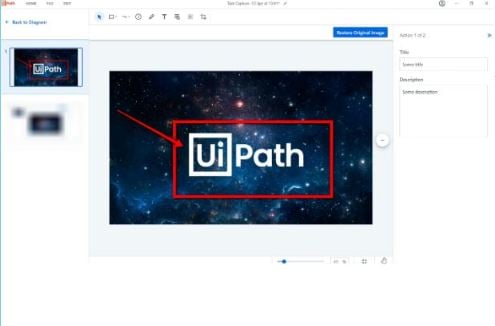
extract-from-image 4. Export process
Once you've verified the process and the steps, you're able to export the document into a more usable form, either as a PDD in Microsoft Word, a diagram image file, or a skeleton for automation in Studio or StudioX as a .xaml file.
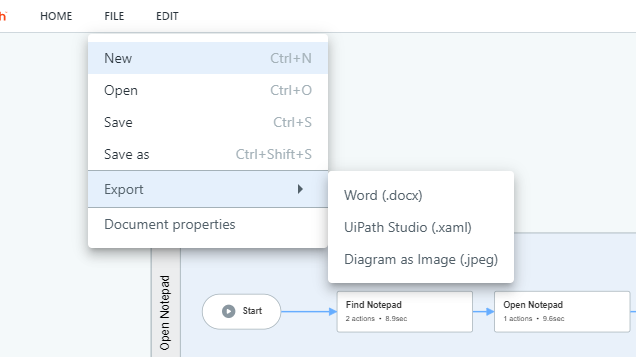
uipath-task-capture-export
5. Generate the PDD
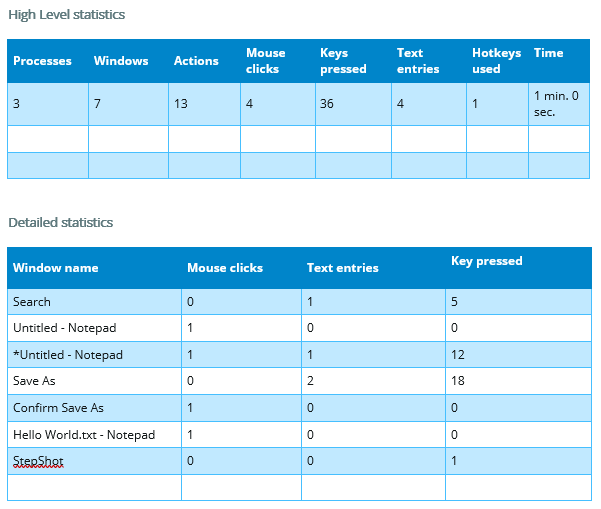
Task Capture allows you to create your own template and add it to be populated by the Task Capture document. Task Capture completes the PDD with the key information about the process – the diagram, recorded steps with annotations, and statistics. However, you can edit the generated file according to your needs to complete the PDD. Check out an example here. Some of the most valuable information pre-populated by UiPath Task Capture is process statistics.
6. Generate a .xaml file
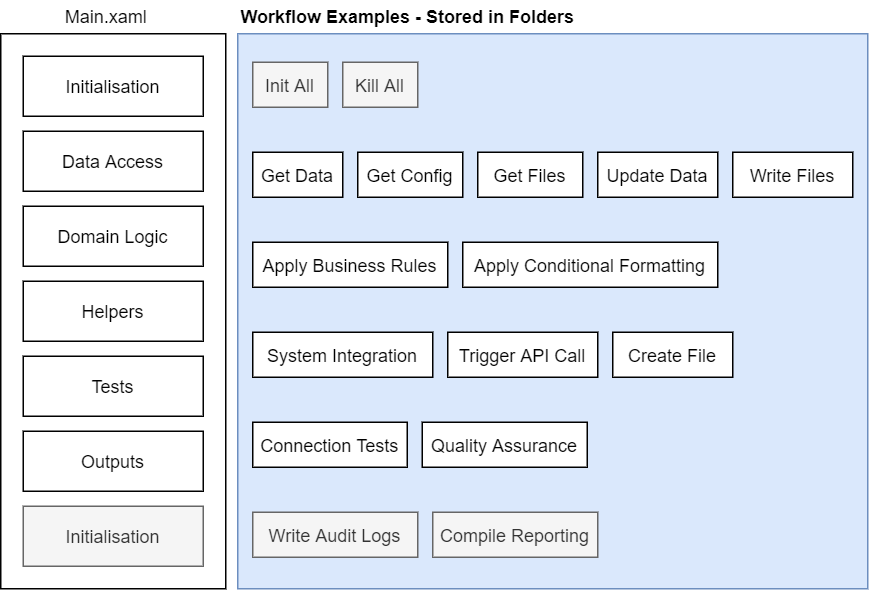
Task Capture allows you to export a .xaml file which can be opened in UiPath Studio or UiPath StudioX, providing you with a skeleton to further develop the automation. Some of the work you're likely to do here's add hard-coded values to variables. You can access UTC process export\notepad automation.xaml.
To transform the exported .xmal into a deployable solution, without using a preexisting solution template, there are a few things that we first need to do. 7. Architectural design
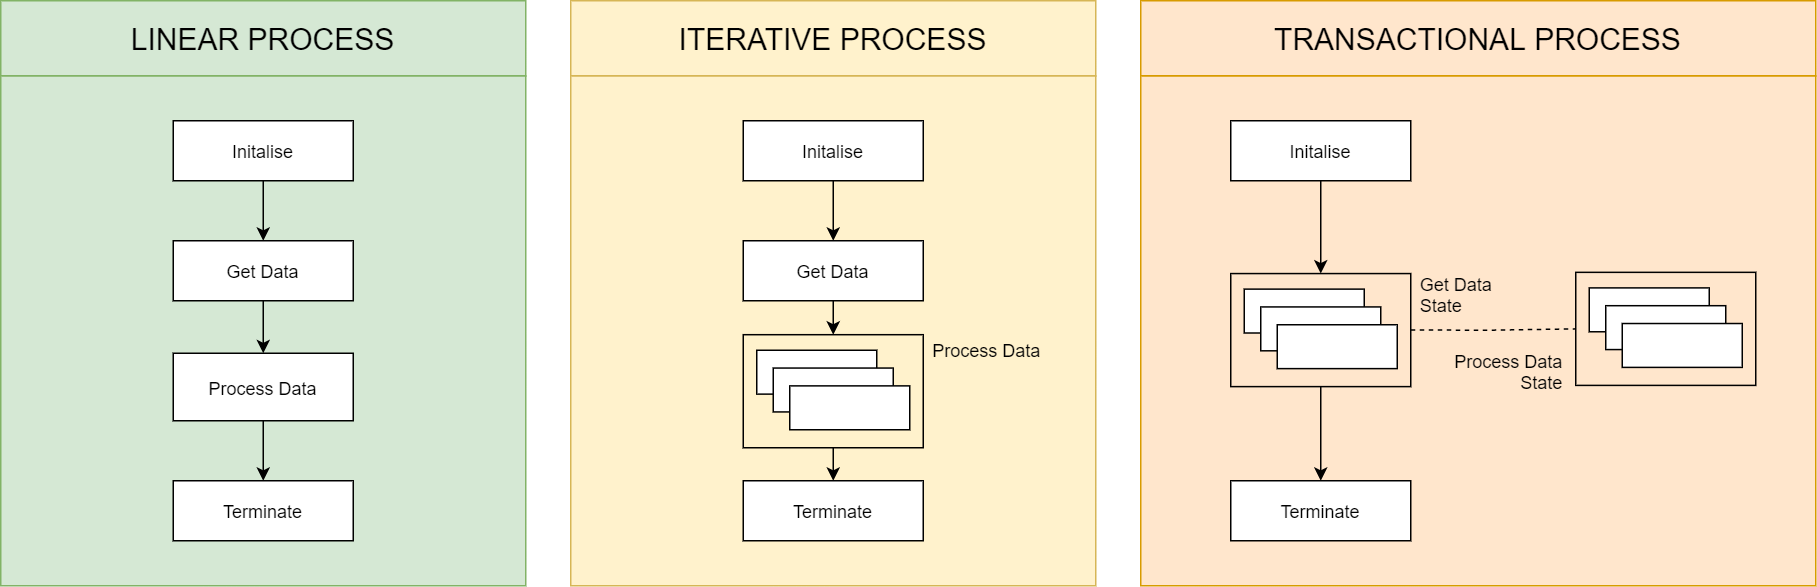
The architectural design, also known as the architecture pattern, should be selected for the solution to be implemented in. UiPath simplifies this decision by guiding us on how and when to implement a linear process as opposed to an iterative or transactional process. Based on your requirements, you may consider using REFramework, state machine or a simple flowchart implementation.
8. Design pattern
Implement some sort of order or code organization which helps break code into more reusable and dynamic components. The design pattern should help in adding a layer of obfuscation to the process which allows for one component to be replaced without redeveloping the entire process.
9. Exception handling
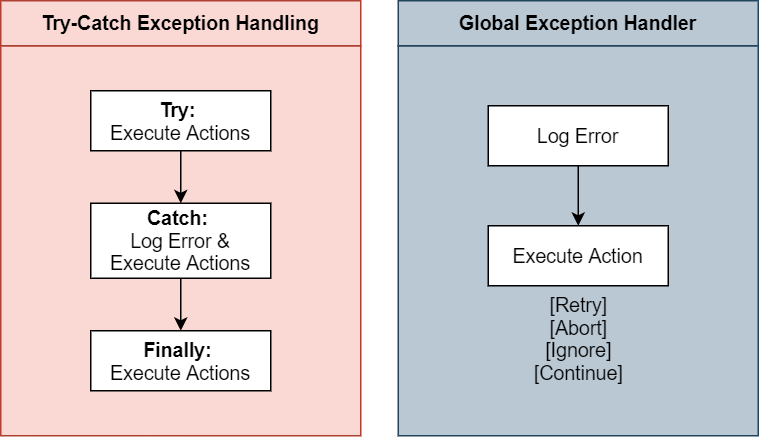
You'll need to implement exception handling either through using try-catch statements or by adding a global exception handler.
Conclusion
UiPath Task Capture helps alleviate a lot of the admin behind understanding the process, setting up the templates for solutions, and even getting the collected information into documentation templates. Explore UiPath Task Capture and discover benefits such as:
1. Decreased automation of preparation time
2. Decreased development time
3. Increased consistency across solutions
4. Increased process standardization
Keep in mind the best practices when working with UiPath Task Capture.

Application Architect, Dimension Data
Related articles


Get articles from automation experts in your inbox
SubscribeGet articles from automation experts in your inbox
Sign up today and we'll email you the newest articles every week.
Thank you for subscribing!
Thank you for subscribing! Each week, we'll send the best automation blog posts straight to your inbox.