
How to Build a Robot-Powered Inventory Dashboard with UiPath Apps

Summarize:
Visualization of data is vital for an organization to understand and measure their growth.
Dashboards are one of the methods we use today to visualize data. Dashboards allow a user to understand the key performance metrics that matter to their business, department, or project.
A very familiar example of a dashboard is the UiPath Orchestrator Dashboard. It quickly helps us understand the following:
Number of processes we have in Orchestrator
Number of jobs succeeded and failed
Number of queue items processed
With the launch of UiPath Apps, you can now develop front-end dashboards and robot interactions efficiently by enabling back and forth communication with robots and processes.
Now, let’s build an Inventory Dashboard in UiPath Apps.
Before getting started, you’ll need the following:
UiPath Studio/StudioPro
Robots JS:
Let’s get started.
Inventory Dashboard overview
We are going to build an Inventory Dashboard that will show the product name, total sales, total supplier, pending and total orders, and current stock. We will take the product name as an input from UiPath Apps and display the data with a click of a button.
We are going to build Dashboard in three Steps:
Step 1 – Build a process in UiPath Studio
Step 2 – Build the Dashboard App in UiPath Apps
Step 3 – Connect process and App through Orchestrator
Step 1 – Building a process in UiPath Studio
Since we are building a dashboard, we will need data to be displayed. For this demo we are going to use data from a Microsoft Excel file. Below is the screenshot of our Excel data.

We will then create a process in UiPath Studio that takes input of the product name and returns the related data to that product. Below is the snippet of the UiPath Studio process.
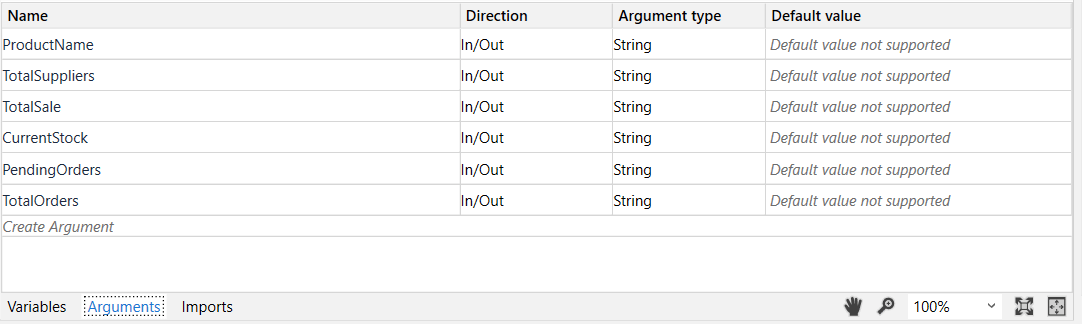
Arguments to be created in the UiPath Studio process:
Activities used in the process:
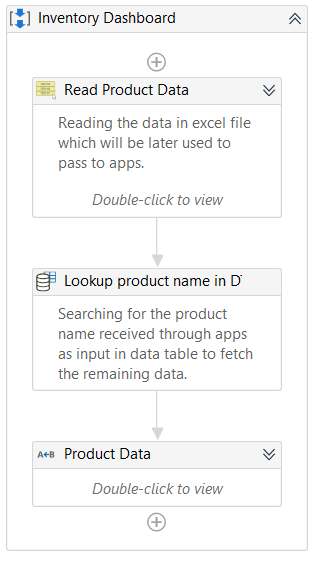
Read Range Activity: To read the data in an Excel file and save it in a Data Table.
Lookup Data Table: To search for the product name received from UiPath Apps in the Data Table.
Multiple Assign: Assigning the other values for the searched product.
Syntax: DataTable.Rows(RowIndex)(ColumnName).ToStringOnce the process is completed, publish it to your orchestrator and add the package in the orchestrator. In the next step we will create our app.
Step 2 – Building the Dashboard App in UiPath Apps
Visit
Click on Apps in the left hand side
Click on Create new on the top right
Enter a meaning name (in our case, Inventory Dashboard)
And now let’s design our app.
Now, using different controls available in UiPath Apps such as Labels, Textbox, Button, and Containers we will design our app.
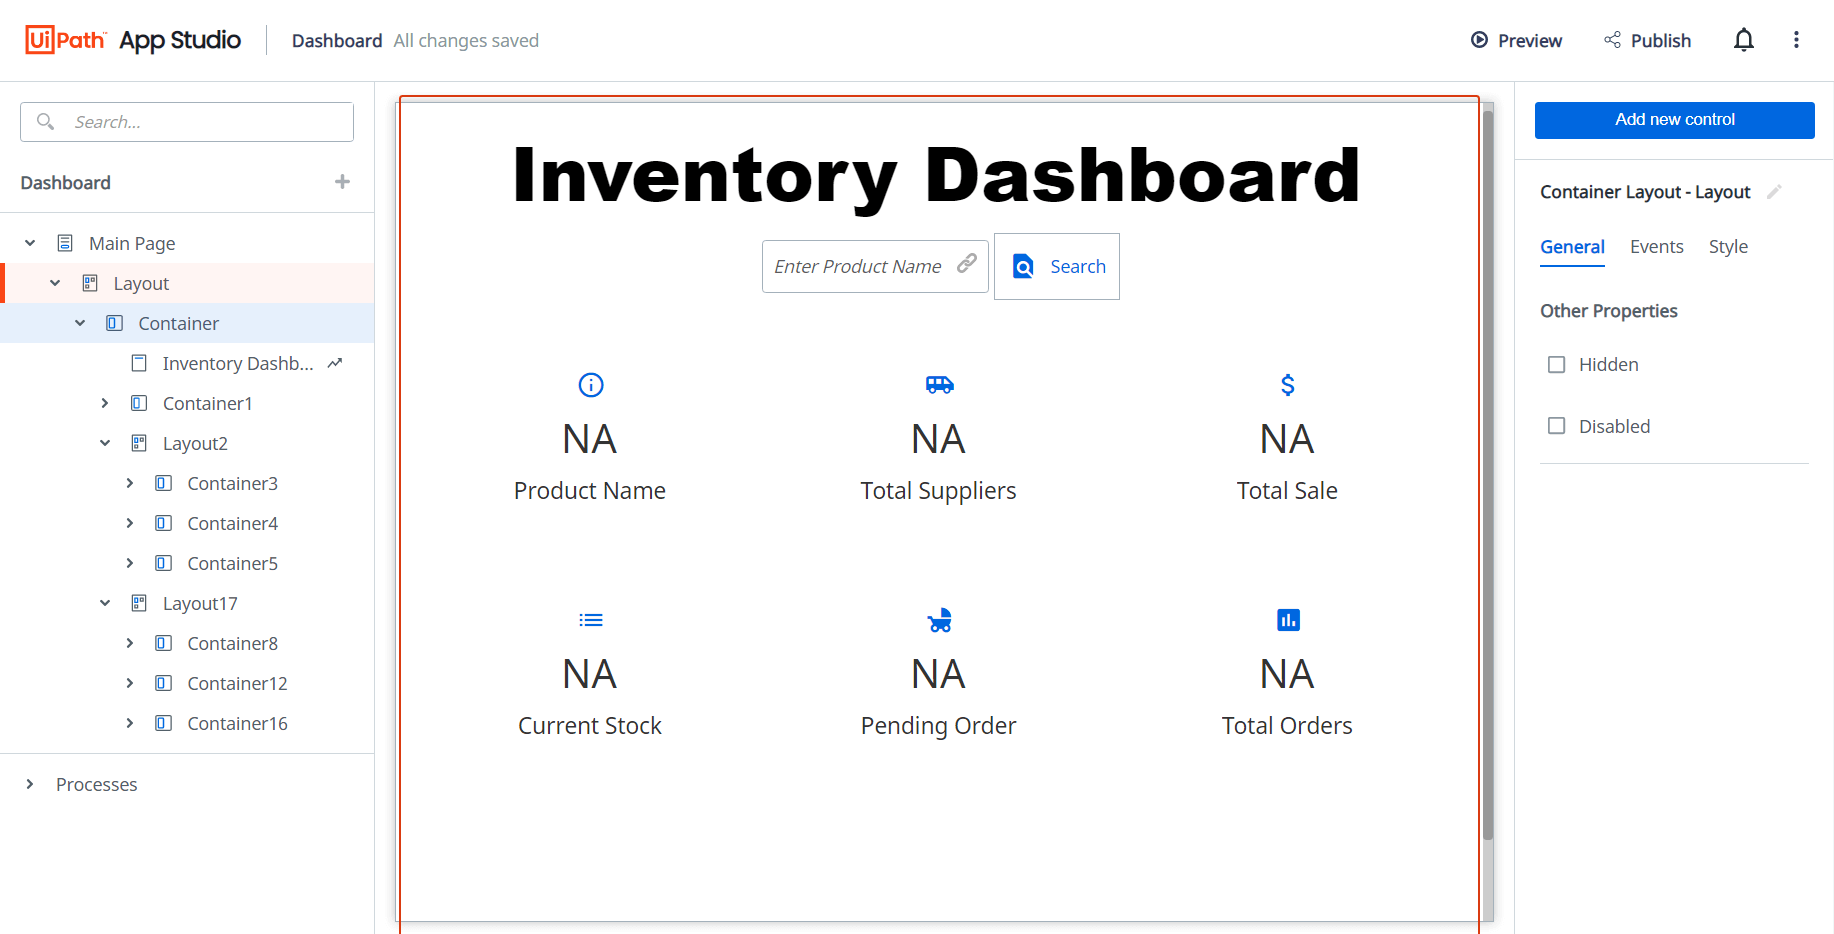
After designing our app it will look like the above screenshot.
Now we will perform the last step, which will complete the Inventory Dashboard App.
In the next step, we will connect our process and UiPath Apps.
As you can see in the above image, we can see a (+) button at the top left; on clicking on that, you will see the following options:
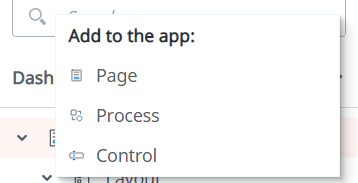
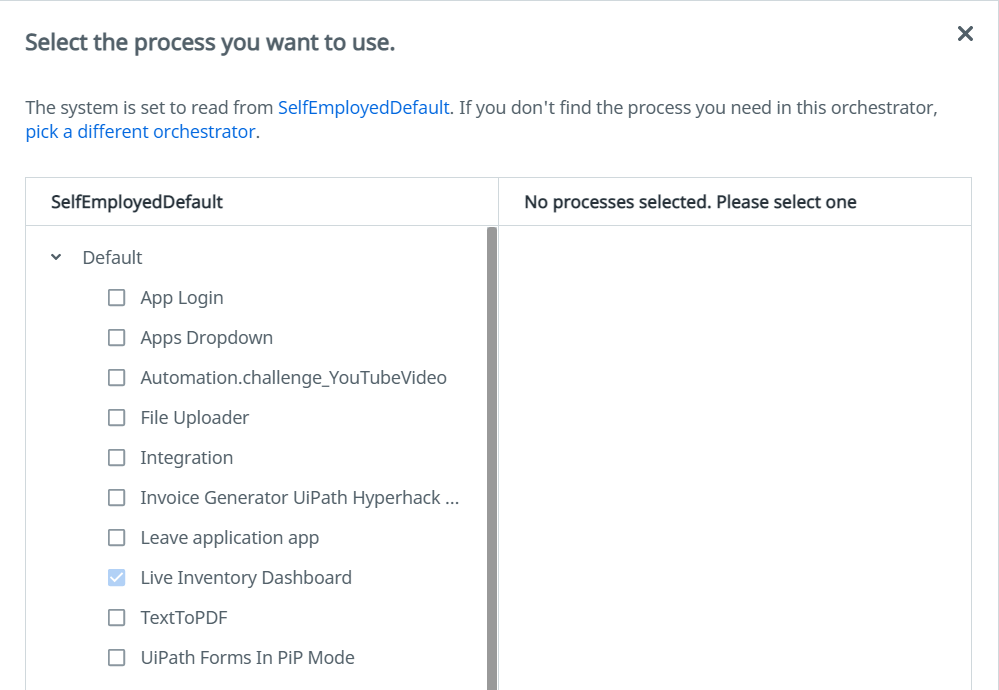
Click on process to add an Orchestrator process which will act as back-end of our App.
After clicking on Process you will see your Orchestrator name. Then click on Next.
You will see a list of processes and select the process that we have published. After that, process will be added to our app.
Once you add the process we have to bind the arguments to our app fields.
Follow the documentation to check how to bind arguments to UiPath Apps: https://docs.uipath.com/apps/docs/connecting-your-app-to-an-orchestrator-tenant
After binding the values, the final step is to trigger the process when the user clicks on the search button.
To do that, follow the below steps:
1. Select the button and in its Event properties click on Create Event.
2. Then select Start Process.
3. Add the Orchestrator Process.
4. Publish the app.
That completes all the steps and we have successfully created our Inventory Dashboard App.
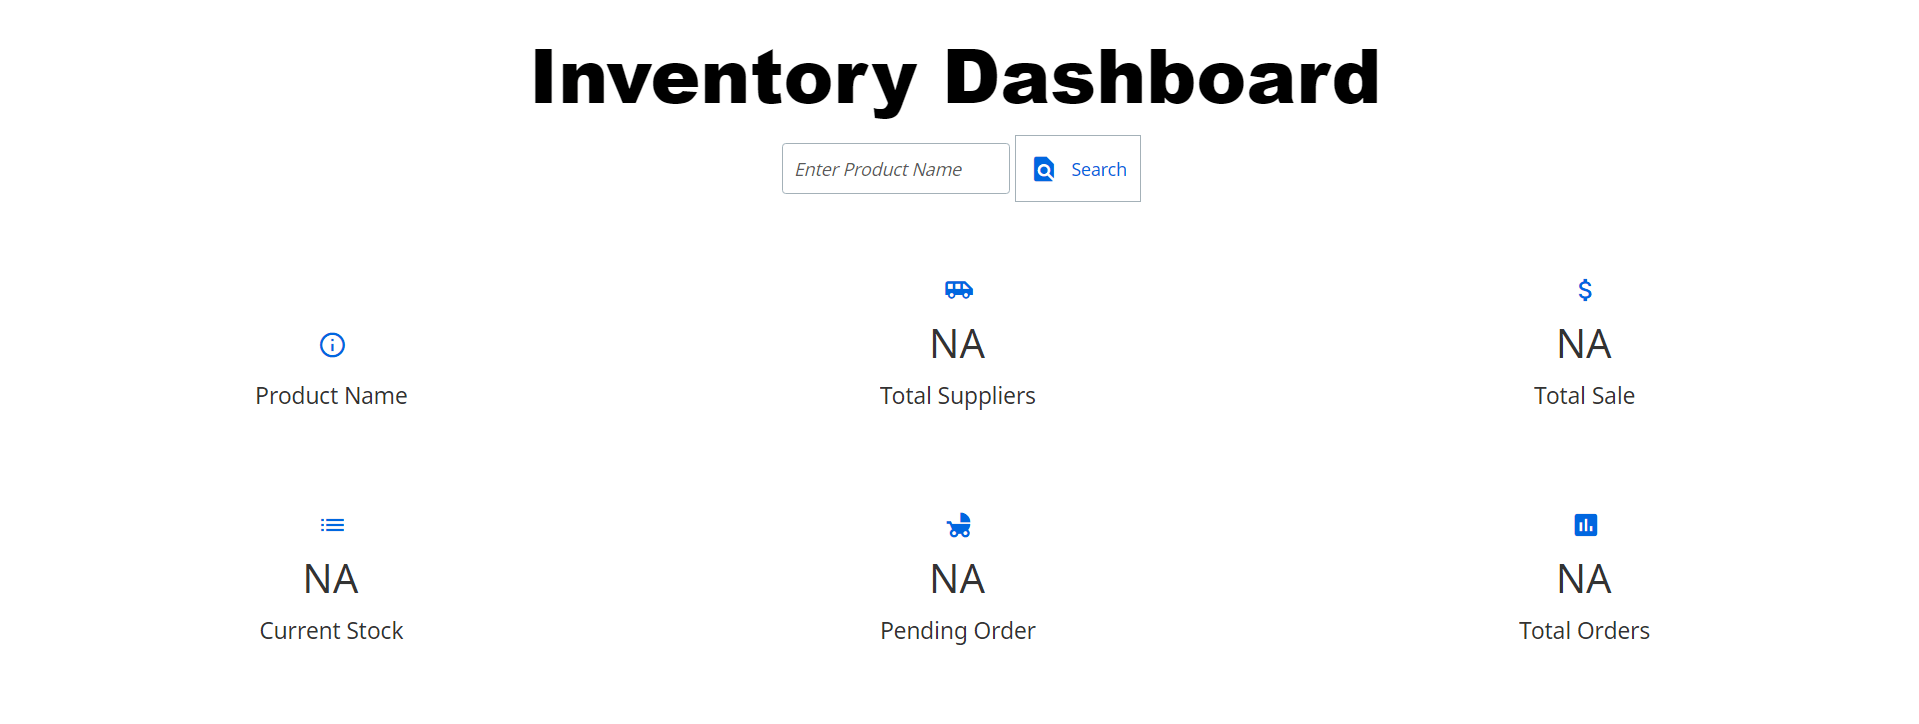
Executing our App
Before Execution:
After Execution:
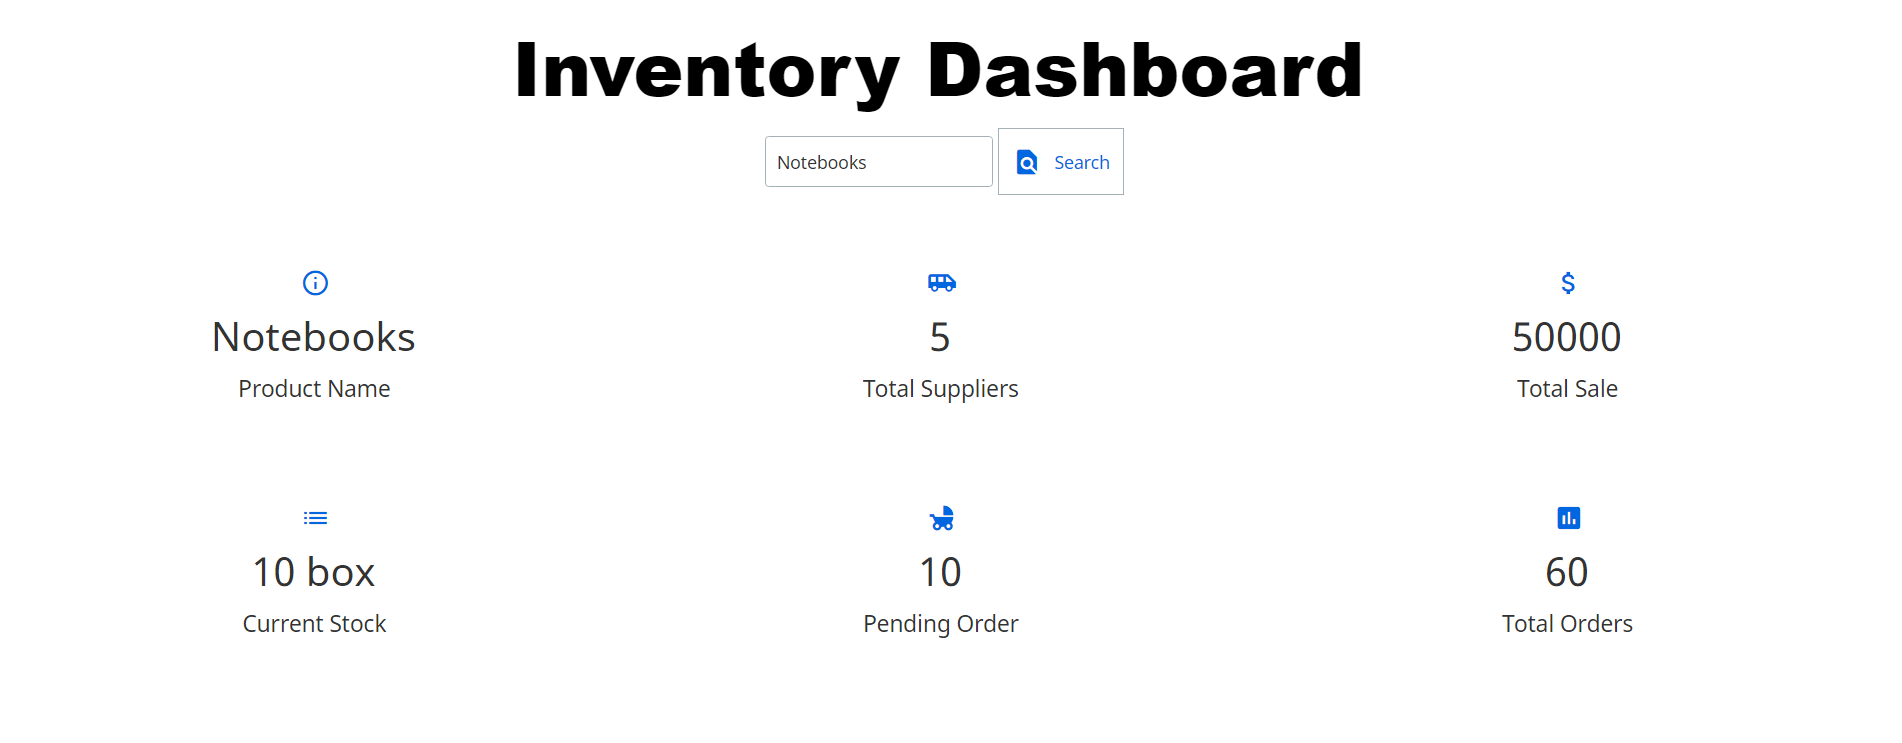
As we see in the above figure, the inventory details are shown in the Dashboard soon as the process executes.
Conclusion
After following three easy steps, we have successfully built our Inventory Dashboard. Practicing the steps specified in this article eventually helps you to build your own dashboards and the back-end processes using UiPath Apps. This practice can help you build a complete application in your organization and automate the process.

Consultant, WonderBotz
Related articles


Get articles from automation experts in your inbox
Sign up today and we'll email you the newest articles every week.
Thank you for subscribing!
Thank you for subscribing! Each week, we'll send the best automation blog posts straight to your inbox.
Get articles from automation experts in your inbox
Sign up today and we'll email you the newest articles every week.
Thank you for subscribing!
Thank you for subscribing! Each week, we'll send the best automation blog posts straight to your inbox.