UiPath integrates Microsoft Outlook in UiPath Studio. This means there are activities integrated that help you with the email automation when you are using the Outlook application.
Before starting your automation, make sure you are logged in to Outlook. Please bear in mind that it is not necessary to have the application open.
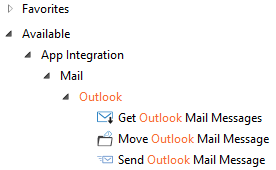
These are the activities that UiPath provides for Outlook :

-
Get Outlook Mail Messages
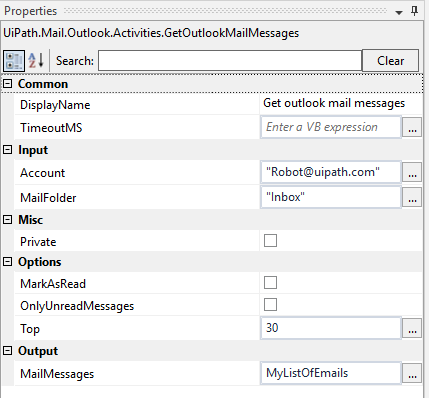
This activity, as the name suggests, grabs your emails from the Outlook application and adds them to a list. Let's take a look at the properties of this activity:
 The most important are: Account, MailFolder, Top and MailMessages. Without these properties the activity will not work.
Input:
- Account: Insert your email address.
- MailFolder: Generally you will grab your emails from "Inbox", but you could also place there any folder from your Outlook application.
Output:
- MailMessages: The easiest way is to press right click in the blank space ( or Ctrl+K ) to create the output variable which is a list of MailMessages.
Options:
- MarkAsRead: If you grab some emails that were not read, these will be checked as read in Outlook.
- OnlyUnreadedMessages: Check this option to get only the emails that were not read.
- Top: Indicate the number of emails you want to extract.
-
Move Outlook Mail Message
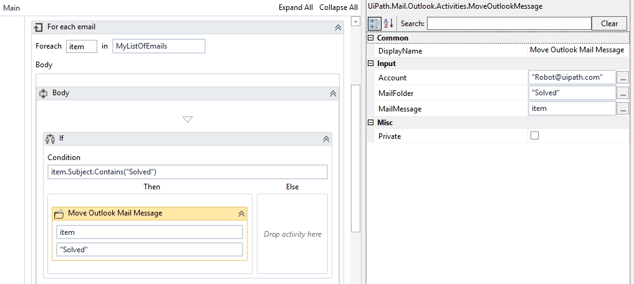
This activity will move an email to a specified folder. Let's take a look at the picture below to see how to use this activity:

In this situation we will go through the list of emails that we managed with the previous activity and if the email's subject contains the word "Solved", we move that email in the "Solved" folder.
-
Send Outlook Mail Message

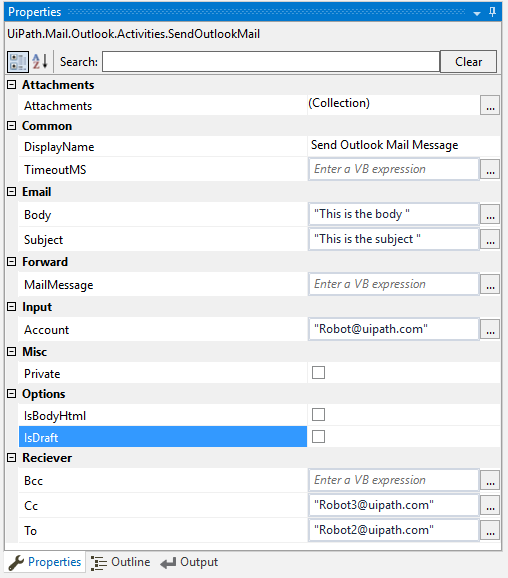
By using the "SendOutlookMailMessages" activity, you are able to send an email from UiPath Studio. Let's examine the properties from the picture above.
- Body: Fill in the blank space with the body of the email you want to send.
- Subject: Fill in the blank space with the subject of the email you want to send.
- MailMessage: If you already have a MailMessage object, you can forward that email without completing the subject and the body.
- Account: Insert your email address. This is considered as the sender address.
- CC: Insert here the addresses that you want to include in the 'Cc.' If you have more than one address, type them separated by comma.